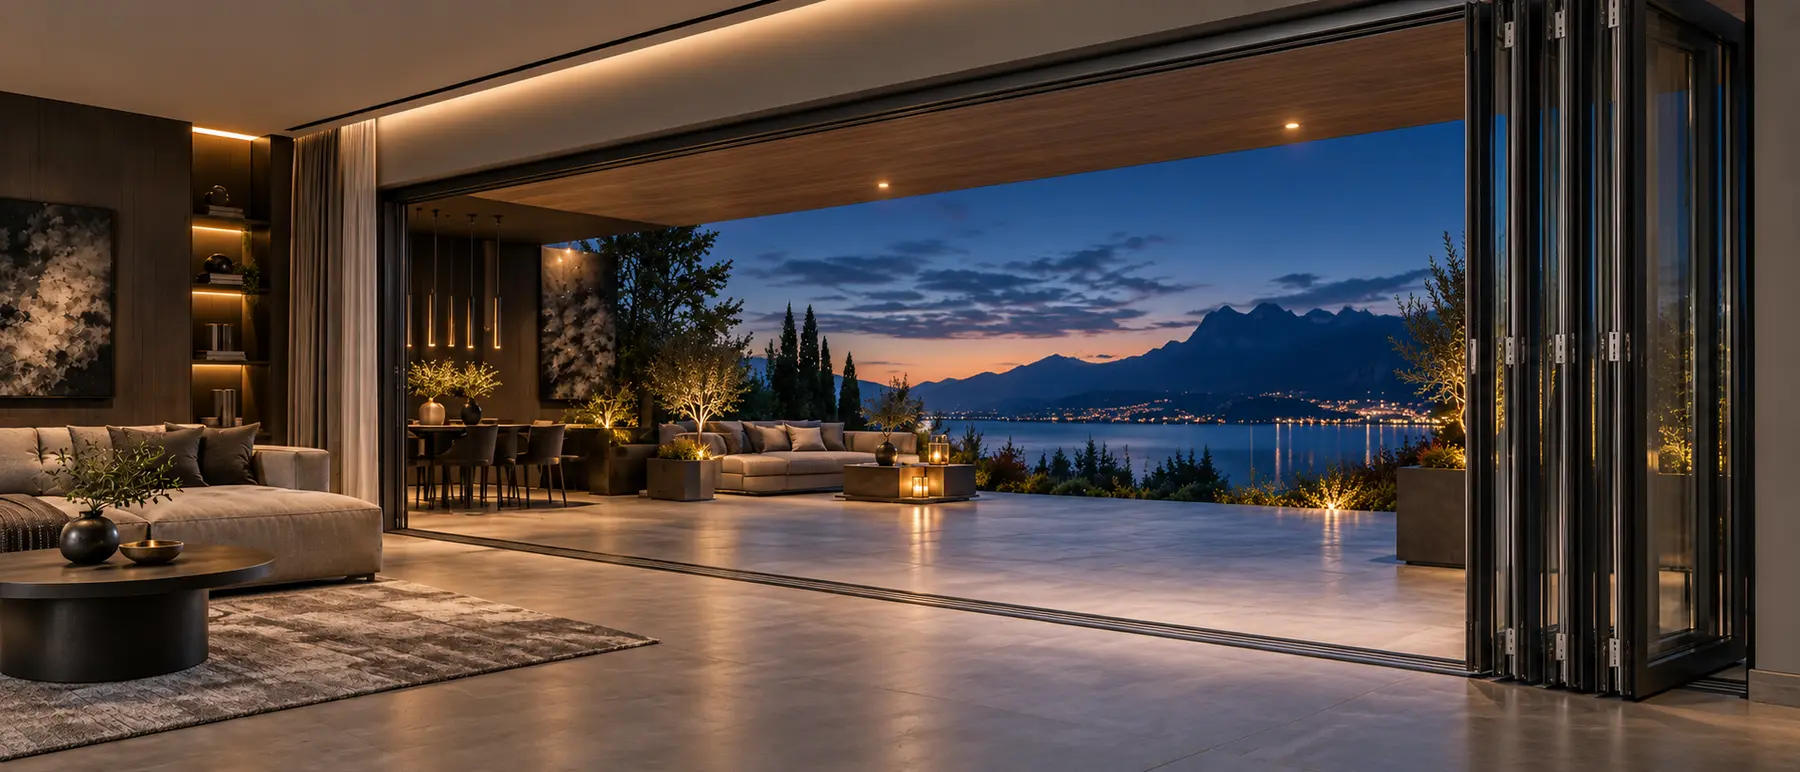

Windows and doors tailored
to your home.
I help you move from plans and numerous possibilities to a clear, well-informed choice. Windows, doors, garage doors, roller shutters, external venetian blinds and sliding systems—selected as one coherent solution.
I CURRENTLY REPRESENT
MK DRZWI I OKNA Sp. z o.o.
 View our completed projects
→
Personal advice. Complete project support.
When you work with me, you have one dedicated adviser and the complete resources of MK DRZWI I OKNA—from selecting solutions and surveying, through logistics and installation, to after-sales service.
advice
survey
logistics and installation
service
View our completed projects
→

NEEDS FIRST. SOLUTIONS SECOND.
Every project is different.
That is why, instead of starting with a specific product, it is better to establish what truly matters: comfort, appearance, durability, how it will be used and the budget. Only then can the right solutions be selected with confidence.
My role is to bring structure to your choices and translate technical performance into decisions that make sense for your project.
How exactly can I help?
- comparing profiles and glazing units
- selecting suitable sliding systems
- selecting roller shutters and external venetian blinds
- explaining differences between installation methods
- comparing several sensible options
If a more expensive solution offers no genuine value, I will say so. If an extra cost is worthwhile, I will explain why.
BEGIN WITH YOUR NEEDS
What matters most to you?
ADVISER’S TIP
You do not need to know the system names. Let us identify your needs first and select the solution afterwards.
I want to control costs
Thermal performance matters to me
I am planning large glazed areas
Appearance matters most
I want a quieter home
I am not sure—I need advice
AN INFORMED CHOICE
It is not about collecting more quotations.
It is about choosing the right solution.
A sound decision begins not with the number of quotations, but with understanding the differences.
DIGITAL ADVISER • 6 QUESTIONS
Not sure where to begin?
Not sure where to begin?
Find the right direction in 60 seconds.
Answer a few simple questions about your home, priorities and intended use. At the end, you will receive a direction worth considering—without providing personal details and without pretending to offer an automatic quotation.
✓ around 60 seconds
✓ no contact details
✓ instant result
60seconds
PVCthermal performance • budget
ALUdesign • dimensions
TIMBERnatural character
HSTpatio • comfort
QUESTION 1 OF 6Project stage
This is directional guidance, not a technical design or automatic quotation.
HOME ARCHITECTURAL STYLES
What is the character of your home?
Choose the style that best reflects the feel of your project. These are not rigid labels, but a point of reference: which window, entrance-door, garage-door and shading solutions usually complement that architecture best.
ADVISER’S TIP
First choose the character of the home, then explore the technical and visual solutions worth considering.

01 / HOME STYLE
Modern barn-style home
This direction suits homeowners who appreciate a simple form, a strong visual statement and large glazed areas. The windows and doors should usually emphasise the architecture rather than compete with it.
large glazed areasdark profilessimple forms
Works particularly well with
- PVC or aluminium windows with a dark finish
- large glazed areas and HST / Slide patio systems
- entrance doors with a clean, modern design
- external venetian blinds or concealed roller shutters
What to consider
- consistent colours across the windows, entrance door and garage door
- the dimensions of the units and ease of operation
- planning the shading solutions at the design stage
PRODUCTS
One project. A coordinated window and door package.
ADVISER’S TIP
Do not compare profile names and prices alone. Let us establish your needs first—then narrow the choice to solutions that genuinely make sense.
 WINDOWS
Windows
PVC, aluminium, timber and bespoke solutions—selected to suit the building, performance requirements and budget.
View window types →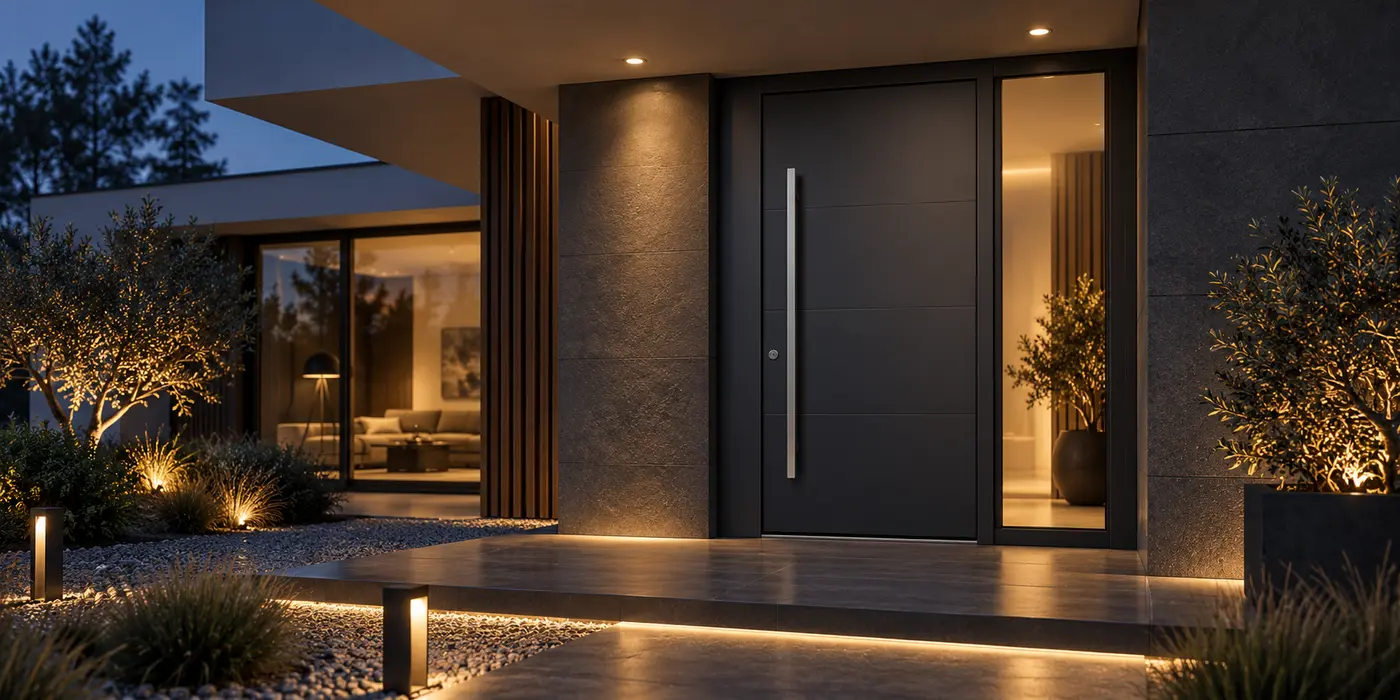 ENTRANCE DOORS
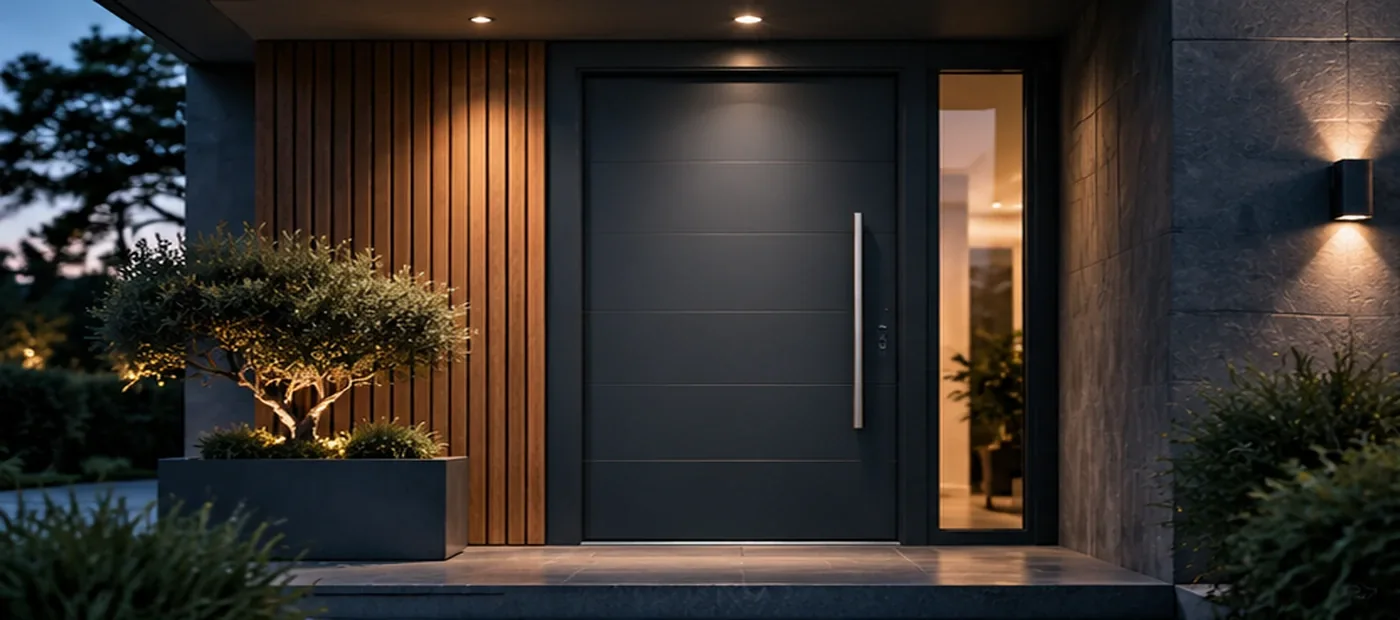
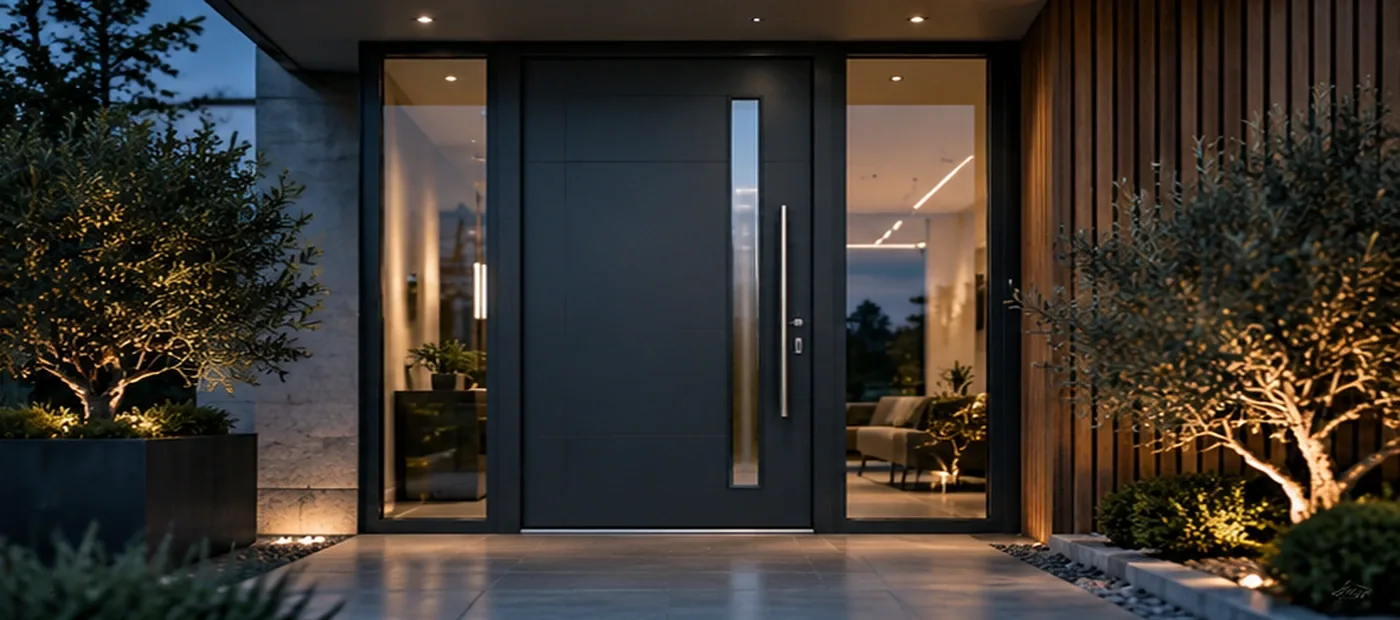
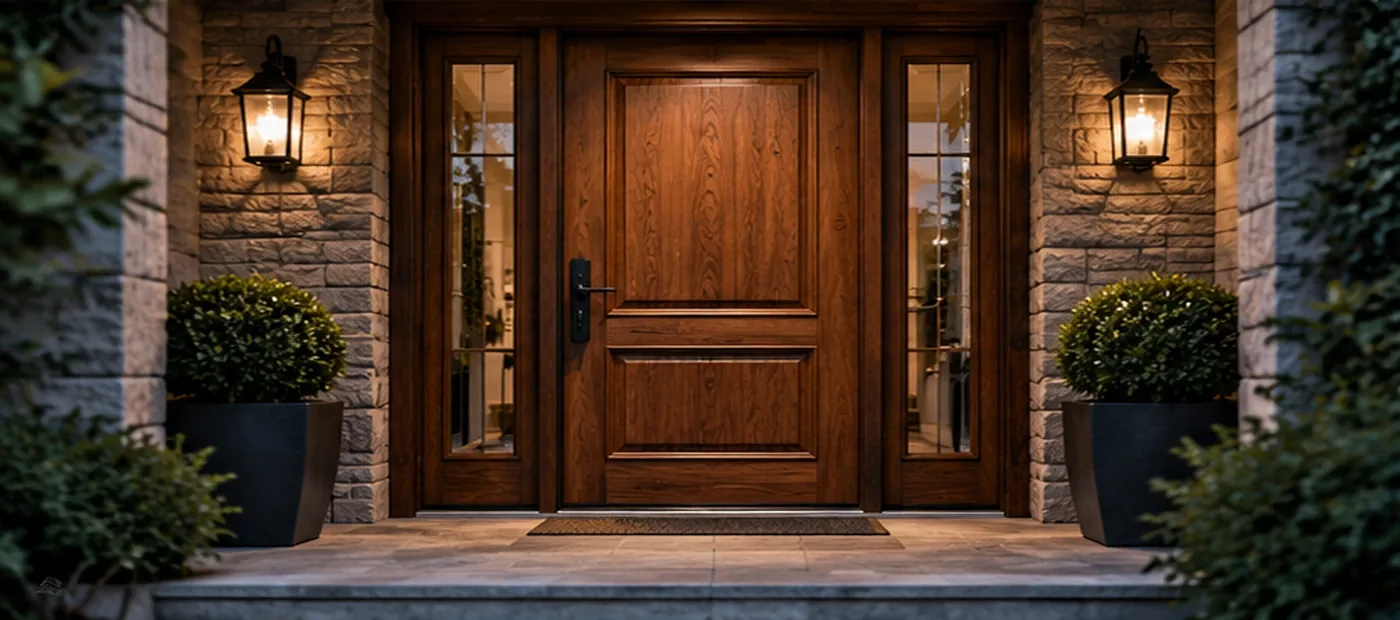
Entrance doors
Thermal performance, security, appearance, threshold and coordination with the façade.
Learn more →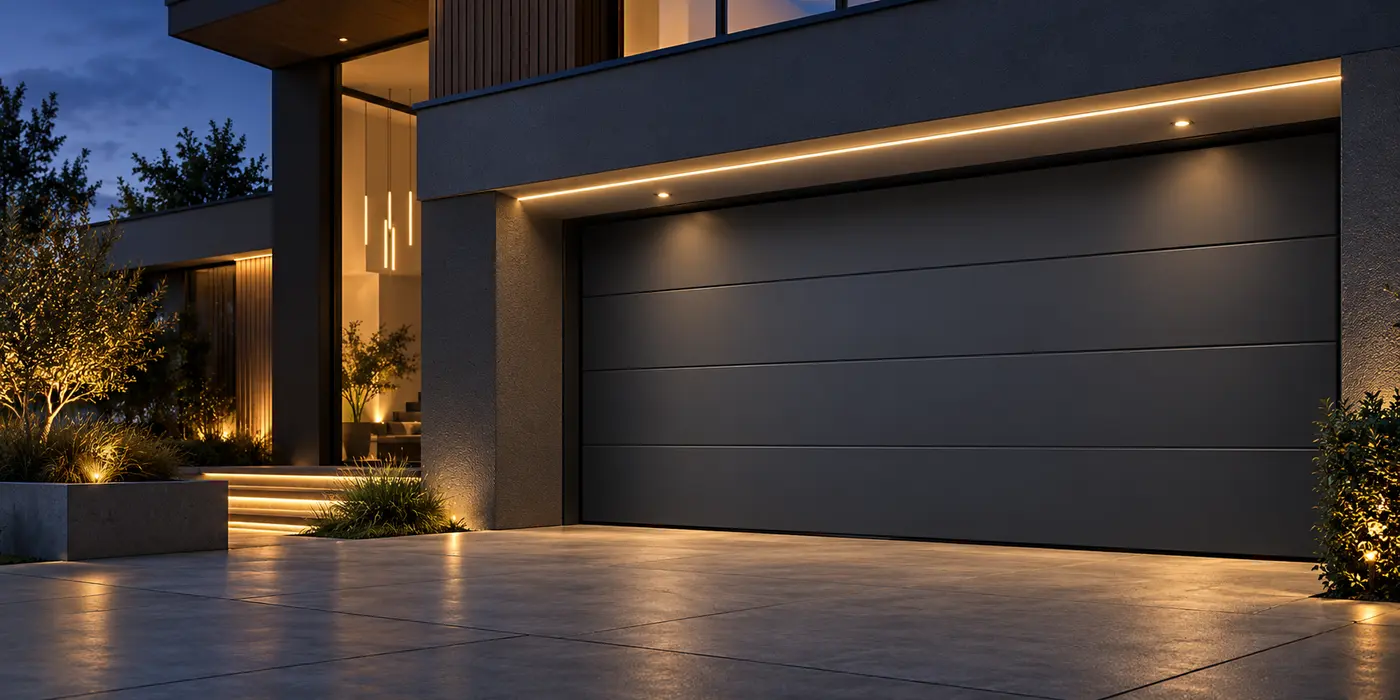 GARAGE DOORS
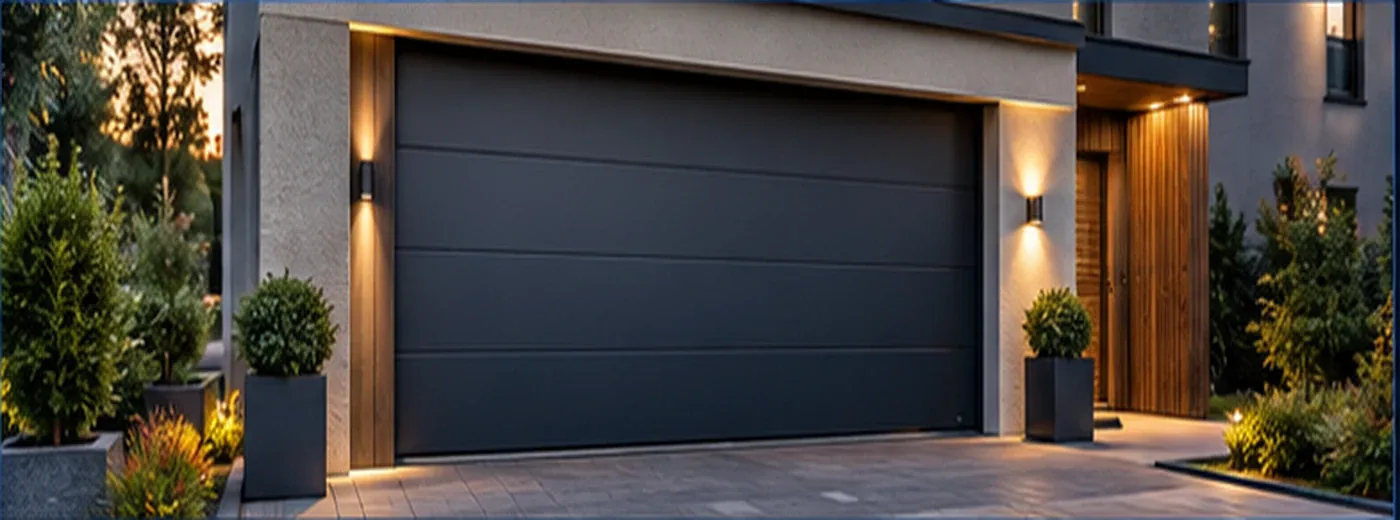
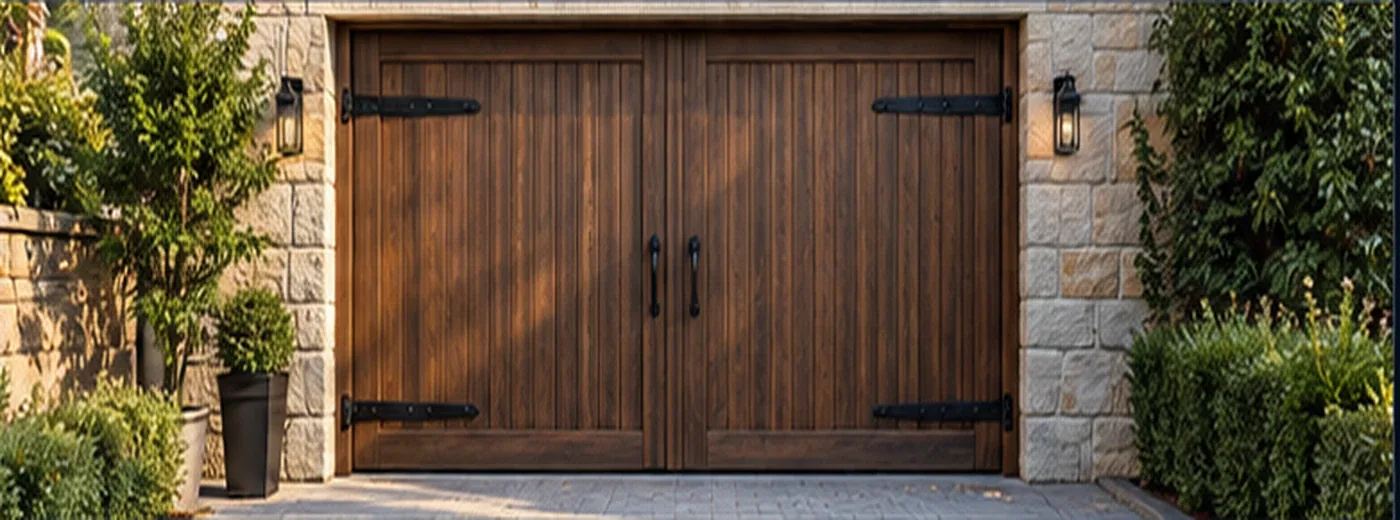
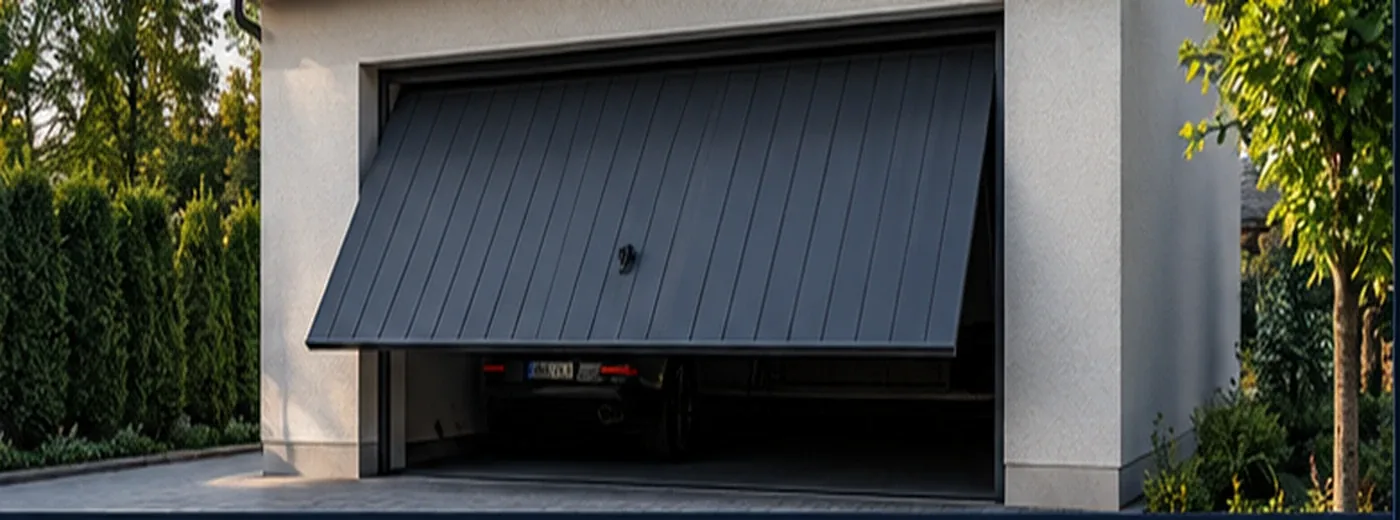
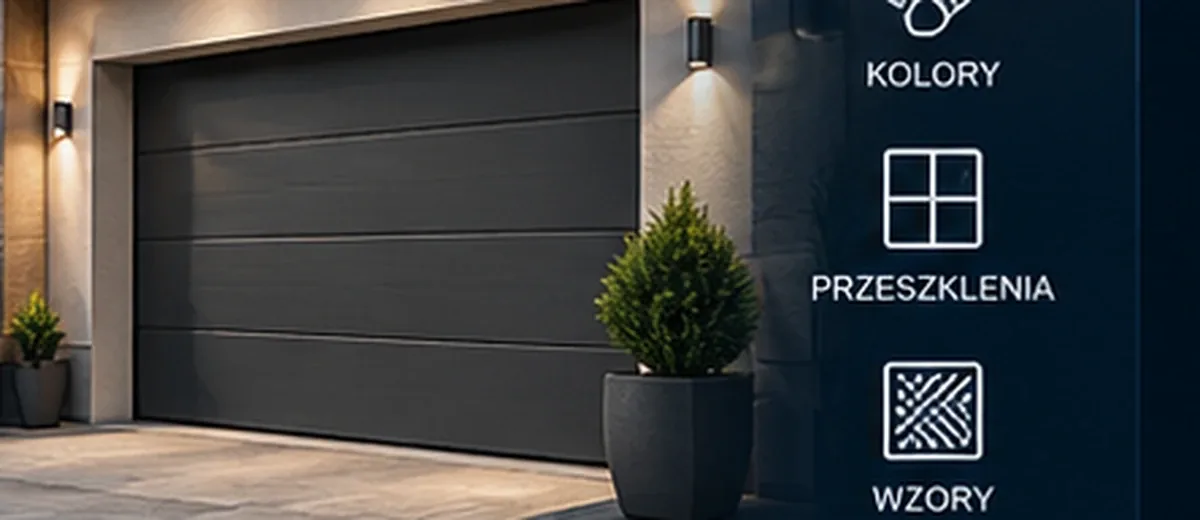
Garage doors
Selecting the garage door, operating method and automation, and coordinating it with the other windows and doors.
Learn more →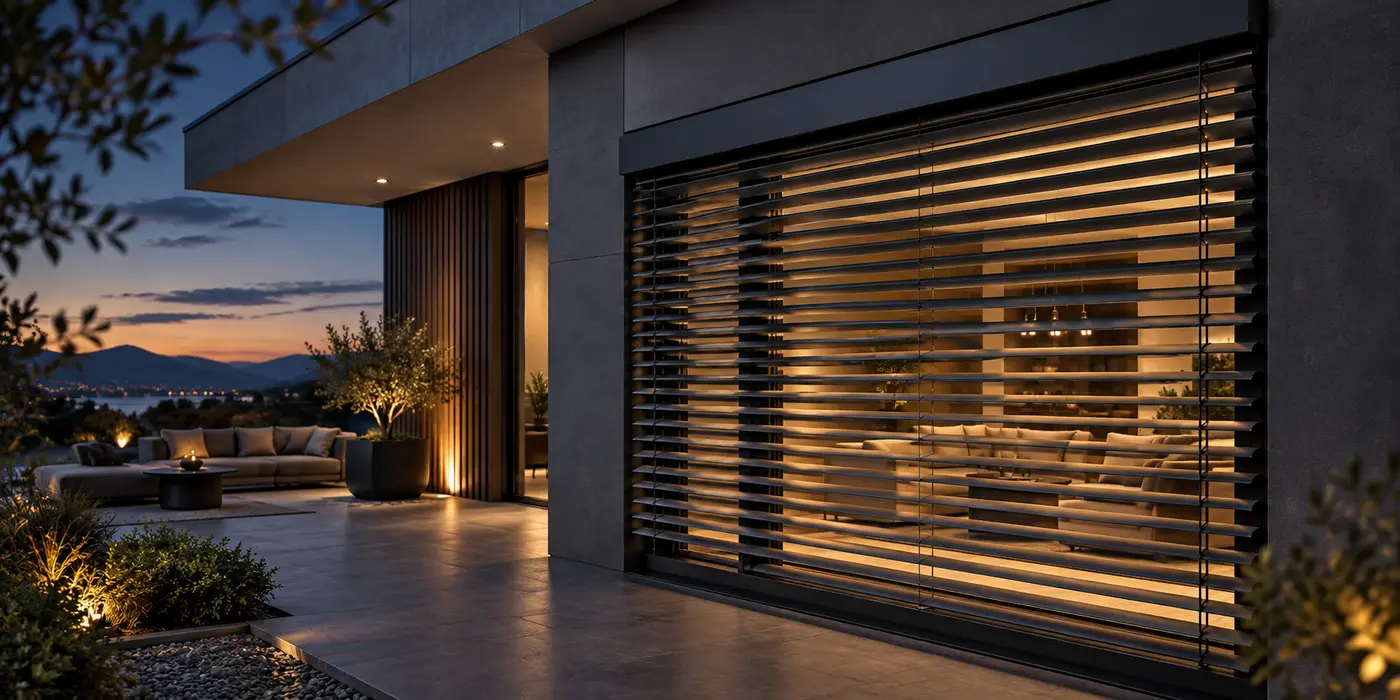 ROLLER SHUTTERS / EXTERNAL VENETIAN BLINDS
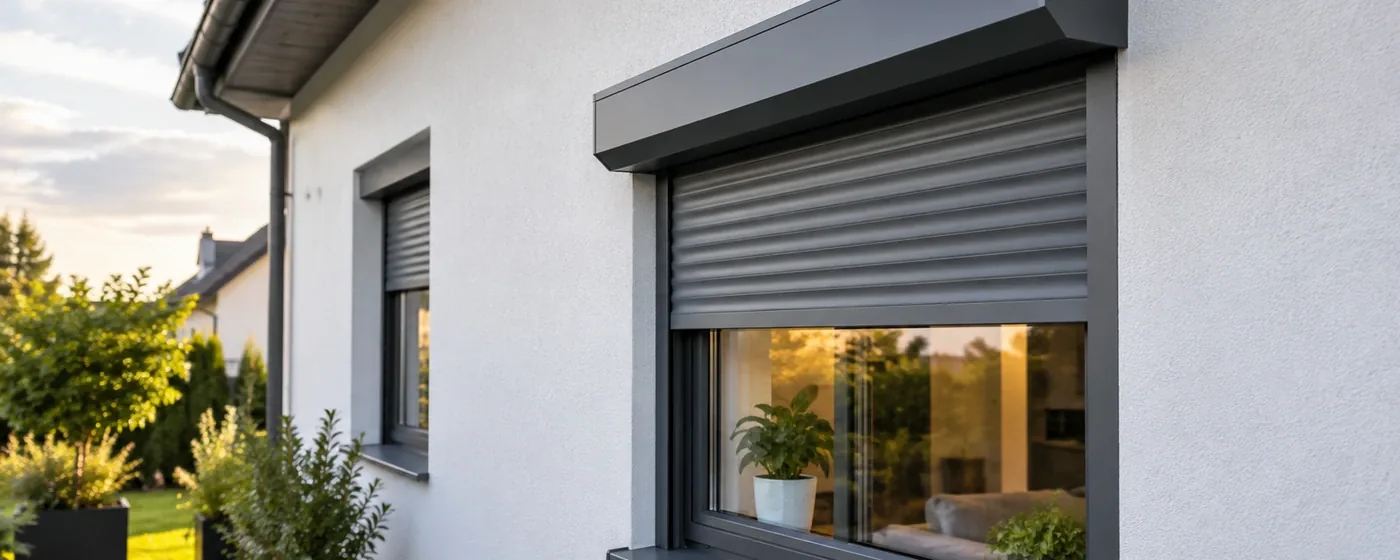
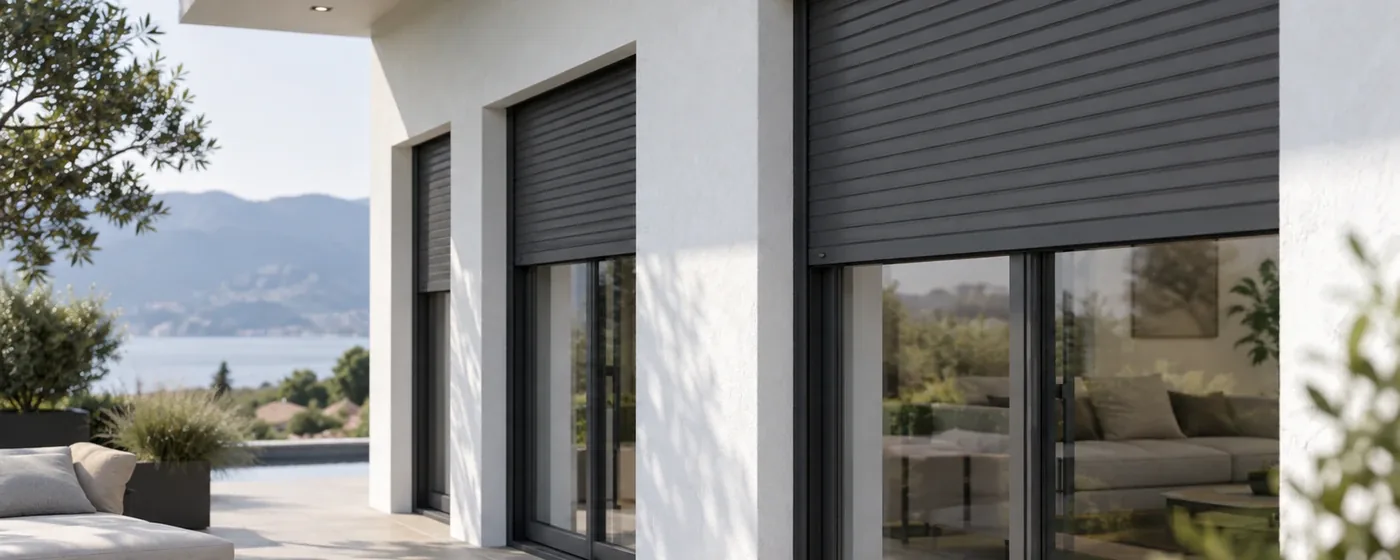
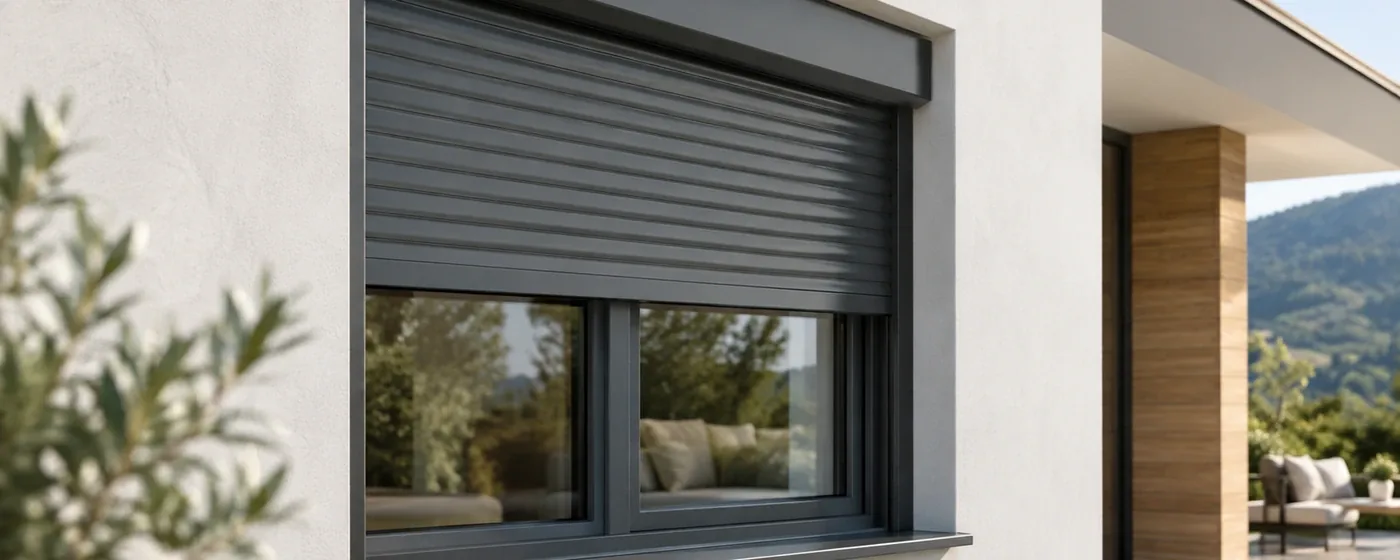
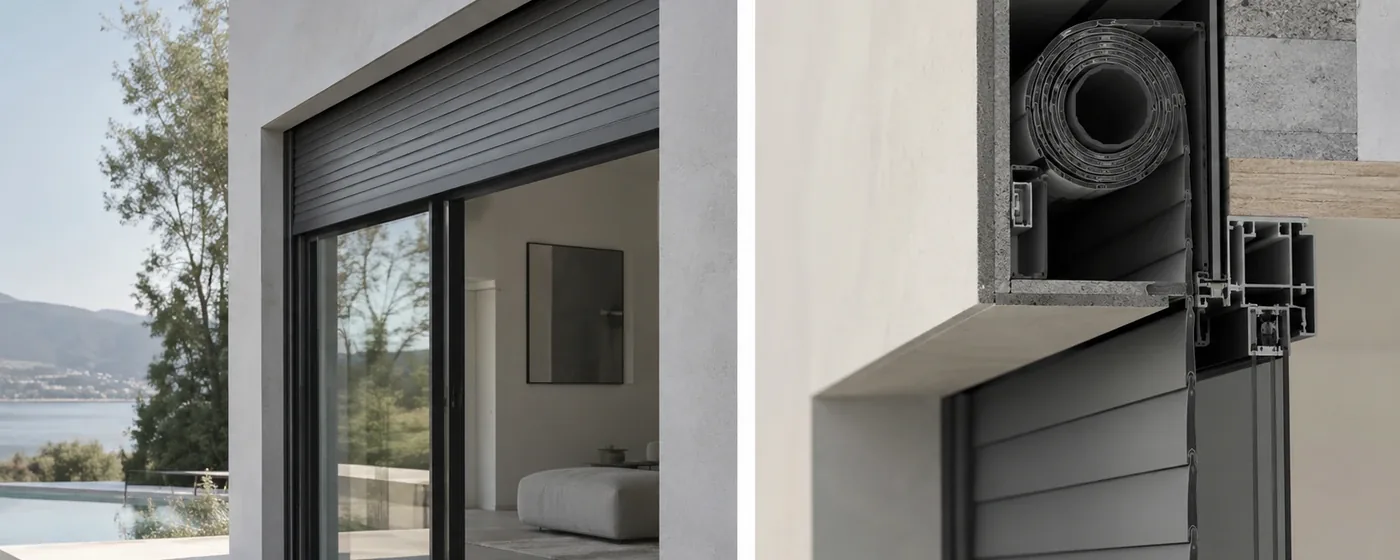
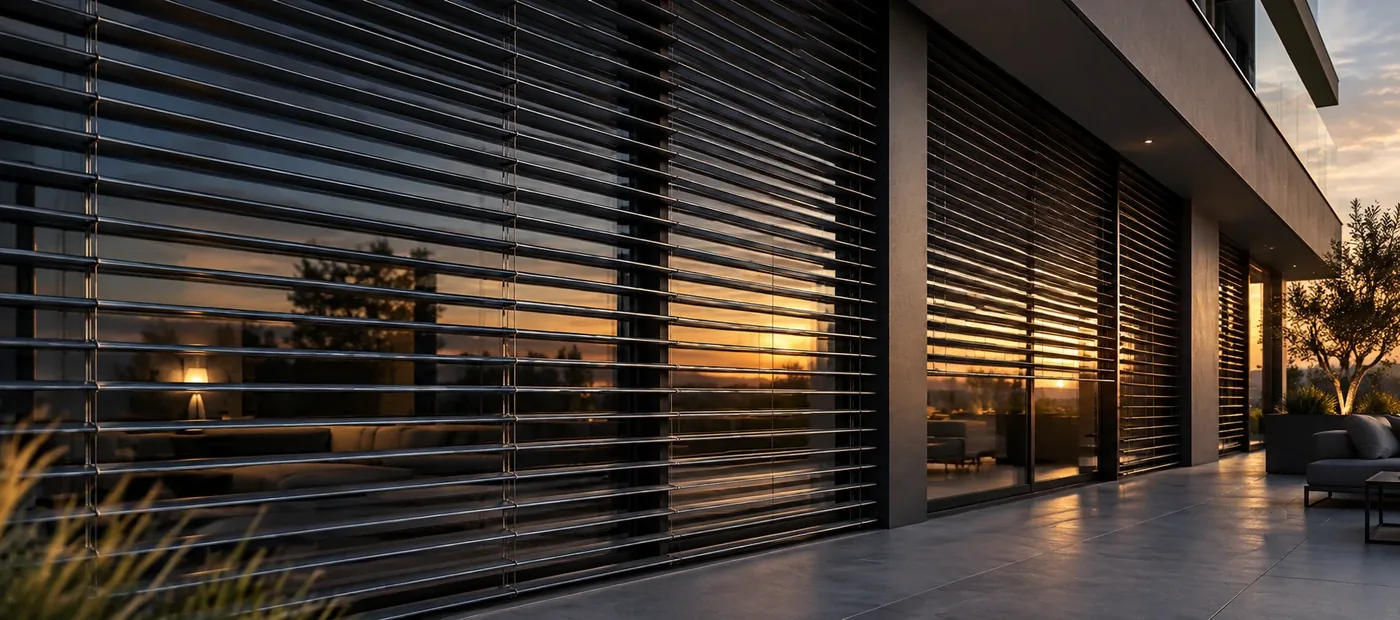
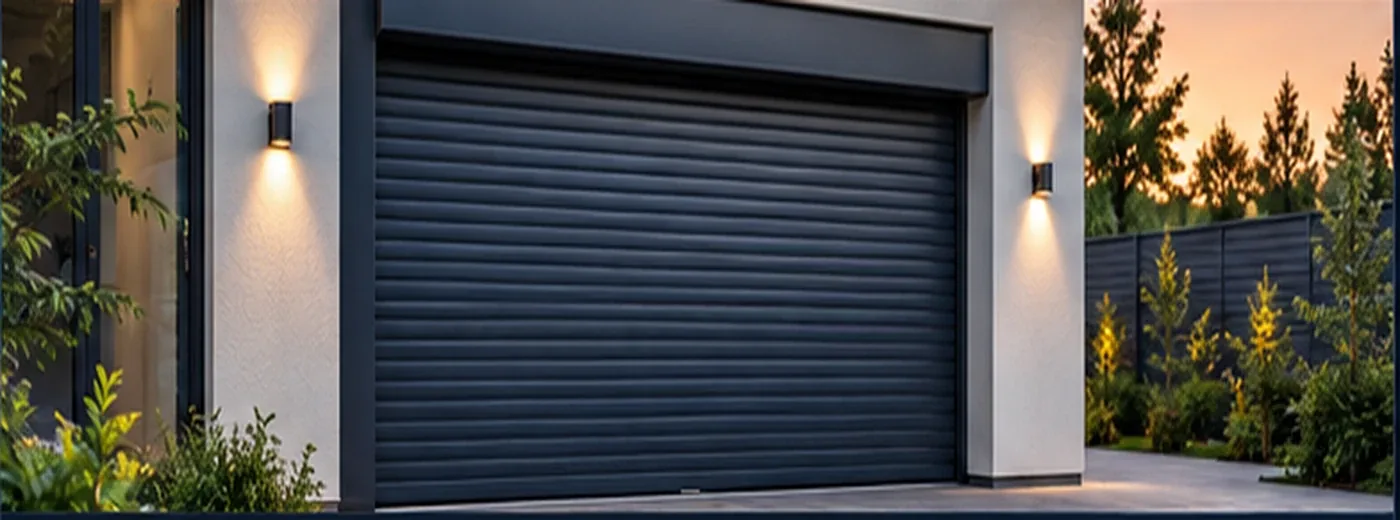
Roller shutters and external venetian blinds
Selecting a system to suit the construction stage, façade, desired comfort and controls.
Explore the solutions →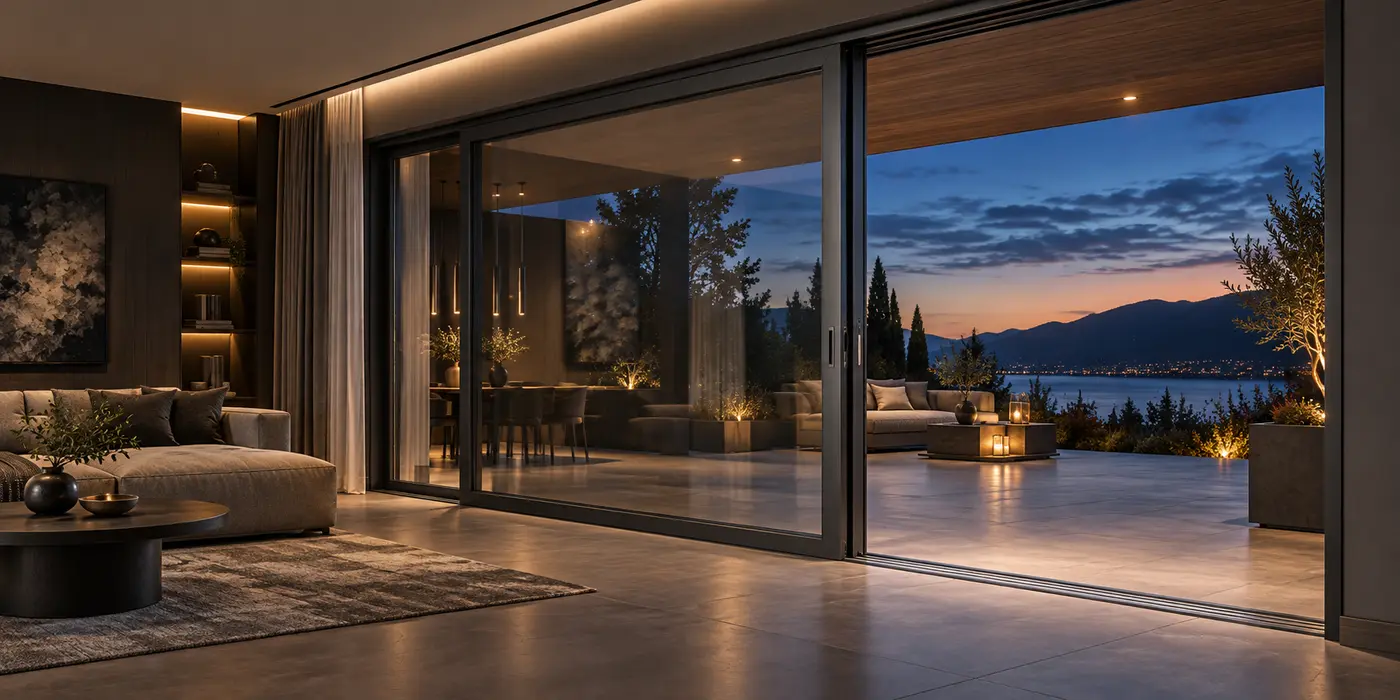 SLIDING DOORS
Sliding doors
I help select a solution to suit the glazed area, required convenience and budget.
Explore PSK, Slide and HST →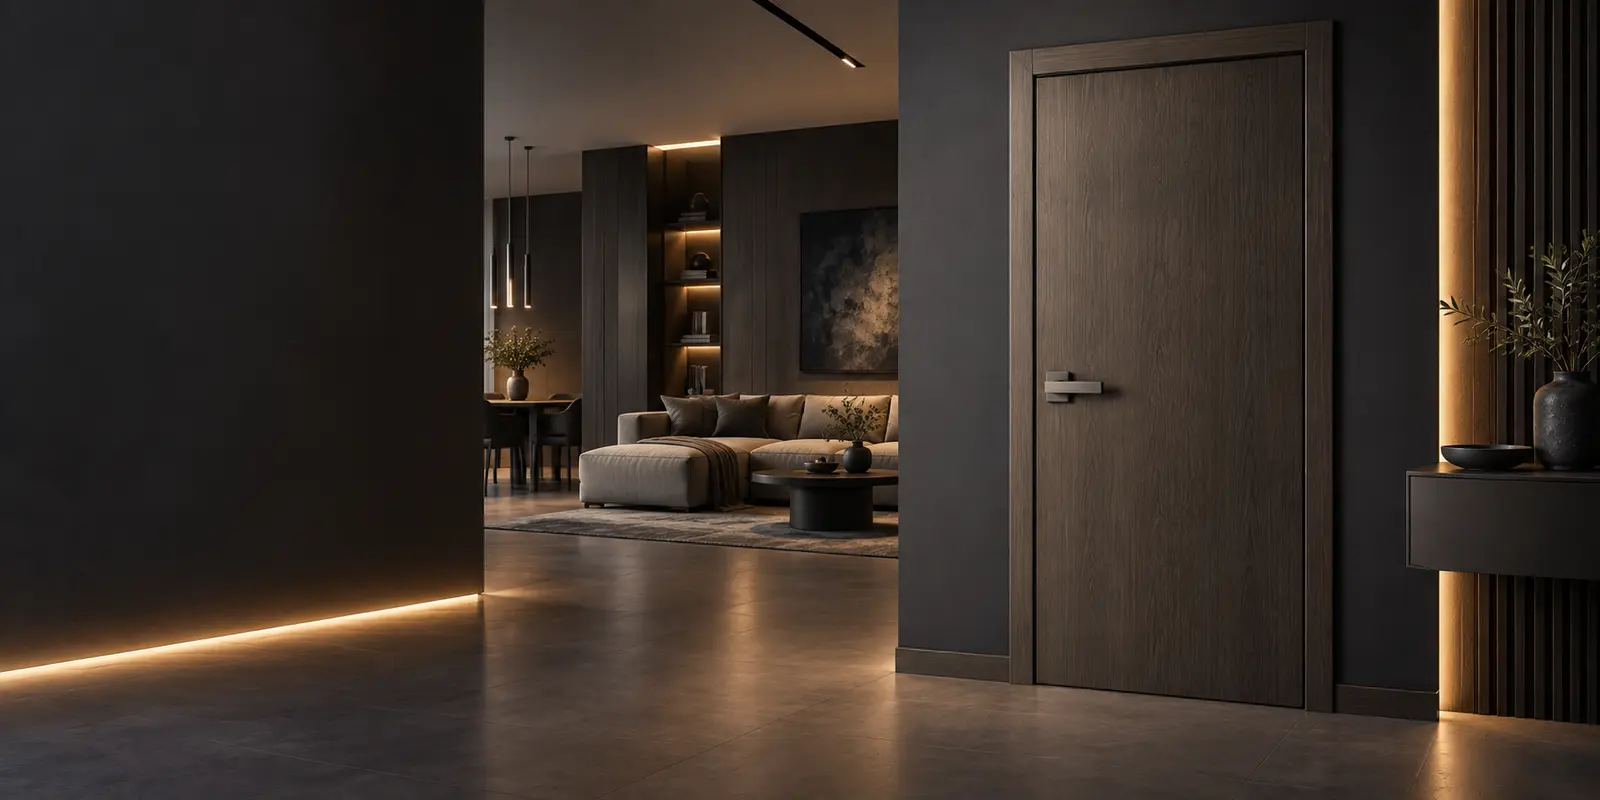 INTERNAL DOORS
Internal doors
Selecting the design, colour and finish of internal doors to suit the interior.
Explore internal doors →HOW WE WORK TOGETHER
From plans to an informed decision.
01
ADVISER’S TIP
The first step is simple. Send what you already have—we will organise the rest together.
01
You send your plans
Plans, a window and door schedule, dimensions or photographs.
02
We establish your needs
Budget, appearance, performance, timescale and intended use.
03
We choose the right direction
We select the solutions that best meet the needs of your project.
04
We discuss the quotation
I explain the differences and answer your questions.
05
You make your decision
With confidence—knowing what you are paying for and which solution you are choosing.
KNOWLEDGE HUB
Find the answer before you decide.
Enter a topic, performance value or question. You do not need to know the technical term—the search also recognises common expressions and related phrases.
⌕
Popular searches:
Key topics to begin with
6 of 18

01
Buying and comparing quotations
3 min read
Where should you begin when requesting a window and door quotation?
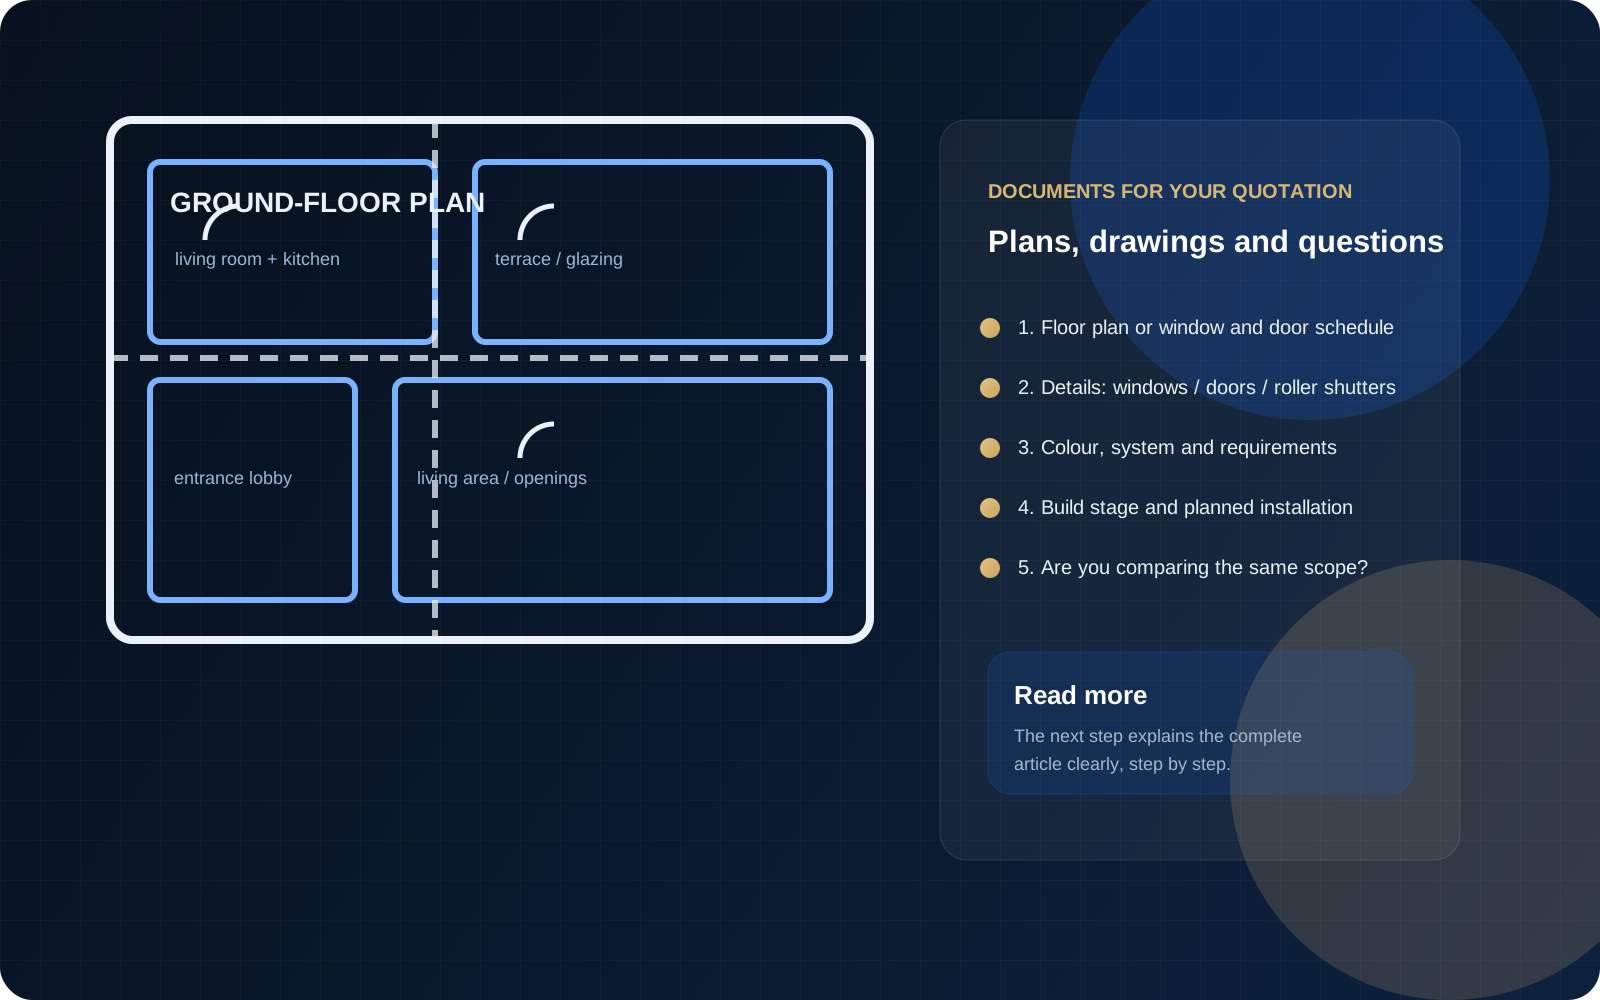
What to prepare before your first enquiry: plans, dimensions, a window and door schedule, your expectations and basic information about the project.
Read more →
Buying and comparing quotations · customer guide
Where should you begin when requesting a window and door quotation?
A sound quotation does not begin by asking for the price per metre of window. It begins with an understanding of the building, dimensions, intended use and the homeowner's expectations.
Answer in 30 seconds
To begin a quotation, prepare the plans or window and door schedule, unit dimensions, opening methods, preferred material and colour, details of roller shutters or external venetian blinds, the required installation scope, location and project stage. You do not need to know the names of profiles, hardware or glazing units—that is what the adviser is there to explain.
Six pieces of information that lead to a sound quotation
Each point complements the others. Together, they create a complete picture of your project.
01Plans and dimensionsFloor plans, schedule and unit subdivisions
02MaterialPVC, aluminium, timber or a mixed-material solution
03Opening methodFixed, tilt-and-turn, PSK, Slide or HST
Your project
Complete information
04Colour schemeExterior, interior, profile core and accessories
05Glazing and shadingThermal performance, quiet, safety, roller shutters and external venetian blinds
06Installation and locationScope of work, site conditions and transport
The more precise the initial information, the more accurate and comparable the quotation.
Why are window dimensions alone not enough?
Two windows of identical width and height can differ significantly in price. One may be fixed and the other tilt-and-turn. One may be white with basic equipment, while the other has foil on both sides, safety glass, concealed hinges and additional functions.
The same applies to patio access. The same opening can be fitted with conventional French doors or a PSK, Slide or HST system. These solutions differ in construction, ease of operation, possible dimensions, threshold and price.
A quotation based solely on the approximate number and size of windows can therefore only be an initial estimate.
1. House plans or window and door schedule
The best starting point is a PDF of the house plans. Particularly useful are:
- a window and door schedule,
- floor plans for each storey,
- building sections and elevations,
- information on future finished floor levels.
The schedule usually shows the dimensions and subdivisions of each unit, but does not always contain everything needed to assess installation. Sections help verify, among other things, floor levels, insulation thickness, patio level and the way the openings will be prepared.
If you do not have plans, prepare your own window list. For each unit, note the width, height, opening method and room. Remember, however, that plan dimensions are used for an initial quotation—they do not replace the survey carried out before ordering.
2. New build or replacement windows and doors?
The adviser needs to know whether the windows will be installed in a new building or replaced in an occupied house or flat.
For a new build, the preparation stage of the openings, floor levels, insulation thickness, window position within the wall, preparation for patio doors and planned roller shutters or external venetian blinds all matter.
For replacement work, also allow for removal, possible damage to plaster and window sills, making good the openings, carrying out and disposing of the old units, the storey, lift access and whether the new units can be brought in safely.
The scope of work should be described clearly in the quotation. You need to know whether the price covers the products alone or all work connected with their replacement.
3. PVC, aluminium or timber?
If the plans do not specify a material, begin by defining your own requirements.
PVC is most frequently chosen for its excellent price-to-performance ratio and broad suitability for typical houses and flats.
Aluminium enables larger units with slimmer sightlines. It is often used in modern architecture and for large glazed areas where profile rigidity is particularly important.
Timber provides a natural appearance and distinctive finish, but requires informed maintenance and is usually more expensive.
The same material need not always be used throughout a building. In some cases, PVC windows in most rooms and aluminium for the largest glazed units are a sensible combination.
4. The opening method matters
For each window, specify whether it should be fixed, side-hung, tilt-only, tilt-and-turn, fitted with a flying mullion or part of a sliding system.
Fixed units are simpler and provide a larger glazed area. Remember, however, that they cannot be opened or easily cleaned externally without safe access.
For large windows, the sash weight and capabilities of the specific system must be checked. Not every subdivision shown in an architectural visualisation can be made in every material. The adviser should assess not only appearance, but also safety and long-term ease of operation.
5. External, internal and profile-core colours
Saying ‘I want anthracite windows’ may not be enough for an accurate quotation. Establish whether the colour is required externally only or on both sides, the profile-core colour, and the finish of the handles, hinge covers and glazing spacers.
A window that is anthracite outside and white inside is different from one that is anthracite on both sides with a dark core. The difference affects appearance, price and sometimes lead time.
For the entrance door, garage door and shading, aim from the outset for a coherent colour scheme across the complete façade.
6. The glazing unit should reflect your needs
Glazing is responsible for more than thermal insulation. It can also reduce noise and overheating, improve security, protect against injury or increase privacy.
Triple glazing is common in new homes, but the number of panes alone does not describe the complete window. The thickness and glazing build-up, coatings, spacer and performance of the complete unit also matter.
If the house is beside a busy road, mention this in your initial enquiry. An acoustic solution should be matched to the type of noise and the complete window, rather than added casually as a single item.
7. Consider roller shutters and external venetian blinds early enough
If external roller shutters, external venetian blinds or screens are planned, it is best to include them when the windows are first quoted.
The shading system can affect unit height, lintel preparation, insulation thickness, cable routes, motor positions and installation method. Deciding too late can restrict the options or require completed openings to be altered.
Initially, simply indicate which windows will have shading and whether operation is to be manual, wired, radio-controlled or integrated with the home automation system.
8. Installation is part of the complete solution
Even an excellent window will not achieve its expected performance if installed incorrectly. State in your enquiry whether the quotation should cover supply only, standard installation, airtight or multi-layer installation, installation within the insulation layer, system extension profiles, thermally efficient base supports, removal, disposal and making good the openings.
Standard and airtight installation are not the same scope of work. With airtight installation, the joint between the window and wall is protected internally and externally with suitable materials. The exact solution must be matched to the wall construction and project stage.
Patio systems require particular attention. The substrate, floor level and drainage must be prepared correctly. These matters should not be left until installation day.
9. Location and site conditions
The project location is needed for a complete quotation. It affects transport, installation-team planning and the ability to carry out a survey.
Also mention any difficulties: a high storey, no lift, restricted access, a narrow staircase, very heavy units or the need for lifting equipment.
This information enables proper planning and reduces the risk of unforeseen costs after the order has been signed.
Short quotation form
Prepare your enquiry in 2 minutes
Select one answer for each point. At the end, you will receive a ready-to-send message.
0/12completed
Message preview
Select at least 1 itemYour summary
Hello, please contact me regarding a quotation for windows and doors.
When you select an option, a prepared message will open. You can edit it and attach your plans before sending. Nothing will be sent automatically.
Common mistakes in an initial enquiry
Comparing the final price alone
A lower price may result from a different installation method, simpler equipment, transport being excluded, different glazing or required accessories not being included.
Missing colour information
Colour on one side, both sides and a dark profile core can carry different prices and affect the lead time.
Omitting roller shutters or external venetian blinds
Shading added at a late stage may require changes to window heights, lintels or insulation.
Choosing a sliding system from a photograph alone
PSK, Slide and HST differ in operation, threshold, airtightness, structural capabilities and price.
Treating plan dimensions as manufacturing dimensions
The final manufacturing dimensions should be established during the survey after the prepared openings have been checked.
Do you have house plans or your own window schedule?
Send the documents and indicate which solutions require discussion. This will allow a clear quotation and options tailored to your project to be prepared—without guesswork or hidden differences in scope.
You do not need to have all the information. Send what you already have—we will establish together what else is needed.

02
Buying and comparing quotations
4 min read
How should you compare quotations?
Price alone is not enough. See how to compare profiles, glazing, equipment, installation and scope of work.
Read more →
Buying and comparing quotations · customer guide
How should you compare quotations?
The final price alone tells you very little. Two quotations may look similar while actually including different profiles, glazing, equipment, installation work and contractor responsibilities.
Answer in 30 seconds
First align the dimensions and subdivisions, then compare the product, glazing, equipment and installation, and only look at the price at the end. If a quotation does not describe an item, do not assume it is included. Ask for written clarification.
Interactive guide
1/5
Compare quotations in five steps
Select a stage or move forward. Each step shows where differences are most often hidden.
Are both companies quoting for the same units?
Compare the number of units, dimensions, subdivisions, sashes, opening directions, mullions and patio systems. A different drawing means a different product and a different price.
The key questionDoes every unit have the same dimensions, subdivisions and opening method?
Do the performance values describe the same unit?
Check the full system name, material, glazing unit and Uw value of the complete window. Do not compare the glazing's Ug with the complete unit’s Uw.
The key questionDoes the quoted value apply to the glass, frame or complete window?
Are the equipment and extras identical?
Compare the hardware, handles, trickle vents, warm-edge spacers, safety glass, roller shutters, controls, window sills, insect screens and additional profiles.
The key questionWhich items are included in the price, and which appear only in the visualisation?
What does the item ‘installation’ actually mean?
Establish the fixing and sealing method, threshold support, removal, making good, window sills, adjustment and disposal. A single word can describe entirely different scopes.
The key questionDoes installation include all work needed to complete the project?
Do you know the full cost and responsibilities?
Check the survey, transport, unloading, timescale, tax, payment schedule, product warranty and responsibility for the installation service.
The key questionCould significant additional charges arise after the order is signed?
1. First check whether both companies are quoting for the same thing
The comparison begins before analysing profiles and performance values. First check whether both quotations contain exactly the same units.
Compare the number of windows and doors, widths and heights, number of sashes, subdivisions, fixed and opening elements, opening directions, mullions, French doors, sliding systems and additional extension and coupling profiles.
Even a small difference can change the price substantially. A fixed window is usually simpler than an opening sash. French doors are not the same as a PSK, Slide or HST system. If the unit layouts are not identical, you are not yet comparing prices for the same products.
2. Compare the configuration, not just the profile name
The system name matters, but does not describe the complete window. One profile family may be offered with different glazing units, reinforcement, hardware, colours and equipment.
Check the material, full system name, system depth, seal arrangement, core colour and reinforcement used—particularly for large units. The description ‘six-chamber profile’ alone does not tell you the equipment, rigidity of the specific window or performance of the complete unit.
For large glazed areas, ask whether the solution has been checked for dimensions, glass weight, colour and opening method. The fact that a unit can be priced does not always mean the chosen option will be best in use.
3. Do not compare the glazing value with the complete-window value
Ug describes the glazing unit, Uf the frame, while Uw describes the complete window—the glazing, frame and effect of the glazing edge. If one company quotes Ug and another Uw, the values are not directly comparable.
The Uw value can change with the dimensions, subdivisions and proportion of glazed area. One result should therefore not automatically be assigned to every unit in a schedule.
Also check the number of panes, total glazing-unit thickness, type of warm-edge spacer and whether the glass is safety, toughened, laminated, solar-control or acoustic. The phrase ‘triple glazing’ still does not mean identical glazing.
4. Check functionality and equipment
Two windows that look similar can differ in how they operate. Compare side-hung and tilt functions, the night-vent position, mishandling protection, handles, hinges, magnetic contacts, trickle vents and additional security features.
For doors, the locks, cylinders, pull handles and access-control method are among the important details. Do not assume that an item visible in a catalogue photograph is included in the price. The equipment should be listed in the quotation.
5. Colour is more than the name ‘anthracite’
Check whether the colour is on one side or both, and the colours of the profile core, seals, glazing bead and hinge covers. For aluminium, establish whether the surface is powder-coated, anodised or foil-wrapped.
The same everyday colour name does not guarantee an identical result from different manufacturers. Smooth, textured and woodgrain anthracite finishes can look different. Compare physical samples in daylight before ordering.
6. Extras must be itemised separately
A lower price often results from omitting items that later appear as extras. Check roller shutters, external venetian blinds, screens, controls, window sills, thermally efficient base supports, extension profiles, insect screens, trickle vents and making-good work.
With shading systems, the product cost is not the only consideration. Their use affects window height, lintel preparation, insulation and the electrical installation.
7. Compare installation as a separate service
The single word ‘installation’ can describe completely different scopes of work. One quotation may include only positioning and foam, another multi-layer sealing, and a third also removal, making good and disposal of the old units.
Ask for an itemised description of the fixings, sealing materials, threshold support, base or extension profiles, making good, window sills, adjustment and disposal. For HST systems and large panes, also establish how the units will be brought in, whether on-site glazing is required and what equipment is needed.
A good product installed incorrectly cannot realise its potential. The installation price should therefore not be judged without knowing its scope.
8. Transport, survey, timescale and responsibility
Check whether the survey, transport, unloading and carrying in are included in the price. Establish the indicative production lead time, when it begins, price validity, payment schedule and applicable tax.
Distinguish the manufacturer’s product warranty from the responsibility of the installation company. These may be two different scopes. CE marking and declared product performance also do not replace an assessment of the specific configuration and quality of service.
9. Align the scope first, negotiate afterwards
When you identify differences, do not immediately negotiate the price. First ask each company to update its quotation using one consistent set of assumptions.
Please confirm that the quotation covers the stated dimensions and subdivisions, agreed glazing and colour, equipment, transport and described installation scope. Please also list separately any items not included in the price.
Only after this alignment can the difference be assessed fairly. Sometimes the proposal that appears more expensive on the first page proves better value because it includes more work and equipment.
Why can a PLN 4,000 difference be misleading?
Quotation APLN 48,000
Quotation BPLN 52,000
The review shows that Quotation A excludes transport, thermally efficient base supports beneath the patio doors, disposal and multi-layer installation. Quotation B includes these items.
Once the missing scope is added, Quotation A costs PLN 54,500. This does not automatically mean Quotation B is best—it means the two proposals can now be assessed fairly.
Interactive check
Which quotation is described more clearly?
Mark an item if the quotation describes that area clearly. The result does not assess product quality—it shows how complete the information is.
Quotation A0/10No information to assess
Quotation B0/10No information to assess
AreaQuotation AQuotation B
Begin marking the information shown in the quotations.
Common pitfalls
A discount calculated from a price that cannot be verified
A high percentage discount looks attractive, but what matters is the final price for a comparable scope.
‘Included as standard’ without being stated in the quotation
If an important item is absent from the documents, ask for it to be added. Verbal assurances are difficult to verify several months later.
Comparing one window instead of the complete package
One company may price a simple unit attractively while charging more for sliding systems, doors and extras. Base your decision on the complete scope you need.
Focusing on a single performance value
The best glazing Ug value cannot compensate for an unsuitable system, incomplete installation or inadequate support beneath a heavy unit.
Do you have two quotations and find it difficult to identify the differences?
Send them for review. I will compare the units, performance, equipment and installation scope point by point. I will explain the price difference, identify what is missing and show which extras may be genuinely justified.
You do not need to know the technical terms. Simply send the documents—I will organise the differences and explain them in plain language.

03
Windows
4 min read
Window profiles—what really matters?
System depth, chamber count, seals and profile construction—which details matter, and which are easily overvalued.
Read more →
Windows · informed system selection
Window profiles—what really matters?
Chamber count and millimetres of system depth are only part of the picture. The quality of the finished window depends on the profile, reinforcement, seals, glazing, hardware, manufacture and installation working together.
Answer in 30 seconds
Do not choose a window solely by profile name or chamber count. Ask for the complete configuration of the specific unit: system, reinforcement, glazing unit, hardware, complete-window Uw value, dimensional limitations and installation method. A good profile is the foundation, but does not guarantee a good window on its own.
Interactive anatomy of quality
1/5
What does a good window really consist of?
Select a layer to see its function and what to ask before ordering.
The profile forms the frame of the complete unit
Its depth, chamber geometry, internal wall arrangement and capacity for suitable glazing affect thermal performance, appearance and the range of possible units. Chamber count alone, without information about the complete system, is not a meaningful ranking.
Affectsframe insulation, appearance, glazing range and dimensions
AskWhat are the full system name and the frame and sash configuration?
Reinforcement provides stability
In PVC windows, the correct reinforcement helps transfer loads and limit deformation. Its specification depends on dimensions, opening method, glass weight and colour, among other factors. Large, dark-coloured units require particularly careful verification.
Affectsrigidity, hardware operation, sash behaviour and lasting adjustment
AskWhat reinforcement is specified for this particular unit?
Seals work together with the profile geometry
It is not only the number of seals that matters, but their complete arrangement, corner quality, sash compression and correct adjustment. An additional central seal can improve separation of profile zones, but cannot remedy poor workmanship.
Affectsair permeability, driving rain, acoustic performance and comfort
AskWhat seal arrangement does the system use, and what adjustment service is provided?
The glazing unit occupies most of the window area
It is not merely a matter of two or three panes. Pane thicknesses, glass type, warm-edge spacer, light transmission, solar gains, safety and acoustic performance all matter. Ug applies to the glazing, Uf to the frame and Uw to the complete window.
Affectsthermal performance, daylight, overheating, noise and safety
AskWhat is the exact glazing build-up and Uw value for the window quoted?
Installation connects the product to the actual building
Even an excellent window will not achieve its intended performance if it is incorrectly supported, fixed or sealed. The installation method should reflect the substrate, dimensions, window position within the wall and façade build-up.
Affectsjoint airtightness, stability, threshold and moisture risk
AskHow will the window be fixed, supported and sealed on every side?
1. What exactly is a window profile?
A profile is a system of extruded sections used to form the frame, sash, mullions and other parts of the unit. PVC profiles contain chambers and spaces for reinforcement and drainage, among other functions. In aluminium, the profile geometry, thermal breaks, insulators and joining method determine the system’s capabilities.
The profile defines the window’s basic capabilities, but the finished product is created by the manufacturer. That is where the reinforcement, glazing, hardware, seals and production technology are selected. Two windows based on a similar class of system can therefore differ in configuration and manufacturing quality.
2. System depth—important, but not in isolation
A deeper profile usually gives the designer more room for effective geometry, suitable glazing and more developed insulation zones. It does not mean that every deeper window will automatically outperform every shallower system.
When comparing solutions, consider the frame Uf value, available glazing range, frame and sash construction, seals and dimensional capabilities together. Millimetres are technical information—not a verdict in themselves.
3. Chamber count is not a quality score
Chambers limit heat flow within the profile and perform specific structural functions. Their number is meaningful only in relation to their width and shape and the system’s complete geometry. Seven very narrow chambers need not perform better than six properly designed ones.
Instead of asking only ‘how many chambers?’, request the full system name, the profile Uf value and the Uw value for the specific window dimensions. This is far closer to a meaningful buying decision.
4. Reinforcement and structural performance—particularly for large windows
The sash must carry the weight of the glazing unit, operate on its hardware and transfer loads acting on the unit. Reinforcement should not be selected using one rule for the entire home. Dimensions, subdivisions, function, glass weight, colour, exposure and installation location all matter.
Dark PVC profiles heat up more strongly in sunlight. This does not mean they must be avoided, but the manufacturer should confirm the permissible dimensions, correct reinforcement, subdivisions and installation guidance. For the largest glazed areas, it is also worth comparing aluminium solutions or revising the arrangement of fixed and opening sections.
5. Two or three seals?
Systems may have external and internal seals or an additional central seal. The latter creates more clearly separated zones, but the number alone still does not describe the airtightness of the finished window.
The rebate geometry, material quality, welded or joined corners, correct compression, drainage and subsequent adjustment all matter. In practice, a well-made and correctly adjusted window is more important than the marketed advantage of one isolated feature.
6. The profile must suit the glazing, and the glazing must suit the home
The glazing unit forms the largest area of most windows. Its selection affects heat loss, daylight, room overheating, noise protection and safety. The profile must securely accommodate the appropriate glazing unit.
Do not compare the glazing Ug value with the complete window’s Uw. Uw accounts for the glazing, frame and effect of the glazing edge. The result also depends on the unit’s dimensions and subdivisions, so one number from marketing material does not automatically describe every window in the home.
7. Hardware and manufacturing quality determine everyday use
The profile does not open or close the sash—the hardware installed in the finished window does. Its specification, number of locking points, additional functions and adjustment affect comfort and airtightness. For heavy sashes, permissible weights and correct glazing support are particularly important.
Manufacturing precision is equally important: unit geometry, welds or corner joints, drainage, glazing packers and quality control. The profile brand is no substitute for the quality of the window manufacturer.
8. Colour and dimensions change operating conditions
A dark surface exposed to sunlight can reach a much higher temperature than a light one. Large units also deform more and carry greater weight. An anthracite patio-door sash should therefore not be assessed in the same way as a small white window.
Before ordering, check the limitations of the specific system and manufacturer. If the unit is close to the permitted range, consider changing the subdivisions, introducing a fixed section, using different glazing or selecting a more rigid material.
Your project check
What needs particularly careful checking?
Select the project characteristics. The result will not recommend a profile brand—it will prepare a list of the most important questions for the supplier.
Required level of attentionStandard
Your question list
9. How can you compare two profiles without falling for marketing?
- Establish the full frame and sash system name, not just the brand.
- Compare configurations with the same dimensions, subdivisions, colour and opening method.
- Check the frame Uf, glazing range and Uw of the complete unit.
- Ask for details of the reinforcement and confirmation that the largest units are permitted.
- Compare the seal arrangement, hardware, glazing unit and equipment.
- Assess the finished-window manufacturer and installation scope separately.
If the quotation does not contain this information, it does not automatically mean the product is poor. It does mean you need clarification before deciding.
The most common misconceptions
‘The more chambers, the better the window’
Not without context. The complete profile geometry, its depth, Uf, glazing and workmanship of the finished window all matter.
‘The most insulating glass means the most insulating window’
Ug describes the glazing. For the finished window, check Uw, which also accounts for the frame and glazing edge.
‘The same profile brand means the same window’
No. The manufacturer selects the configuration, reinforcement, glazing and hardware, and is then responsible for manufacturing quality.
‘A good profile will compensate for poor installation’
No. The connection between the window and building forms part of the final performance and must be properly designed and executed.
Have you chosen a profile but are unsure whether the configuration is correct?
Send the window schedule or quotation. I will check whether the system, glazing, reinforcement, functions and installation suit the dimensions and intended use in your home.
You do not need to know the technical terms. Floor plans, a window and door schedule or the quotation you received are enough—I will identify what you should ask about.
04
Performance and energy efficiency
4 min read
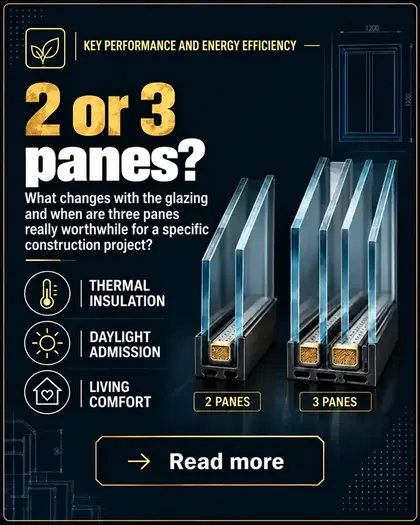
Double or triple glazing?
What does the glazing unit change, and when does triple glazing genuinely make sense for a particular project?
Read more →
Performance and energy efficiency · glazing units
Double or triple glazing?
A third pane can significantly reduce heat loss, but does not guarantee the best window by itself. The complete glazing build-up, its weight, daylight, solar gains, frame and installation all matter.
Answer in 30 seconds
For a home heated throughout the year, it is usually worth beginning the assessment with triple glazing. Double glazing may make sense in a seasonal or unheated building, or where low cost is more important and thermal requirements are modest. Base the final decision on the complete window—not the number of panes alone.
Interactive comparison
See what an additional pane changes
Switch between the options. The diagram illustrates the construction principle, not the technical scale of a specific product.
insulating cavity
cavitycavity
Two panes and one insulating cavity
Thermal insulationUsually lowerthan in a comparable triple-glazed unit
WeightLowerbeneficial for sashes and transport
CostUsually lowerbut compare the complete window and equipment
A sensible direction for some seasonal buildings, unheated rooms or projects where greater heat loss is knowingly accepted.
Three panes and two insulating cavities
Thermal insulationUsually betterwith a correctly configured glazing unit
WeightHigherimportant for large opening sashes
CostUsually higheroften justified in a heated home
The most common starting point for a new home heated throughout the year. Daylight, solar gains, weight and complete-window performance must still be checked.
1. What do double and triple glazing mean?
A double-glazed unit consists of two panes separated by one sealed cavity. A triple-glazed unit has three panes and two cavities. The spaces between the panes are usually filled with an inert gas, and low-emissivity coatings are applied to selected glass surfaces to limit heat loss.
Counting the panes is not enough. Their thicknesses, cavity widths, gas, coatings, spacers and additional glass functions all matter. Two triple-glazed units can have different performance and applications.
2. The greatest difference: reducing heat loss
With comparable technology, an additional pane and second cavity usually provide a lower glazing Ug value and therefore better thermal insulation. In a heated building, this can improve comfort near the window and reduce energy loss.
Remember that Ug describes the central area of the glazing. The complete-window Uw also matters and is affected by the frame, glazed area, glazing edge and unit dimensions. Excellent glass in an unsuitable frame or incorrectly installed window cannot deliver its full benefit.
3. Internal-pane temperature and comfort
Better glazing insulation can keep the internal pane warmer when outdoor temperatures are low. This reduces the sensation of cold near large glazed areas and lowers the risk of condensation on the internal surface, although humidity, ventilation and room temperature remain critical.
Comfort—not merely the heating bill—is one of the strongest arguments for triple glazing in a living room, bedroom or large patio doors.
4. More panes mean greater weight
Every additional pane increases the glazing-unit weight. This affects the hardware, sash stability, permissible dimensions, transport, carrying in and installation. For a small window, the difference is easily managed; in a large unit, it can mean tens of additional kilograms.
A tall or wide sash must be assessed as a complete unit: profile, reinforcement, hardware and glass. Sometimes a fixed section, revised subdivision or a system designed for higher loads will be the best solution.
5. Daylight and solar energy
An additional pane and coatings can reduce the amount of daylight and solar energy passing through the glazing unit. The difference depends on the specific configuration and should not be judged from pane count alone.
Ask for two values: light transmission Lt and total solar energy transmittance g. Priorities may differ on a north-facing elevation from a large south- or west-facing glazed area, where overheating protection also becomes important.
6. Triple glazing does not guarantee quiet
More panes do not automatically provide better noise protection. Glass thicknesses, asymmetry between panes, cavity widths, an acoustic laminate, window airtightness and correct installation all matter for acoustic performance.
If the house is beside a busy road, do not simply order ‘triple glazing’. Describe the noise source and ask for a specific glazing build-up and the acoustic rating of the complete window.
7. Safety also requires specific glass
A standard triple-glazed unit does not automatically become safety, security or impact-resistant glass. Where human impact is possible, in low-level glazing, doors or large panes, toughened or laminated glass should be considered according to the design and risk.
This glass affects price, weight and production time, so it should be stated in the quotation for the specific items.
8. Warm-edge spacer and glazing edge
The spacer separates the panes around the perimeter of the glazing unit. A low-conductivity solution, commonly called a warm-edge spacer, improves temperatures at the glazing edge and affects the complete-window Uw value.
Check its type and colour. A dark spacer may complement anthracite profiles, but the technical choice should reflect the window configuration rather than appearance alone.
Interactive adviser
Which glazing unit should the discussion begin with?
Answer four questions. You will receive a direction for the assessment and a list of points to confirm—not an automatic product selection.
Recommended starting pointBegin with triple glazing
What needs to be confirmed?
9. When can double glazing be a sensible choice?
Double glazing is not inherently a poor solution. It may be economically justified in a garage, outbuilding, seasonally used property, unheated space or where lower performance requirements have been consciously accepted.
Do not choose it solely because the price of one window is lower. For a year-round home, compare the extra cost of triple glazing with the difference in comfort, the complete-window Uw and the planned life of the building.
10. When does triple glazing make the most sense?
Most often in a new or upgraded home heated throughout the year, particularly when reducing heat loss and improving comfort near large glazed areas matter. The glazing unit must, however, suit the profile, hardware, dimensions and installation method.
For heavily sun-exposed elevations, an overheating and external-shading assessment may also be needed. The lowest Ug does not solve every problem—g, Lt, safety glass or acoustic glass may be equally important.
Common selection mistakes
Comparing pane count alone
Ask for the full glazing build-up, Ug, spacer and Uw of the specific window.
Assuming triple glazing will always make the home quieter
Noise control requires a suitable acoustic build-up, an airtight window and correct installation.
Overlooking the weight of a large sash
Check the permissible dimensions, hardware, profile, reinforcement and installation logistics.
Choosing the lowest Ug without assessing solar exposure
Light transmission Lt, solar energy transmittance g, elevation orientation and solar shading also matter.
Not sure which glazing unit to choose for your home?
Send the plans or window schedule. I will compare double- and triple-glazed options, considering Uw, daylight, overheating, acoustic performance, unit weight and installation.
You do not need to interpret every performance value yourself. I will explain where the extra cost provides genuine value and where it is unnecessary.
05
Performance and energy efficiency
3 min read
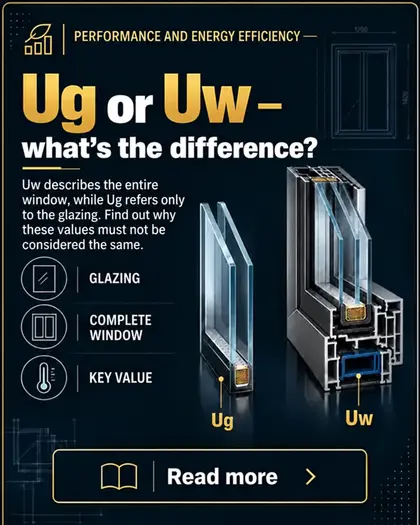
Ug vs Uw—what is the difference?
Uw describes the complete window, while Ug applies only to the glazing unit. See why these values should not be used interchangeably.
Read more →
Performance and energy efficiency · reading quotations
Ug vs Uw—what is the difference?
Ug describes the glazing, while Uw describes the complete window. Confusing these two values is one of the most common reasons why apparently similar quotations are difficult to compare fairly.
Answer in 30 seconds
Ug describes heat transfer through the central area of the glazing unit. Uf applies to the frame. Uw describes the complete window: the glazing, frame and effect of the glazing edge. When buying a window, compare primarily the Uw for the specific unit and dimensions—not merely an advertised Ug.
Interactive performance map
1/4Select a symbol to see what it actually describes
Each value applies to a different area. Together, they produce the result for the complete window.
Glazing value
Describes heat transfer through the central area of the glazing unit. It does not include the frame, complete-window dimensions or connection between the window and wall.
UnitW/(m²·K)The lower the value, the better the glazing's thermal insulation.
Frame value
Describes heat transfer through the frame and sash profiles. It depends on the material, system geometry, reinforcement and the calculation or test method used.
UnitW/(m²·K)Uf is not the same as the Uw of the complete window.
Effect of the glazing edge
The linear coefficient describes additional heat flow along the junction between the glazing and frame. This is where the spacer type matters, among other factors.
UnitW/(m·K)In the calculation, it is multiplied by the length of the glazing perimeter.
Complete-window value
Combines the effects of the glazed area, frame area and glazing edge. It therefore changes with the dimensions, subdivisions, profile and glazing unit.
UnitW/(m²·K)This is the key value for comparing finished windows of the same configuration and size.
1. What does the letter U actually mean?
The thermal transmittance U indicates how much heat passes through a particular building item at a temperature difference. It is expressed in W/(m²·K). In practice, remember one simple rule: the lower the U-value, the better the thermal insulation of the item described.
The final phrase—‘the item described’—is crucial. The same letter U with a different subscript may refer to the glazing, frame, complete window, door or wall. Without the subscript and description, the number can be meaningless.
2. Ug—the glazing-unit value
The subscript ‘g’ comes from the English word glass. Ug describes the thermal insulation of the central area of the glazing unit. It is affected by the number of panes, low-emissivity coatings, cavity widths, gas type and glazing build-up, among other factors.
Ug does not describe the profile, hardware, seals, perimeter spacer or installation. If an advertisement shows a very low value with small print stating ‘for the glass’, do not treat it as the complete-window result.
3. Uf—the frame value
The subscript ‘f’ means frame, referring to the frame. Uf describes the thermal insulation of the frame and sash profiles. The result is affected by the material, depth, geometry, chambers, thermal breaks and reinforcement used.
A profile with a good Uf can improve the window’s Uw, but its significance depends on the proportion of frame in the total area. A small, heavily subdivided window has proportionally more frame than a large fixed glazed unit.
4. Ψg—the invisible effect of the glass edge
At the junction between the glazing unit and profile, heat flow differs from that at the centre of the pane. It is described by the linear coefficient Ψg, read as ‘psi g’. Because it is linear, its effect depends on the length of the glazing perimeter.
The spacer separating the panes matters here. A so-called warm-edge spacer reduces conduction at the edge and can improve Uw and the internal surface temperature at the glass edge. It does not, however, change the Ug of the central area of the glazing unit.
5. Uw—the complete-window result
The subscript ‘w’ means window. Uw includes the glazed area with its Ug, the frame area with its Uf and the linear effect of the glazing edge. The result is divided by the window’s total area.
Uw = (Ag × Ug + Af × Uf + lg × Ψg) ÷ Aw
Ag is the glazed area, Af the frame area, lg the glazing perimeter and Aw the complete window area. Real units also include system details and subdivisions, so the authoritative result should come from the manufacturer’s documentation.
Educational calculator
See why Ug is not equal to Uw
The model applies to a simple rectangular window without mullions. It illustrates the calculation method—it does not replace the manufacturer’s result.
Indicative complete-window result— W/(m²·K)
Enter valid data to see the result.
- Window area
- —
- Glazed-area proportion
- —
- Difference between Uw and Ug
- —
The result is a simplified educational simulation. It does not include mullions, glazing bars, exact profile geometry or the rules for declaring the performance of a specific product.
6. Why does Uw change with size?
The frame and glass edge perform differently from the centre of the glazing unit. When the proportions of these areas change, the average result changes too. A large fixed window generally has a higher proportion of glass, while a small window with several sashes and mullions has more profile area and a longer glazing perimeter.
The value quoted for a reference window therefore need not match every unit in your schedule. Ask for the Uw values of the most important units or a schedule of results for individual items.
7. Does a lower Uw always mean the best choice?
A lower Uw means better window thermal insulation, but it does not describe every aspect of performance. It does not directly indicate light transmission, solar gains, noise protection, safety, watertightness, wind resistance or ease of opening.
In practice, window performance should suit the building. For a large west-facing glazed area, overheating protection may be just as important as insulation. Beside a busy road, suitable acoustic glazing and airtightness matter.
8. Uw does not assess installation
Uw is a product property of the window. It does not describe the quality of the connection between the frame and wall. Installation has its own requirements: fixing, support, airtightness, protection from water, thermal insulation of the joint and limiting the thermal bridge at the building junction.
It is therefore possible to buy a window with an excellent Uw and lose part of the benefit through incorrect installation. The product and installation quotations should be assessed together, but their performance values must not be confused.
9. How should two quotations be compared correctly?
- Check that both values are identified as Uw, rather than one being Ug.
- Compare the same dimensions, subdivisions and opening methods.
- Confirm the glazing build-up, Ug and spacer type.
- Check the complete frame system, colour and profile configuration.
- Ask whether Uw is given for the specific window or only a reference unit.
- Compare the equipment, installation and other performance characteristics separately.
Common pitfalls
The large headline figure is Ug, although the customer assumes it is Uw
Always check the small subscript beside U and the description in the documentation.
One Uw value assigned to every window
The result depends on the dimensions, subdivisions and proportions of frame and glass. Ask for confirmation for the key items.
Comparing Uw values for different units
Fixed, tilt-and-turn and multi-sash windows can have different results even within the same profile family.
Treating Uw as a complete quality assessment
It is a thermal performance value. It does not replace an assessment of structural performance, acoustics, functionality, workmanship and installation.
Do you have a quotation and are unsure whether it shows Ug or Uw?
Send the schedule. I will check what the values describe, whether they can be compared fairly and which information still needs to be obtained from the supplier.
You do not need to know the formulae or symbols. You will receive a clear explanation of what each figure means for your windows.

06
Performance and energy efficiency
3 min read
Warm-edge spacer—a small component that matters
How does a warm-edge spacer differ from an aluminium spacer, and how does it affect the edge of the glass?
Read more →
Performance and energy efficiency · glass edge
Warm-edge spacer—a small component that matters
The spacer runs only around the perimeter of the glass, yet this is where the insulating glass unit is most vulnerable to heat loss. Its material affects the edge temperature, the Uw value of the complete window and the risk of condensation.
Answer in 30 seconds
A warm-edge spacer reduces heat transfer around the perimeter of the insulating glass unit more effectively than a traditional aluminium spacer. It can raise the temperature at the inner edge of the glass, improve the window’s Uw value and reduce the risk of condensation. It cannot, however, eliminate condensation caused by high humidity, poor ventilation or a low indoor temperature.
Interactive comparison
What happens at the edge of the glass?
Switch between the options to see how the spacer material affects the assessment. This is a qualitative visualisation and does not show temperatures for a specific window.
greater heat transfer at the edge
reduced heat transfer at the edge
Aluminium conducts heat well
A more pronounced thermal bridge forms around the perimeter of the insulating glass unit. The inner glass surface beside the spacer may be cooler than the centre of the pane.
Glass edgecooler
Effect of Ψgusually greater
Condensation riskusually higher
The material reduces heat conduction around the perimeter
Solutions made from materials with lower thermal conductivity improve conditions at the edge of the insulating glass unit. The precise effect depends on the spacer, glazing, profile and the complete window.
Glass edgeusually warmer
Effect of Ψgusually lower
Condensation riskmay be lower
1. What is a spacer?
A spacer runs around the perimeter of the insulating glass unit and maintains a constant distance between the panes. It helps form the sealed cavities containing air or an inert gas. Together with the sealing system, it also contributes to the durability of the edge seal.
Depending on its design, the spacer either contains or works with a desiccant that absorbs residual moisture inside the unit. The spacer is therefore not a decorative strip but a functional component of the insulating glass unit.
2. Why is the glass edge a critical area?
At the centre of the unit, the cavities and coatings work across their full width. At the perimeter, the spacer, seals and connection to the profile also come into play. Heat transfer is more complex here, so the temperature of the inner surface near the edge may be lower.
This local effect is described by the linear thermal transmittance Ψg. In the Uw calculation, it is multiplied by the length of the glass perimeter. The more divisions and small glazed areas there are, the greater the total edge length in relation to the area.
3. What does ‘warm-edge spacer’ mean?
This common term describes spacers that reduce heat conduction at the edge more effectively than traditional aluminium. They may be made of polymers, stainless steel or a combination of several materials. Not all products have the same properties.
The statement ‘warm-edge spacer as standard’ therefore does not describe the full configuration. A good quotation should specify the manufacturer or type, colour and its use in the particular glazing unit.
4. How does a warm-edge spacer affect Uw?
The spacer affects the linear component of the calculation at the glass edge. A solution with a lower Ψg can reduce the Uw value of the complete window. The scale of the improvement depends on the dimensions, number of glazed areas, profile and specific combination of materials.
A warm-edge spacer does not change the Ug value measured at the centre of the glazing. Two glazing units may therefore have the same Ug value while the complete windows achieve different Uw values because of the frame and glass edge.
5. A higher edge temperature means greater comfort
Reducing the thermal bridge can raise the temperature of the inner glass surface beside the spacer. The difference is local but important, as moisture often appears first in cool corners.
A warmer edge reduces the risk of reaching the dew point and may lessen the sensation of cold near the window. Complete freedom from condensation cannot be guaranteed, however: outdoor and indoor temperatures, humidity, ventilation, curtains and air circulation also matter.
Dew point calculator
Could condensation form on the measured glass edge?
Set the indoor conditions and enter the approximate surface temperature at the lower edge of the glass. The calculator will compare it with the dew point.
Calculated dew point—°C
—
Set the parameters to see the assessment.
- Surface temperature
- —
- Margin above dew point
- —
This is an educational tool. Infrared thermometer readings depend, among other things, on the device settings and the surface. Condensation should be assessed together with ventilation, humidity and outdoor conditions.
6. Dew point — when does condensation form?
Air can hold a certain amount of water vapour. When humid air meets a surface colder than its dew point, condensation begins to form. The higher the indoor humidity, the higher the surface temperature at which condensation can already occur.
The same pane may therefore remain dry at 40% humidity but mist up at 70%. A warm-edge spacer increases the safety margin at the edge, but it cannot replace effective ventilation and heating.
7. Condensation inside, outside and between the panes — three different situations
On the room side
This usually indicates a combination of a cool surface, high humidity and insufficient air exchange. The operating conditions and edge temperature should be checked.
On the outer pane
This may occur periodically with well-insulated glazing when the outer pane is cool and humid outdoor air reaches its dew point. It does not mean that the glazing unit has lost its seal.
Inside the unit, between the panes
This may indicate that the insulating glass unit has lost its seal. Ventilating the room will not resolve it; the unit requires professional inspection.
8. Spacer colour also affects appearance
The spacer is visible through the glass around the entire perimeter. Black or dark grey works well with anthracite profiles and dark gaskets. Light grey may look more natural with white windows. The difference is more noticeable in large glazed areas.
Colour must not take precedence over technical performance. Two spacers that look alike may have different constructions and Ψg values. It is best to check the product type, its properties and a visual sample together.
9. What will a warm-edge spacer not solve?
- excessive humidity and ineffective ventilation,
- an unsuitable insulating glass unit,
- installation errors and a cold connection to the wall,
- lack of heating or restricted air circulation near the window,
- a failed edge seal causing condensation between the panes.
It is a valuable part of a complete solution, but not a miracle addition that solves every moisture problem.
10. What should you check in a quotation?
- Is the spacer warm-edge or aluminium?
- What exact spacer type or manufacturer has been specified?
- What colour will it be in each window?
- Is the spacer included in the Uw calculation for the complete window?
- Does every specialist glazing unit—safety, acoustic or solar-control—use the same spacer?
- Is the specification included in the written quotation rather than merely promised verbally?
The most common misconceptions
‘A warm-edge spacer means the glass will never mist up’
It reduces the risk at the edge, but humidity, temperature and ventilation also determine whether condensation forms.
‘Every black spacer is warm-edge’
Colour does not determine thermal conductivity. Check the product type and technical data.
‘A warm-edge spacer improves the glazing Ug value’
It primarily affects the glass edge and the Uw value of the complete window, not the Ug value at the centre of the glazing unit.
‘It is only useful in passive houses’
The benefit of a warmer glass edge can also matter in an ordinary year-round home, particularly where there are many windows or large glazed areas.
Would you like to check which spacer is specified in your quotation?
Send me the schedule or a photo of the glazing-unit description. I will check the spacer type, colour and effect on the specification, and explain whether you are comparing like-for-like solutions.
If condensation appears on the glass, also describe where and under what conditions. I will help distinguish natural condensation from a situation that requires inspection.
07
Performance and energy efficiency
4 min read
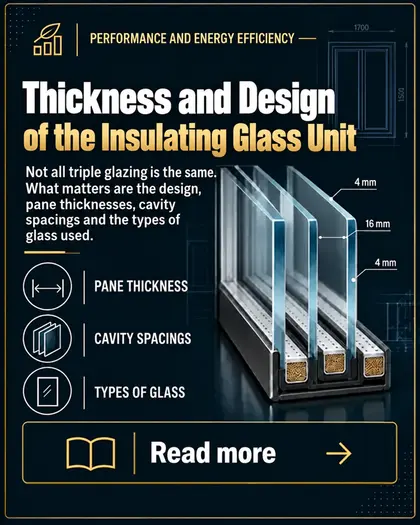
Thickness and construction of an insulating glass unit
Not all triple glazing is the same. Its construction, pane thicknesses, cavities and glass types all matter.
Read more →
Performance and energy efficiency · insulating glass units
Thickness and construction of an insulating glass unit
Two quotations may both specify ‘triple glazing’ yet describe entirely different units. Pane thicknesses, cavity widths, gas fill, coatings and safety, acoustic or toughened glass all matter—and only together do they form the complete insulating glass unit.
Answer in 30 seconds
The total thickness is the sum of all glass panes and the cavities between them. The number of millimetres alone does not tell you whether the glazing will provide good thermal insulation, noise reduction and safety. First read the full unit make-up, then check its performance for the specific size and application.
Interactive decoder
Break down the glazing specification layer by layer
Choose an example, then select any layer to see its function and the approximate overall thickness of the unit.
4 mm glass
The outer pane of the unit. Its type and thickness are selected according to the size, loads, safety requirements and required acoustic performance.
- Glazing make-up
- 4/16Ar/4
- Number of panes
- 2
- Nominal thickness
- 24 mm
The examples explain how to read the specification. They are not a universal recommendation for every window; the final make-up should reflect the dimensions, system, loads and required functions.
1. What exactly is an insulating glass unit?
An insulating glass unit consists of two or more panes joined around the perimeter by a spacer and sealing system. The spaces between the panes form sealed cavities filled with air or an inert gas, most commonly argon.
A modern insulating glass unit can simultaneously reduce heat loss, improve noise protection, increase safety and limit overheating. Each function, however, requires a particular construction and does not result solely from the number of panes.
2. How do you read 4/18Ar/4/18Ar/4?
The numbers indicate successive pane and cavity thicknesses, read from outside to inside. This example has 4 mm glass, an 18 mm argon-filled cavity, a central 4 mm pane, another 18 mm argon-filled cavity and an inner 4 mm pane, giving a nominal overall thickness of 48 mm.
Letters and additional symbols may describe the gas fill, toughened or laminated glass, a coating or a specific product name. Manufacturers do not always use identical notation, so compare the shorthand in the quotation with the glazing data sheet.
3. Double or triple glazing?
A double-glazed unit has one cavity, while a triple-glazed unit has two. The additional pane and cavity usually improve thermal insulation but increase weight and overall glazing thickness. The profile, hardware and fixing method must be suitable for this.
Do not assess a solution by the number of panes alone. Check the unit’s Ug value, the complete window’s Uw value, the solar energy transmittance g, light transmittance and any specialist functions.
4. Does a wider cavity always insulate better?
No. Increasing the cavity width helps only up to a certain range determined by the gas and construction. If the space is too wide, movement of the gas can increase heat transfer, so making it wider delivers no further expected improvement.
An 18 mm cavity is therefore not automatically better than a 16 mm one. Performance depends on the complete configuration tested or calculated by the manufacturer, not on one isolated figure.
Construction calculator
See how the overall glazing thickness is built up
Adjust the values in the example triple-glazed unit. The tool adds the panes and cavities but does not calculate Ug or permitted dimensions.
Your example make-up4/18Ar/4/18Ar/4
48mm
This is the standard notation for a triple-glazed unit. Compatibility with the profile and the required performance must be confirmed in the specific quotation.
Visual scale: 36–68 mm
5. What do low-emissivity coatings do?
A thin, virtually invisible coating reduces heat radiating from the room through the glass. Its position on the correct surface within the unit is part of the designed configuration and should not be altered arbitrarily.
Coatings affect not only thermal insulation but also light transmission, reflection and the amount of solar energy entering the interior. With large glazed areas, these values should be considered together, particularly on highly exposed elevations.
6. Argon, krypton and air in the cavities
An inert gas reduces heat transfer through the cavity more effectively than ordinary air. Argon is most common in residential windows because it offers a sensible balance of performance and cost. Krypton may be used in more specialised, often narrower configurations.
The presence of the symbol ‘Ar’ alone is not enough to assess quality. Fill level, unit integrity, spacer type, coatings and edge-seal workmanship also matter.
7. Float, ESG and VSG — three different terms
Float glass
The basic glass pane. Its use is selected according to the location, dimensions and loads.
Toughened glass (ESG)
It is heat-treated to increase its mechanical and thermal resistance. When broken, it fragments into small pieces. It cannot subsequently be cut or drilled freely.
Laminated glass (VSG)
It consists of at least two panes bonded by an interlayer. When broken, the fragments remain attached to that layer. The notation 44.2 usually describes two 4 mm panes and two film layers, so the actual thickness is slightly more than 8 mm.
8. A thicker pane does not automatically mean less noise
Acoustic insulation depends on the complete construction. Asymmetric pane thicknesses, laminated glass with an appropriate interlayer, cavity widths and the airtightness of the complete window can all help. Two units with the same overall thickness may therefore have entirely different acoustic performance.
For road or aircraft noise, ask for the Rw rating and the C and Ctr spectrum adaptation terms for the complete declared configuration. The phrase ‘acoustic glass’ without a result does not allow a fair comparison of quotations.
9. Unit weight and system capabilities
Every additional millimetre of glass increases the sash weight. As a guide, one square metre of 1 mm thick glass weighs about 2.5 kg. Large safety or acoustic units may weigh considerably more than standard glazing.
Check not only the maximum glazing thickness accepted by the profile, but also the permitted sash weight, hardware selection, support, transport and installation. This is particularly important for patio doors and large glazed elements.
10. How should two insulating glass units be compared?
- Request the full make-up of every pane and cavity.
- Check the number of panes, gas fill and overall thickness.
- Establish which panes are toughened, laminated, acoustic or solar-control glass.
- Compare Ug, the g-value and light transmittance.
- If noise reduction matters, check Rw together with C and Ctr.
- Confirm the warm-edge spacer, its type and colour.
- Check that the result applies to the exact configuration you will receive.
The most common misconceptions
‘The thicker the glazing unit, the warmer the window’
Not always. Thermal performance depends on the arrangement of panes, cavities, gas, coatings and spacer, while the complete window is also affected by the profile and geometry.
‘Triple glazing always reduces noise better than double glazing’
The number of panes alone is not enough. The acoustic construction and tested result for the complete glazing unit or window are crucial.
‘All 44.2 glass is burglar-resistant’
The laminated-glass notation alone does not determine the resistance class of the complete glazing. The class must be confirmed for the specific product.
‘If the unit fits the profile, it can be used’
In addition to thickness, check weight, structural requirements, hardware, support and the system manufacturer’s dimensional limits.
Do you have a glazing specification you cannot decipher?
Send me a photo or extract from the quotation. I will break down the notation, check the glass functions and identify which performance values to ask about before ordering.
Ideally, also include the window dimensions, its location and whether your priority is thermal performance, safety, noise reduction or solar protection.

08
Windows
5 min read
PVC, aluminium or timber?
There is no single material that is best for everyone. Compare the character, capabilities and applications of three technologies.
Read more →
Windows · choosing the material
PVC, aluminium or timber?
There is no single material that is best for every home. PVC, aluminium and timber have different strengths, limitations and costs. A good choice begins with the unit dimensions, architecture and your priorities—and only then with the system name.
Answer in 30 seconds
PVC is usually the most rational direction for standard windows and a controlled budget. Aluminium provides considerable freedom with slim profiles, very large glazing and modern architecture. Timber is chosen for its natural material, interior character and the ability to renovate the surface. The final decision must be confirmed for the specific dimensions, performance and intended use.
Interactive adviser
What matters most in your project?
Select up to three priorities. The tool will indicate a useful starting point for the discussion—it does not replace calculations or the design of the specific window.
Best-matched direction
Select your priorities
Select one, two or three answers. You will see the reasoning and a comparison of all materials.
You can select up to three priorities.PVC—
Aluminium—
Timber—
1. Design first, material second
The frame material is important, but it does not work in isolation from the rest of the window. The result is influenced by the specific profile system, steel or composite reinforcement, thermal breaks, insulating glass unit, hardware, seals, dimensions and configuration of the unit.
We therefore do not compare the word ‘PVC’ with the word ‘aluminium’. We compare complete, correctly specified windows with the same dimensions, functions and installation conditions.
Material comparison
See the strengths and limitations
Switch between materials. The characteristics are general—a specific system may extend the limits.
multi-chamber profile with suitable reinforcement
PVC
Most often selected where good performance, easy care and a sensible cost matter. The dimensional range depends on the system, reinforcement, colour and unit configuration.
2. PVC windows—strengths and limitations
PVC works well for most standard tilt-and-turn windows and balcony doors. Multi-chamber profiles can achieve good thermal performance, the surface is easy to clean, and a wide range of colours and foil finishes is available.
As dimensions increase, reinforcement, structural performance, glass weight and profile colour become more important. Dark surfaces heat up more strongly in the sun, so the manufacturer may apply different dimensional limits, additional reinforcement or specific installation rules.
3. Aluminium—when scale and slimness matter
The stiffness of aluminium allows large glazing and slim units to be designed, especially in modern homes, façades and sliding systems. Profiles can be powder-coated or finished using other technologies, providing great freedom of colour.
Aluminium conducts heat well, so external windows use profiles with thermal breaks and extensive insulating zones. The description ‘aluminium window’ is not enough—the specific system, frame Uf and complete window Uw must be checked.
4. Timber—natural character and renovation potential
A timber frame has a natural texture and warm character that cannot be fully replicated by a print. Properly manufactured laminated profiles are stable, and the surface can be renovated after many years.
Timber does, however, require informed care. Coatings must be checked regularly, particularly where exposed to strong sunlight and driving rain. The maintenance interval depends on the timber species, colour, exposure and manufacturer’s recommendations.
5. Thermal performance—do not judge by the material name
Each of the three materials can form an energy-efficient window when the system and specification are correctly selected. In PVC, profile geometry, reinforcement and sealing matter. In aluminium, thermal breaks and insulating inserts matter. In timber, profile depth, species and laminated construction matter.
Use the Uw of the complete window at its actual dimensions for comparison, not merely the frame Uf or glass Ug. Two products with the same glazing unit can achieve different Uw values because of the frame, spacer and proportion of glass.
6. Large glazing and patio doors
For large units, the material is only one part of the decision. Profile structural performance, glazing-unit weight, permitted sash dimensions, hardware type, deflection and the threshold support method must be checked.
Aluminium often offers the greatest dimensional possibilities, but PVC and timber can also form large sliding doors within the limits of a specific system. There is no need to force one material throughout the house: PVC may make sense for standard windows and aluminium for a statement patio glazing unit.
7. Durability, care and everyday use
PVC and coated aluminium do not require periodic painting, but they need regular cleaning and inspection of seals, drainage and hardware. Timber additionally requires inspection, care and renovation of the coating in accordance with the manufacturer’s instructions.
Regardless of material, poorly adjusted hardware, blocked drainage or aggressive cleaning agents can shorten trouble-free use. In practice, a ‘maintenance-free window’ does not exist.
How should you interpret the differences?
| Criterion | PVC | Aluminium | Timber |
|---|---|---|---|
| Typical direction | standard windows and a sensible budget | large glazing and slim architecture | natural character and classic interiors |
| Surface care | low | low | regular checks and periodic refinishing |
| Dimensional capabilities | dependent on the system and reinforcement | usually very large | good, dependent on profile construction |
| Appearance | colours and foil finishes | slim profiles, wide range of finishes | natural grain and various coatings |
| Initial cost | usually the lowest | usually the highest | usually higher than PVC |
This comparison shows typical directions, not a quality ranking. Price and capabilities depend on the manufacturer, system, dimensions, equipment and installation.
8. Colour and appearance over time
A colour sample should be viewed in daylight and compared with the façade, roof and interior. The same anthracite can look different on PVC foil, aluminium powder coating and a stain or paint on timber.
With dark colours, solar exposure is important. Ask about the finishing technology, warranty terms, cleaning instructions and possible differences between components made from different materials.
9. Purchase price is not the full cost of the decision
The window price must be supplemented by items needed for correct installation, transport of heavy units, specialist glass, extension profiles, finishing works and servicing. For timber, allow for future coating maintenance; for very large units, allow for logistics and installation equipment.
A comparison is meaningful only with the same scope. A cheaper item may not include the same glazing, hardware, colour, installation or preparation for window sills and roller shutters.
10. Can materials be combined in one house?
Yes. The material can be matched to the function of the unit. PVC may serve most standard windows, aluminium the largest glazing, and timber the areas where a natural frame has particular value for the interior.
However, the colour, profile widths, threshold levels and external appearance must be coordinated deliberately. Combining materials should look like a design decision, not an accidental collection.
What should you check in the quotation?
- The exact system name and profile depth.
- Uw of every important window at its actual dimensions.
- Construction of the insulating glass unit and type of warm-edge spacer.
- Reinforcement, thermal breaks and dimensional limits.
- Surface type, colour and care instructions.
- Permitted sash weight and the hardware used.
- Full scope of installation, support and finishing works.
- Warranty terms for the product, coating and installation.
The most common misconceptions
‘Aluminium is always cold’
Modern external systems use thermal breaks. The result depends on the specific profile and complete window, not the metal alone.
‘PVC is unsuitable for large windows’
It can form large units, but their limits depend on the system, reinforcement, colour, glazing and opening configuration.
‘Timber deteriorates quickly’
A well-made and properly maintained timber window can last a long time. Coating inspection, exposure and regular maintenance are crucial.
‘The most expensive material always makes the best window’
A more expensive material may offer different capabilities, but quality also depends on the design, manufacture, glazing, hardware and installation.
Are you unsure which material suits your project?
Send the window schedule or plans with dimensions. I will indicate where PVC is entirely sufficient, where aluminium is worth considering and where timber may provide the greatest aesthetic value.
We will prepare the comparison using the same dimensions, insulating glass units and installation scope—then the differences will be fair and clear.
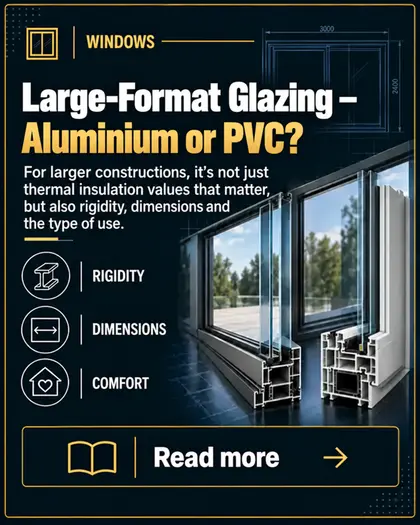
09
Windows
4 min read
Large glazing—aluminium or PVC?
For larger units, thermal performance is not the only consideration—stiffness, dimensions and the way the unit is used also matter.
Read more →
Windows · large-format units
Large glazing—aluminium or PVC?
For a very large window, the question is not simply ‘which material?’. The dimensions, opening method, glass weight, wind load, support and capabilities of the specific system must be established first. Only then can PVC and aluminium be compared fairly.
Answer in 30 seconds
Aluminium usually offers greater design freedom, slimmer profiles and a better starting point for very large units. PVC can be an excellent and more economical solution for many large windows and sliding doors, but it reaches the limits of a specific system sooner. The decision must be based on calculations and documentation, not only on the opening dimension given by the client.
Interactive size analyser
See the scale of your glazing
Set the width, height, number of panes and operating method. The calculator will show the area and indicative weight of the glass alone.
Scale of the unit— m²
Indicative glass weight—
—
Set the parameters to see the assessment.
- Configuration
- —
- What must be confirmed
- —
The weight calculation assumes 4 mm panes and a glass density of approximately 2.5 kg/m² for each millimetre of thickness. It excludes spacers, profiles and thicker, laminated or specialist glass. It is not a structural check.
1. ‘Large window’ is not one category
The same width can represent a completely different technical task. Fixed glazing transfers loads differently from a heavy sliding sash, while hinged doors require different hardware and proportions. Configurations, storey height, building location and wind exposure also matter.
The manufacturer therefore sets permitted dimensions not for ‘aluminium’ or ‘PVC’ in general, but for the specific system, configuration, profiles, glass and hardware.
Comparison of directions
What does the frame material change?
Switch between options to see typical design consequences. This is not a classification of a specific product.
greater proportion of profiles and reinforcement
PVC
It can form large windows and sliding systems when the dimensions, reinforcement and colour comply with the manufacturer’s documentation. As the size increases, profiles and subdivisions may become more visible.
2. Why does aluminium often win at the largest sizes?
Aluminium extrusions provide high stiffness with relatively slim sections. This facilitates the design of tall and wide units, large sliding sashes and solutions with reduced visible framing.
This does not mean there are no limits. Every system has defined maximum dimensions and weights, and the profile must be matched to the loads. For external windows, the thermal breaks, frame Uf and complete-unit Uw must also be checked.
3. When is PVC still a very good solution?
In many homes, PVC comfortably handles standard windows, wide fixed glazing and sliding doors designed within the limits of a specific system. Its advantage is usually a more favourable price combined with good thermal performance and easy care.
The correct reinforcement, configurations, colour, glass weight and sliding technology are crucial. If the design approaches the system limits, mullions should not be removed and sashes should not be enlarged merely to achieve a more dramatic view.
4. Fixed glazing, opening sash or sliding system?
Fixed glazing
There is no movable sash or hardware responsible for guiding it. This often allows a larger glass area and simpler construction, but access for cleaning and possible replacement of the glazing unit must be planned.
Side-hung or tilt-and-turn sash
The glazing-unit weight acts on the hinges. As width and height increase, so do the demands on the profile, hardware and correct glazing of the sash.
Sliding system
It can carry very heavy sashes, but requires the correct rollers, tracks, threshold and support. HST, Slide and PSK are different technologies—they must not be compared only by the width of the opening.
5. Glass weight changes everything
One square metre of 1 mm thick glass weighs approximately 2.5 kg. A standard triple-glazed unit with three 4 mm panes contains about 30 kg of glass per square metre—before profiles, spacers and additional layers are included.
Laminated glass, thicker toughened glass or an acoustic unit can significantly increase the weight. In large doors, this affects hardware selection, ease of sliding, transport, installation and the feasibility of future servicing.
6. Structural performance and wind—the invisible part of the design
A large pane acts as a surface that collects wind pressure and suction. The load depends on factors including the location, building height, terrain, window position and dimensions. The profile and glass must limit deflection to the level specified for the unit.
The same glazing may therefore require one solution in a sheltered single-storey house and another on a tall, exposed façade. An assessment based only on a photograph or opening width is insufficient.
7. Dark colour and profile expansion
Dark profiles can become very hot in the sun. In PVC, this is particularly important for dimensions, movement allowances, reinforcement and fixing. Aluminium also changes length with temperature, so large units require planned clearances and system connections.
This does not mean anthracite is a mistake. It means the colour must be considered in the design and installation—especially on south- and west-facing façades.
8. Threshold and support are as important as the frame
A heavy sliding system needs stable, continuous and level support. The threshold must not hang on arbitrary points or move under the sash weight. Continuity of insulation must be maintained and the unit correctly connected to the waterproofing and terrace floor build-up.
Errors in this area can cause sash drop, sliding problems, leakage and heat loss. The most expensive system cannot compensate for an incorrectly prepared opening.
When is a more detailed assessment required?
| Situation | Why does it matter? | What should be confirmed? |
|---|---|---|
| Very wide moving sash | high weight and hardware load | permitted sash dimensions and weight |
| Tall glazing without subdivisions | deflection of the profile and glass | structural calculations and pane thickness |
| Dark colour in full sun | greater profile heating | movement allowances, reinforcement and fixing |
| Low threshold beside a terrace | risk of support and waterproofing errors | layer detail beneath the threshold |
| No access for heavy glass | difficult transport and glazing | logistics, equipment and delivery route |
9. Transport, installation and future servicing
Very large glazing must not only be manufactured—it must be transported, unloaded, brought into the building and installed safely. A glass manipulator, crane, suction equipment or glazing after the frame has been installed may be required.
The possibility of replacing the glass in future should also be planned. A fence, terrace canopy or completed façade may later restrict access to a unit that is currently being installed on an open building site.
10. One material throughout the house or a mixed solution?
There is no technical requirement to use one material everywhere. A rational arrangement is often PVC for standard windows and aluminium for the largest patio glazing. This uses the strengths of both solutions while controlling the budget.
The colour, profile heights, configurations and external appearance must be refined. A well-designed combination of materials is visually coherent and does not look like a compromise.
What should the quotation contain?
- Exact system name and opening configuration.
- Dimensions of the complete unit and individual sashes.
- Construction, thickness and weight of the insulating glass unit.
- Permitted sash weight and hardware type.
- Reinforcement, structural profiles and method of joining segments.
- Uw of the complete unit, not merely the glass Ug.
- Threshold, support and insulation solution beneath the unit.
- Transport and glazing method, and equipment required for installation.
The most common misconceptions
‘PVC is always unsuitable for large glazing’
No. Many large units can be correctly manufactured in PVC. The specific system, reinforcement, configuration and dimensions must, however, be checked.
‘Aluminium has no limits’
Every system has dimensional, weight and structural limits. Aluminium extends them, but does not remove them.
‘The largest possible pane gives the best result’
The visual effect must be combined with safety, functionality, installation feasibility and future servicing.
‘If the sash slides, the unit has been correctly selected’
Smooth operation at handover does not confirm correct support, structural performance or how the system will behave after years of use.
Are you planning large glazing or patio doors?
Send the plan, schedule or opening dimensions. I will check a possible configuration, operating method, indicative glass weight and the material direction worth pricing.
Include information about the colour, orientation, floor level and access to the installation location—these details genuinely change the decision.

10
Doors and sliding systems
5 min read
PSK, Slide or HST?
Three ways to create patio access. They differ in operation, threshold, design capabilities and price.
Read more →
Patio doors · sliding systems
PSK, Slide or HST?
These three names describe different ways in which the sash moves. They differ in ease of operation, threshold, dimensional capabilities, sealing method and price. A good choice begins with everyday needs and ends with checking the specific system and installation.
Answer in 30 seconds
PSK is usually the most budget-friendly solution and can provide a tilt function, but requires a more complex operating sequence. Slide is a comfortable middle option: the sash moves away from the seals and then slides, although the details depend on the manufacturer. HST is best suited to very large glazing, easy sliding and a low threshold, but usually costs the most and requires exceptionally careful preparation beneath the threshold.
Interactive direction selector
0/3
What matters most for your patio access?
Select up to three priorities. The tool will show which mechanism is worth checking first.
Select up to three priorities—the most important for your home.
Direction to investigate
Select your priorities
You will see the reasoning and the points that must be confirmed in the specific quotation.
PSK—
Slide—
HST—
The result is a direction for further analysis. Final feasibility depends on factors including dimensions, glass weight, opening configuration, profiles, hardware and installation conditions.
1. Mechanism first, trade name second
The terms PSK, Slide and HST are sometimes used very loosely in quotations. Two products described as ‘Slide’ may operate differently, have different thresholds and different dimensional limits. The name alone is therefore insufficient—the manufacturer, system series, sash configuration and locking method must be known.
The key difference is what happens to the sash before it moves: whether it moves away from the frame, is lifted onto rollers or moves in a manner specific to the particular system.
See how it works
Three systems, three different experiences
Switch between mechanisms. The simple animation shows the principle of sash movement, not a technical section of a specific product.
move the sash away and slide
PSK
The sash first moves away from the frame and then slides along the track. Operation requires a defined handle sequence; selected configurations also allow the sash to tilt.
2. PSK – a sensible budget, but more demanding operation
PSK, or a parallel slide-and-tilt system, uses hardware that moves the sash away from the frame and guides it parallel to the fixed section. Its strengths are usually a more attractive price and, with the right configuration, a tilt function.
You do, however, need to accept a pronounced threshold and learn the correct sequence of handle movements. With a large, heavy sash, operation may be less intuitive than with an HST system. Regular hardware adjustment and correct glazing and packing of the sash are especially important.
3. Slide – a comfortable middle ground, but check the specific technology
Modern systems described as Slide are designed to make the sash easier to move and seal without the tilt sequence typical of PSK. They can offer more convenient operation, an attractive appearance and good weather-tightness, making them an interesting alternative between PSK and HST.
However, 'Slide' does not denote a single universal standard. Before purchasing, check how the hardware operates, the available opening configurations, maximum sash weight, threshold height, whether trickle ventilation is possible, and the test results for the complete unit.
4. HST – large formats and effortless sliding
In a lift-and-slide system, turning the handle raises the sash so that it can move on carriages along the track. This allows even a heavy sash to operate smoothly, provided the unit has been correctly specified, installed and adjusted.
HST generally offers the greatest size capabilities and low-threshold options. The price is higher and the installation detail more demanding. Continuous support, precise levelling, thermal insulation and the connection between the threshold and patio waterproofing are particularly important.
How should you interpret the differences?
| Criterion | PSK | Slide | HST |
|---|---|---|---|
| Typical operating principle | move away from the frame and slide, often with a tilt function | sliding action with a system-specific mechanism | sash lifted and moved on carriages |
| Ease of operation | good, but requires the correct operating sequence | usually simpler than a conventional PSK system | very high when correctly adjusted |
| Threshold | usually pronounced | depends on the chosen system | a low threshold may be possible, depending on the system |
| Large and heavy sashes | limited by the capabilities of the specific hardware | greater capabilities in selected systems | the best starting point for very large formats |
| Budget | usually the lowest | usually mid-range | usually the highest |
| Most important check | hardware, adjustment and sash weight | the precise mechanism specification | threshold support and patio detail |
This comparison shows typical tendencies. Performance figures and available functions must always be confirmed for the specific product.
5. A low threshold does not automatically mean a weather-tight detail
A threshold close to floor level makes access more comfortable, but requires the floor build-up, patio, drainage and waterproofing to be coordinated. If water has no safe drainage route, even a good system can be compromised by a poorly designed junction.
Before ordering, establish the finished internal floor level, patio height, type of substructure, insulation beneath the threshold and drainage solution. These decisions belong in the planning stage, not on site during installation.
6. Compare weather performance using test evidence, not product names
Watertightness, resistance to wind load and air permeability are affected by the seals, compression, drainage, unit geometry, corner construction and installation. It would be misleading to claim that every unit of one type is more weather-tight than every unit of another.
Ask for the test classifications of the specific solution and the Uw value of the complete unit at the ordered size. The glazing's Ug value alone does not describe the patio door’s performance.
7. Clear opening width versus overall unit size
Large doors do not always provide an equally wide clear opening. In a layout with one moving sash, the fixed section and profiles occupy part of the opening. In more complex configurations, the sliding arrangement affects the number of tracks, frame widths and price.
When comparing quotations, ask for a drawing showing the clear opening width when fully open. In everyday use, this is more meaningful than the unit’s overall external width.
8. Glass weight and system limits
A large triple-glazed insulating glass unit can weigh hundreds of kilograms. The hardware, carriages, profiles and supports must have adequate load capacity in reserve. The maximum catalogue size is not always the right choice for a particular colour, glazing specification and wind exposure.
If a quotation approaches the maximum permitted sash weight, do not ask only whether it can be made. Also ask how much capacity remains in reserve and what servicing may involve after several years of use.
9. Installation determines how the sash will perform over time
The threshold of a sliding system requires level, stable and continuous support. Individual packers must not leave long unsupported sections, and the material beneath the threshold must carry the load without permanent deformation.
Equally important are frame plumb, diagonals, fixings, sealing at the wall junction and adjustment. A distorted frame or moving threshold quickly undermines the comfort the customer paid for.
10. What should you compare between two quotations?
- The full manufacturer’s name and system range.
- The opening configuration and number of moving and fixed sections.
- Dimensions, sash weight and insulating glass unit specification.
- The actual clear opening width when open.
- The threshold height and construction, not merely the phrase 'low threshold'.
- The Uw value of the complete unit and its performance classifications.
- The support method, sealing and connection to the patio.
- The scope of adjustment, warranty and after-sales servicing.
The most common misconceptions
'HST is always the best option'
HST is an excellent choice for large sashes, low thresholds and high expectations of operating comfort. With a smaller opening and limited budget, its capabilities may not provide a proportionate benefit.
'PSK is simply a cheaper HST'
No. It is a different mechanism, with a different method of operation and usually a different threshold zone. Comparing price alone obscures the most important differences in everyday use.
'Every Slide system works in the same way'
No. The name covers different solutions. Check the specific mechanism, sealing action, functions and test results.
'A low threshold only needs to be level with the patio'
Without correctly designed waterproofing, drainage and support, this can create a risk of moisture damage or operating problems.
Not sure which system is right for your patio?
Send me the opening dimensions, a room plan or two quotations you have received. I will compare the mechanism, clear opening width, threshold, performance and installation scope – without reducing the decision to price alone.
In your message, add who will use the opening, how often it will be opened, and whether your priority is a low threshold, a large pane of glass or the budget.
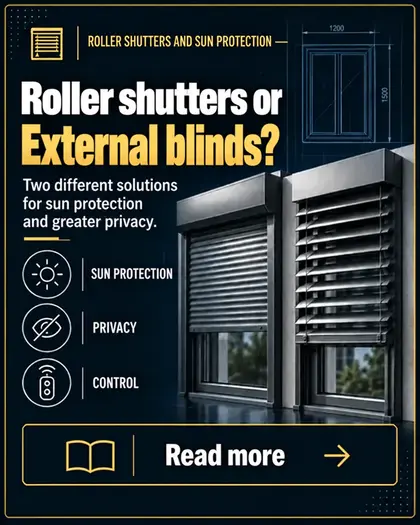
11
Roller shutters and shading
4 min read
Roller shutters or external venetian blinds?
Two different solutions for solar protection and greater privacy. See how they differ in everyday use.
Read more →
Roller shutters and shading · home comfort
Roller shutters or external venetian blinds?
A roller shutter provides the strongest blackout and prevents views in from outside. External venetian blinds let you direct daylight rather than simply block it or let it in. The right choice depends on the room, orientation, architecture and how you want to use the shading each day.
Answer in 30 seconds
External roller shutters are particularly well suited to bedrooms where strong blackout, complete privacy and a fully screened window when closed are important. External venetian blinds work particularly well in living rooms, kitchens and home offices with large glazed areas, where you want to limit direct sun while retaining daylight and the view. Both solutions can be combined thoughtfully within one home.
Interactive adviser
0/3Choose shading for the room
Select the room and up to three of your most important requirements. The result will indicate which direction is worth exploring further.
Select up to three requirements – the ones that genuinely matter most.
Recommended direction
Select your requirements
You will receive a brief explanation and guidance on what to check before ordering.
Roller shutters—
External venetian blinds—
This is functional guidance, not the selection of a specific product. A final decision requires checks of the dimensions, wind zone, installation method, box, drive and electrical installation.
1. The key difference: block or control the light?
A roller shutter curtain consists of interlocking profiles. When lowered, it forms a continuous screen in front of the window. You can stop it higher to admit some light, but you cannot direct the sun’s rays at a chosen angle.
External venetian blinds use horizontal slats that can be raised, lowered and tilted. They can therefore limit direct sunlight while retaining daylight indoors, which is especially valuable across large glazed areas.
Daylight and privacy simulator
See how the interior changes
Switch between shading types and move the control. The visualisation illustrates the operating principle; it is not an exact measurement of light levels.
shutter curtain lowered halfway
Daylightmedium
Privacyhigh
Viewpartial
As the shutter curtain is lowered, it increasingly blocks light and improves privacy. It does not control the direction of the sun’s rays.
2. External roller shutters – where do they make the most sense?
They are most often chosen for bedrooms, children's rooms and spaces where a high level of privacy is needed in the evening. A lowered curtain limits incoming light and screens the interior regardless of the viewing angle.
A roller shutter also creates an additional air space in front of the glazing and protects the window from direct solar radiation. The same thermal effect cannot be promised for every building, however, as it depends on the window, curtain, airtightness, box and method of use.
3. External venetian blinds – daylight without sacrificing the view
The greatest advantage is the adjustable slat angle. You can reduce harsh sunlight and glare while keeping the room bright and maintaining a visual connection with the garden. This makes external venetian blinds well suited to tall windows in living rooms, dining areas and home offices.
After dark, the situation changes: a brightly lit interior is easier to see from outside. Adjusting the slats improves privacy, but it should be checked from both viewing directions. An external venetian blind is not inherently a complete blackout solution either.
What do you actually get?
| Criterion | External roller shutter | External venetian blind |
|---|---|---|
| Daylight control | mainly through the curtain position | through both the height and angle of the slats |
| Blackout | usually considerably stronger | light reduction, depending on the slats |
| View with the shading in use | decreases as the curtain is lowered | possible between correctly angled slats |
| Privacy in the evening | high when closed | depends on the slat angle and viewing direction |
| Wind | limits depend on the system and dimensions | system limits and weather-responsive controls are especially important |
| Façade character | a more compact, restrained appearance | the technical, modern rhythm of the slats |
| Typical choice | bedrooms and rooms requiring blackout | living room, kitchen, home office and large glazed areas |
This assessment describes typical differences. Specific characteristics must always be confirmed in the documentation for the selected system and its dimensions.
4. Protection from overheating
Both externally mounted solutions stop a large proportion of solar radiation before it reaches the glass. They are therefore a more effective starting point for protection against overheating than shading fitted only on the room side.
Correct use delivers the best results. If the shading is lowered only after the glass and interior have become very hot, it is reacting too late. Automation linked to sunlight, temperature and a schedule can respond before the house begins to overheat.
5. Wind – the key consideration for external venetian blinds
The slats and bottom rail operate outside and are subject to limits determined by their width, height, guide type and installation location. Loads may be greater on an exposed façade, at a high storey or near a building corner.
A wind sensor can automatically raise the blinds when a set threshold is exceeded. It does not replace correct system specification. You should also establish what happens if power or communication is lost and whether weather-responsive control covers every façade.
6. C-shaped and Z-shaped slats – more than appearance
C-shaped slats have a light, traditional appearance and a wide tilting range. When closed, Z-shaped profiles usually overlap more closely and limit light transmission more effectively. Available widths, seals and the degree of closure depend on the system.
It is worth viewing a physical sample. The decision is influenced not only by the slats, but also by the guides, bottom rail, box, colour and distance between the shading and the glass.
7. The box must be planned early
In a new-build, a concealed box can be hidden within the façade layers, but it requires sufficient prepared space and a correctly designed connection to the lintel, insulation and window. The stack height when raised determines the required box size, particularly with tall blinds.
For refurbishment projects, front-mounted or retrofit systems are often used. The box remains visible, but installation does not necessarily require window replacement. Each option must be assessed for its effect on the visible glazed area, service access and insulation continuity.
8. Wired control, radio control and automation
A wired drive requires power and control cables to the switch or control unit. Radio control can reduce some control wiring and make operation easier via a handset or compatible smart-home system. The precise range of functions depends on the drive and control unit.
Before plastering, define the shading groups, switch locations, power supply, sensors and integration. Changes made later may require chasing the walls, additional modules or reduced functionality.
9. Safety and an escape route
An ordinary roller shutter should not automatically be presented as burglar-resistant protection. Enhanced resistance must be demonstrated for a complete, appropriately tested solution comprising the guides, curtain, locking features and installation.
You should also plan how occupants can leave the house during a power failure. This is especially important for patio doors and where there is only one available exit. Depending on the product, the solution may be a deliberately unobstructed exit, backup power or a system with manual operation.
10. Roller shutters and external venetian blinds in one home
You do not need to choose one solution for the entire building. A very practical combination is roller shutters in the bedrooms and external venetian blinds across the large glazed areas in the living zone. This gives each room the function it genuinely needs.
A coherent façade can be maintained by coordinating the colours of the boxes, guides and shading. Their dimensions must be coordinated early, as a roller shutter box and a stacked venetian blind may require different amounts of space.
What should the quotation contain?
- The exact type of system, box, curtain or slats.
- The dimensions of each shading unit and its guide system.
- The colours of the slats or curtain, guides, bottom rail and box.
- The drive manufacturer and model, and the control method.
- The scope of weather sensors and automation.
- Power supply requirements and the electrician's responsibilities.
- The service access solution and provision for an insect screen, if planned.
- Installation and finishing requirements, including connections to the windows or doors and the façade.
The most common misconceptions
'An external venetian blind will darken a bedroom as effectively as a roller shutter'
Usually not. Slats reduce light, but gaps may remain between the elements and beside the guides. A roller shutter is generally the more reliable choice for strong blackout.
'A roller shutter always provides burglary protection'
No. A basic shutter may impede access and screen the interior, but burglar resistance should not be claimed without evidence for the complete product.
'A wind sensor solves every problem'
It does not replace correct sizing, guidance and installation. It is an additional safeguard that must be correctly configured and operational.
'The box can be selected after the windows have been installed'
This is sometimes possible, but with concealed solutions it may already be too late to achieve an attractive, thermally sound detail. Shading is best coordinated with the windows, lintels and façade at the design stage.
Would you like to select shading for the entire house?
Send me the design, window schedule or photographs of the façade. I will indicate where roller shutters or external venetian blinds are more appropriate and what preparation will be required before installation.
Include the orientation, intended use of each room, and whether the electrical installation and façade have already been completed.

12
Installation
5 min read
Basic or airtight installation?
Foam and mechanical fixings, or a multi-layer installation with sealing tapes? See how these solutions differ and when the additional cost is worthwhile.
Read more →
Installation · window-to-wall junction
Basic or airtight installation?
A good window can lose some of its benefits through a poorly executed wall junction. Basic and airtight installation do not differ primarily in how the window is 'screwed in', but in how the insulation layer is protected and the movement of air and moisture is controlled.
Answer in 30 seconds
In both variants, the window must be correctly positioned, supported and mechanically fixed. In a basic installation, the gap is usually filled with expanding foam. An airtight installation provides additional protection for the junction: internally it limits the ingress of air and water vapour, the centre provides insulation, and externally it protects against the weather while allowing the junction to dry. The extra cost is worthwhile only when the substrate, materials and workmanship form a complete system.
Interactive section
Three functions of one junction
Select a layer to see what it protects against and what must not be omitted.
Limits the movement of air and moisture from the room
A vapour-control sealing tape or suitable membrane creates a continuous connection between the frame and the prepared reveal. Corners, fixing points and service penetrations require particular attention.
Principle: the junction should be more airtight on the room side than on the outside, so that moisture is not trapped within the insulation layer.
1. What do both options have in common?
First check the opening dimensions, installation gap, levels, plumb and diagonals. The frame requires stable support and correctly positioned frame fixings, anchors or brackets. Polyurethane foam does not replace mechanical fixing.
In both options, support blocks, movement allowance, the way units are joined, support beneath thresholds and window sills, and sash adjustment are also important. Sealing tapes cannot correct a crooked frame or one supported at arbitrary points.
2. Basic installation – what does it actually include?
It most often means positioning and mechanically fixing the window, then filling the gap with foam. If the junction is promptly finished correctly and protected against water, UV radiation and air movement, this option may satisfy the requirements of a particular project.
Problems begin when foam remains exposed for weeks, is trimmed and left unprotected, or is merely covered by the finishing work without being properly sealed. In that case, the phrase 'foam installation' says nothing about the durability of the complete detail.
3. Airtight installation – three levels of protection
On the room side
The internal layer limits uncontrolled air movement and the ingress of water vapour into the junction. It must be continuous and permanently bonded to both the frame and reveal.
In the centre of the gap
Foam or another insulating material fills the space between the frame and wall, reducing heat loss and sound transmission. It must be suitable for the relevant joint width.
On the outside
The external layer protects against wind and driving rain while allowing the junction to dry towards the outside. It may be formed by a suitable tape, film, membrane or multifunctional sealing product.
Reveal readiness check
Can the sealing layer be bonded securely?
Select the opening's state of preparation. The result will show what needs to be improved before installation.
0/6
The reveal requires inspection
Sealing tapes require a prepared surface. Select the confirmed items to see the assessment.
Basic and airtight – without marketing shorthand
| Element | Basic installation | Airtight installation |
|---|---|---|
| Positioning and mechanical fixing | required | required |
| Insulation layer | usually expanding foam | foam or a proprietary system solution |
| Airtightness on the room side | depends on the subsequent finishing detail | a planned internal sealing layer |
| Protection from the outside | depends on the façade junction detail | a planned weather-protection layer |
| Substrate requirements | an even, stable reveal remains important | adhesion and continuity are especially important |
| Workmanship checks | fixings, support, foam and finishing work | the same, plus corners, overlaps and tape junctions |
The name of an installation option does not replace a description of the materials and junction detail. The quotation should state the precise scope of work.
4. Is airtight installation always 'warm installation'?
These terms are sometimes used interchangeably, but they describe different issues. Multi-layer sealing concerns protection of the junction. The window’s position – within the wall, at its edge or in the insulation layer – affects the isotherms and thermal bridging.
Multi-layer sealing can be used for a window installed within the wall. The window can also be moved out into the insulation layer on brackets, but this requires a separately designed load-bearing system. Sealing tape alone changes neither the position nor the structural behaviour of the unit.
5. Why is reveal preparation so important?
Adhesive should not be bonded to loose dust, crumbling masonry or a wet surface. The reveal must be levelled, cleaned and, where necessary, primed with a product compatible with the system. Irregularities make continuous bonding difficult, especially at corners.
Preparation can be more difficult when replacing windows because removal may reveal voids and remnants of old materials. The extent of repairs should be agreed before the sealing tapes are bonded.
6. Window sill and the lower part of the window
The bottom of the unit is the most heavily loaded part of the junction. The frame and threshold require stable support, while the insulation and waterproofing layers must connect correctly to the internal sill, external sill or patio.
An insulated sill support profile can make it easier to provide support and reduce thermal bridging, but it must suit the frame profile and be installed correctly. Requirements are greater for patio doors because of their weight, low threshold and exposure to water.
7. Expanding tapes, films and membranes
No single material is suitable for every joint. An expanding sealing tape is selected for the joint width and level of exposure. Films may conform better to some offset surfaces, while liquid membranes can help with difficult geometries and refurbishment work.
Products should be mutually compatible and installed in accordance with their instructions. An arbitrary combination of materials may look acceptable but does not guarantee the required adhesion or ability to accommodate movement in the joint.
8. When is the additional cost most worthwhile?
The quality of the junction is especially important in a new, airtight and well-insulated house with mechanical ventilation. Airtight installation is also worth considering for large glazed areas, strong wind exposure, acoustic requirements and where finishing work will be completed much later.
In a refurbishment project, the wall and the options for preparing the substrate must be assessed before deciding. If there is no suitable surface for the tapes to be bonded correctly and connected to the building layers, a remedial detail must be designed first.
9. How should the workmanship be checked?
- Check the position of support blocks and fixings, and the continuity of support.
- Inspect the corners and overlaps in both the internal and external sealing layers.
- Make sure the sealing tapes are neither excessively stretched nor coming away from the substrate.
- Check the junction around the window sill and door thresholds.
- Do not leave materials unprotected for longer than the manufacturer permits.
- Before the finishing work begins, make a photographic record of the entire perimeter.
10. What should the quotation include?
- The method of positioning and mechanically fixing the window.
- The materials used to form each layer of the junction.
- Confirmation of who will prepare and repair the reveals.
- The support solution for the bottom frame, window sill and thresholds.
- The scope of plastering and façade finishing work.
- Responsibility for protecting the sealing tapes during subsequent works.
- The scope of removal, transport and disposal of the old windows and doors.
- The conditions for handover, adjustment and the installation warranty.
The most common misconceptions
'Foam holds the window in place'
Foam is primarily an insulation layer. Loads are transferred by supports and mechanical fixings selected for the wall and the window construction.
'It is enough to apply two sealing tapes'
No. The substrate, corners, overlaps, continuity, material compatibility and connection to the adjoining building layers all matter.
'An airtight installation will compensate for an uneven opening'
Sealing tapes require a suitable surface. Crumbling, wet or very uneven reveals must be prepared first.
'The most expensive option is always necessary'
The scope should suit the building and junction detail. The additional cost is worthwhile when it provides a complete, correctly executed connection.
Would you like to compare two installation options?
Send me the design, photographs of the openings or a quotation you have received. I will check what the installation actually includes, what is missing and whether the additional cost is justified by the conditions in your building.
Include information about the wall material, planned insulation, roller shutters, window sills and the current stage of construction.
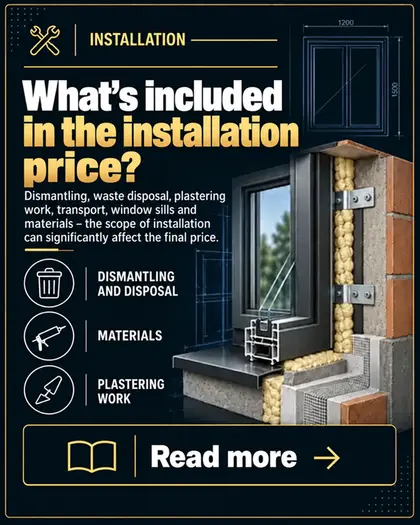
13
Installation
4 min read
What is included in the installation price?
Removal, disposal, making good, transport, window sills and materials—the scope of installation can significantly change the final price.
Read more →
Installation · scope and quotation
What is included in the installation price?
Two quotations may cover the same number of windows yet include completely different scopes of work. The installation price depends not only on the number of units, but also on removal, transport, sealing, support, making good, access to the building and responsibility for materials once the work is complete.
Answer in 30 seconds
‘Installation included’ explains nothing unless the quotation lists the individual tasks. Check the survey, transport, carrying in, protection of interiors, removal, collection, disposal, fixing, sealing materials, threshold support, window sills, making good and adjustment separately. The fairest comparison uses the same list of work, not merely the total at the end of the document.
Enquiry-scope builder
0Select what you need from the installation team
The tool will prepare a clear summary that you can send to the adviser immediately.
Completed summary
New-build home · basic installation
- Select the services you require.
What should you look out for?
Select the services so that the tool can identify possible gaps in the scope.
The builder does not calculate a price. It prepares a complete scope for an individual quotation after the dimensions and site conditions have been checked.
1. Compare the scope, not the heading ‘installation’
One company may quote only for fitting the windows, another may add transport, removal and making good, while a third lists some services as extras. The lowest figure in one line does not necessarily mean the lowest final cost for the completed project.
Ask for labour, materials and optional services to be itemised separately. This immediately shows which tasks are confirmed and which remain the client's responsibility.
2. Survey and order preparation
A good survey covers more than the width and height of the opening. The wall material, condition of the reveals, floor levels, window sills, lintels, roller shutters, installation access and sash opening method must all be assessed.
Establish whether the survey is included in the order or charged separately, and who is responsible for preparing the openings. If concealed damage is revealed after removal, the quotation should state how additional repairs will be charged.
3. Transport, unloading and carrying in
Delivery to the address does not always include carrying the units into every room. Large insulating glass units, HST lift-and-slide doors and heavy constructions may require additional personnel, suction lifters, a glazing robot or a crane.
Vehicle access, parking, stairs, passage widths, the storey and storage space all matter. These conditions should be provided before the quotation, not on the day of installation.
4. Removal does not always mean the same thing
Removal may be carried out in an attempt to preserve the old window or destructively. Work in an empty building differs from work in an occupied property with finished floors, furniture and window sills.
The quotation should specify protection of the room, removal of old anchors and foam, and responsibility for possible damage to the existing reveals. For refurbishment, establish whether the old frame will be removed completely.
5. Collection and disposal are separate services
The team may remove the windows and leave them on the property, or load, collect and dispose of them responsibly. Glass, profiles and building waste take up considerable space, so this item is often charged separately.
Ask whether the rate applies per complete unit, sash, weight or collection. Also establish who removes rubble and waste from making good.
The price is made up of several areas
Logistics
transport, carrying in, storey, weight and equipment
Preparation
survey, protection, removal and repair of reveals
Fitting
support, fixings, foam, tapes and adjustment
Finishing
window sills, making good, waste and handover documentation
6. Installation materials and fixing
The price may include frame fixings or anchors, setting blocks, foam, adhesives, tapes, membranes, brackets, threshold support profiles and waterproofing materials. The difference between options is not simply the number of cans of foam.
For large glazed units, support, the number of fixings and the installation method are more demanding. The quotation should identify the system and lower-junction solution instead of using the general phrase ‘installation materials’.
7. Basic and airtight installation
Basic installation usually covers mechanical fixing of the unit and filling the joint with foam. Airtight installation adds an internal airtight layer and external weather protection, or uses a suitable multifunctional solution.
The additional cost must be assessed together with reveal preparation, primer, corner junctions and subsequent making good. Merely listing tape among the materials does not confirm that the joint is complete.
8. Threshold support, insulated sill profiles and extensions
Components beneath the frame may form part of the product, the installation materials or a separate item. Their role is to carry the weight, maintain the correct level and reduce cooling beneath the window or door.
For patio doors, the support must be coordinated with waterproofing and the finished floor level. Establish whether the quotation covers only the threshold support component or also its installation, sealing and connection to adjoining layers.
9. Window sills and making good
Installation, cutting, end caps, sealing and support of the window sill may be charged separately. Internal plaster repairs do not always include painting, while external making good does not necessarily include restoration of the entire façade.
Ask about the width of the repaired strip, material type, colour and final condition. The phrase ‘fully finished’ should be defined because it can mean different things to different people.
10. Unusual conditions increase the workload
An upper storey, no lift, installation beside a busy road, restricted vehicle access, coupling large units or working above a canopy all change the organisation and risk. Scaffolding, a lifting platform or permission to occupy land may be required.
Such additional charges do not necessarily mean that the price is excessive, but they should be justified by a specific difficulty, equipment requirement and scope of responsibility.
11. Adjustment, handover and servicing
After installation, check sash operation, compression, handles, drainage and that all fittings are present. At handover, take photographs and record comments in the handover report.
Ask whether the first adjustment after a period of use is included in the price and how service requests are submitted. The product warranty and installation responsibility may have different periods and conditions.
What should be stated explicitly?
| Item | Question for the installer | Why is it important? |
|---|---|---|
| Survey | does it include an assessment of the openings and levels? | reduces surprises on installation day |
| Transport | does it include unloading and carrying in? | large units require dedicated logistics |
| Removal | does it include protection and removal of the frames? | affects the time required and the condition of the reveals |
| Disposal | will the old windows and waste be collected? | removal does not necessarily include collection |
| Sealing | which materials and layers are included in the price? | allows the actual standard to be compared |
| Making good | what exactly will the final condition be? | eliminates different interpretations of ‘fully finished’ |
| Servicing | what do adjustment and the warranty cover? | defines the support available after completion |
The most common misconceptions
‘Installation is included, so everything is covered’
No. Without a list of tasks, it is impossible to know whether the price even includes removal, collection, window sills or making good.
‘More expensive installation means a higher margin’
The difference may result from materials, the number of installers, equipment, logistics and the scope of responsibility. Compare the line items instead of assuming the reason.
‘Making good means a wall ready for painting’
Not necessarily. Establish the layers, width of the repair and whether finishing plaster, primer and painting are included.
‘Adjustment after installation is the end of the matter’
Heavy sashes and new buildings may require another check after a period of use. The terms of the first service visit should be known before the order is signed.
Would you like to check whether the installation quotation is complete?
Use the builder above or send the document directly. I will compare the scope, identify unclear items and prepare questions worth asking the installer.
Ideally, include photos of the openings and details of the storey, access, window sills and planned finish.
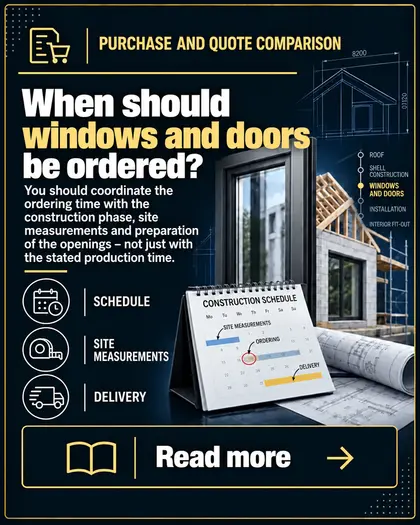
14
Buying and comparing quotations
3 min read
When should windows and doors be ordered?
The timing of the order should be coordinated with the construction stage, survey and preparation of the openings—not only with the stated production lead time.
Read more →
Purchasing · construction schedule
When should windows and doors be ordered?
The best time cannot be reduced to one date in the calendar. Time for selecting the system, surveying, finalising details, production, delivery and installation must be coordinated with the actual construction stage. A late decision delays following trades, while ordering too early may lock in incorrect dimensions.
Answer in 30 seconds
Begin discussions and quotation comparisons before the masonry work is complete. Initial solutions should be established from the design, but final dimensions should only be approved after the openings have been built and checked. Place the order once floor levels, installation method, window sills, roller shutters or external venetian blinds, configurations, colours and opening directions are known. Production lead time is only one part of the overall schedule.
Interactive schedule
0/6What stage has your project reached?
Select the stage and mark the confirmed decisions. You will receive the next safe step.
0% of decisions ready
The next step is to
Gather the requirements and prepare an initial quotation
At the design stage, configurations, sizes, materials, sliding systems and shading can be reviewed. This is a good time to identify openings that need to be changed.
The tool does not set a delivery date. Current production and installation lead times must be confirmed with the supplier for the selected products, colours and equipment.
1. Do not wait for finished openings before the first discussion
An initial design review shows whether the units fall within the capabilities of the selected systems, where subdivisions are needed and whether large glazed areas require aluminium, an HST lift-and-slide system, extensions or special support.
There is no need to order at this stage. It is worth establishing the budget and identifying decisions that affect the masonry, lintels, terrace, insulation and electrical installation.
From design to installation
Design review
systems, configurations, shading and budget
Initial quotation
comparison of options and scope
Survey
openings, levels, details and access
Approval
dimensions, colours, opening directions and equipment
Production and installation
timing coordinated with the build
2. An initial quotation and a final order are two different stages
A quotation based on the design helps compare materials and solutions, but should not automatically become a production document. Openings, levels, insulation thickness and finishing details may change on site.
The final order requires every item to be checked after the survey. The customer should approve the dimensions, opening diagrams, handle positions, colours, glazing, thresholds, window sills, roller shutters and scope of installation.
3. When can a reliable survey be carried out?
The openings should have their final shape, and their edges must not be intended for further cutting or building in. Finished floor-level marks are essential, especially for entrance and patio doors.
If the insulation has not yet been installed, its planned thickness and the window position must be known. For window sills, roller shutters and external venetian blinds, the installation space and subsequent façade layers must be agreed.
4. Production lead time is not the complete project lead time
Before production can begin, the survey, clarification of changes, final quotation, signed order and approved documentation are required. After production, transport, installer availability and building readiness must also be allowed for.
Unusual colours, special glass, entrance doors, large aluminium constructions and automation may have different lead times from standard windows. The schedule must therefore be confirmed for the complete package, not one representative product.
5. Roller shutters and external venetian blinds must be planned early
Concealed systems affect the lintel, insulation, visible glass area and electrical installation. The height of the box or slat stack depends on the shading-system dimensions. Leaving the decision until the end may force the use of a visible box or a smaller window.
Before ordering, specify the drives, cables, switches, control groups and any weather sensors.
6. Floors, thresholds and terraces
Door height cannot be considered separately from the finished floor level. Insulation, underfloor heating, screed and the floor finish must be included. For HST lift-and-slide and entrance doors, the terrace level, drainage and waterproofing also matter.
Unreliable levels can result in an excessively high threshold, the leaf fouling the floor or expensive cutting-out work.
7. Do not order solely because of a promotion
A discount cannot compensate for incorrect dimensions, the wrong opening direction or an unsuitable threshold. All technical decisions must be finalised and documented before production begins.
A promotion has value when the project is ready for an informed order. If the documentation is still changing, it is safer to calculate the cost of delay than risk manufacturing units that do not fit.
8. Delivery too early is also a risk
Windows stored on site require a stable location and protection against toppling, glass damage, dirt and unauthorised access. Long-term storage should not replace a sensible schedule.
The building must allow safe unloading and installation. Access routes, openings, scaffolding and work by other trades must not obstruct the movement of large units.
9. What can delay installation?
- openings that are unfinished or inconsistent with the survey,
- missing floor levels and no preparation beneath thresholds,
- changes to the colour, glazing, configuration or opening method,
- no agreed installation for roller shutters and automation,
- no vehicle access or space for safe unloading,
- conflicts with scaffolding, the roof or other trades,
- weather conditions preventing some of the work.
10. What should be confirmed before signing the order?
- Final dimensions and a diagram of every unit.
- Material, system, colour on both sides and core colour.
- Insulating glass units, warm-edge spacers and safety glass.
- Opening directions, handles, trickle vents and accessories.
- Roller shutters, external venetian blinds, insect screens, drives and controls.
- Threshold heights, extensions and supports.
- Installation option and precise scope of work.
- Production and delivery lead times and possible installation date.
- Terms of payment, handover, warranty and servicing.
The most common misconceptions
‘Windows should only be ordered after all the walls have been built’
The final survey requires completed openings, but the design review and selection of solutions should begin much earlier.
‘The lead time is only the production time’
Order preparation, approvals, transport, installer availability and building readiness must also be allowed for.
‘The house design is sufficient for production’
The design is used for an initial quotation. The dimensions and levels of the completed openings may differ from the documentation.
‘The earlier the windows are delivered, the safer the schedule’
Delivery too early creates storage and damage risks. The best date is coordinated with the building’s readiness.
Would you like to establish a safe time to place the order?
Send the design and tell me what stage the build has reached. I will prepare a list of decisions, identify the right time for the survey and help coordinate the windows and doors with subsequent work.
Include the planned date for making the building weathertight and details of the floors, roller shutters, façade and large glazed areas.

15
Installation
4 min read
How should openings be prepared for installation?
A level, stable and correctly prepared substrate makes proper installation easier and reduces problems at later stages.
Read more →
Installation · building preparation
How should openings be prepared for installation?
A level, load-bearing and correctly dimensioned opening makes it easier to position and fix the window and create continuous sealing. The lower support area is the most important, but errors at the lintel, jambs and façade layers can also delay installation or reduce its durability.
Answer in 30 seconds
Before the survey, remove loose mortar, repair large voids and provide access around the entire opening. Establish the finished floor, window-sill and terrace levels. Before installation, the substrate should be stable, clean, sufficiently dry and prepared for fixing and bonding the seals. Do not alter the dimensions after the final survey without agreement from the supplier.
Interactive opening assessment
0/5Check five areas before installation
Select an area of the opening, read the criteria and assess its condition. At the end, you will receive a list of areas requiring improvement.
OPENINGselect an area
Lintel
Check the height, straightness and fixing space. If you are planning roller shutters or external venetian blinds, confirm the box, insulation and clear window opening.
Start the check
Areas requiring action
- No area has been assessed yet.
The assessment helps gather information, but does not replace a survey or the installer's evaluation of the wall's load-bearing capacity.
1. Final dimensions and shape first
The opening should match the agreed dimensions, include the required installation gap and allow the unit to be levelled. Width and height should be checked at several points, together with the diagonals and plumb.
After the final survey, do not build in, cut out or alter the lower level of the opening without agreement. Any such change may mean that the manufactured window no longer fits.
What has the greatest impact?
Level and support
determine positioning and load transfer
Load-bearing capacity of the substrate
enables durable fixing
Surface evenness
allows continuous sealing to be formed
Coordination of layers
connects the window with the sill, terrace and façade
2. Stable, load-bearing jambs
Fixings must engage with material that will not crumble under load. Loose masonry fragments, uncured mortar and deep voids must be repaired before installation using a method suited to the wall construction.
For hollow masonry units, the chamber arrangement must be known so that suitable fixings can be selected. A levelling layer prepares the surface but cannot always carry loads from the frame.
3. An even surface for tapes and membranes
The sealing must bond to the substrate around the entire perimeter. Sharp steps, open joints and porous voids hinder adhesion. Level the reveal with suitable mortar and allow it to cure before the installers arrive.
Immediately before installation, the surface should be free from dust, grease and loose particles. Select the primer to suit the material and the sealing-system manufacturer’s instructions.
4. Lower area—the most important section
Setting blocks, a sill connection profile, an insulated sill support or system extensions sit beneath the window. They must form a stable base that will not deform under the weight of the frame and glass.
This becomes even more important for entrance and sliding doors. Prepare support along the full required length, establish the finished floor level and plan waterproofing and drainage on the terrace side in advance.
5. Datum level and floor layers
The finished floor-level mark should be clear and confirmed by the site manager or contractor. The structural floor level alone is insufficient if the thicknesses of insulation, underfloor heating, screed, adhesive and finish are unknown.
An error here affects thresholds, doors, window sills and handle heights. Levels must be confirmed separately for each storey.
6. Lintel, boxes and insulation
Space is required above the window for fixing, sealing and any extension profile. If top-mounted or concealed roller shutters or external venetian blinds are planned, their boxes must be coordinated with the opening height and façade thickness.
Check service access and the position of cable outlets. A poorly positioned cable may conflict with a guide rail, anchor or inspection cover.
7. Rebates and window position within the wall
A rebate can protect the joint and reduce the visible frame width, but must leave space for installation and subsequent making good. Its dimensions should suit the profile, roller shutters, guide rails and insulation layer.
The window position—within the masonry, at its edge or in the insulation layer—must be established before preparing the opening. The fixings, brackets, sill widths and sealing arrangement depend on it.
8. Access and safe working
Before installation, remove materials obstructing access, protect floor edges and prepare an unloading area. Scaffolding must not prevent units from being inserted or external sealing from being completed.
Large panes may require a glazing robot or crane. Provide load-bearing access and working space, and resolve conflicts with services, canopies and other trades.
9. The scope is harder to predict when replacing windows
The condition of the wall often only becomes visible after the old frame is removed. Voids, loose plaster, old anchors and uneven surfaces may be revealed. The quotation should state which minor repairs are included and how additional work will be charged.
For an airtight installation, space must be allowed to connect tapes or membranes to existing layers. More extensive work to the reveals may sometimes be necessary.
10. Checklist before the survey and installation
- Confirm the final widths, heights and diagonals of the openings.
- Mark the finished floor, window-sill and terrace levels.
- Repair loose areas, joints and deep voids.
- Level the surfaces intended for sealing.
- Establish the insulation thickness, rebates and window position.
- Confirm the roller-shutter or external-venetian-blind boxes and electrical installation.
- Prepare support beneath thresholds and large units.
- Provide vehicle access, an unloading area and safe access.
- Do not alter the openings after the final survey without agreement.
The most common misconceptions
‘The installer will level everything with foam’
Foam fills and insulates the joint, but does not replace a load-bearing substrate, masonry repairs or stable support.
‘Only the width and height matter’
Diagonals, plumb, levels, sealing space and finishing layers also matter.
‘The opening can still be adjusted slightly after the survey’
Even a small change may compromise the planned installation gap, position or threshold height. It must be reported before production.
‘Smooth plaster means the opening is ready’
The surface must also be stable, clean, sufficiently dry and compatible with the installation materials.
Would you like to check the openings before the survey?
Complete the assessment above and send the result with photos. I will indicate which areas should be improved before the team arrives and what information to prepare.
Photograph the entire opening, then the bottom, corners and lintel separately. Include a tape measure or straightedge to make the scale easier to assess.

16
Performance and energy efficiency
8 min read
Is the best-insulated window always the best choice?
A very low Uw value looks good in a table, but the right choice should take account of the entire building, the installation method and the budget.
Read more →
Performance and energy efficiency · homeowner's guide
Is the best-insulated window always the best choice?
Not always. The lowest Uw value is worthwhile only when it suits the entire building, glazed area, orientation, ventilation and installation method. A good window is not a record in a table—it is a well-selected component of the home.
The short answer
In a new energy-efficient home, a large area of low-Uw windows can genuinely reduce heat loss and improve comfort close to the glass. In a typical refurbishment, however, the difference between two good options may deliver less benefit than correct installation, sealing of the reveals or elimination of thermal bridges.
How far is it worth going with the Uw value?
Select the situation closest to your own. The tool does not choose a specific product—it organises your priorities before quotations are compared.
1. Type of project
2. Glazed area
3. Main objective
58%
Recommendation: a good balance
Do not buy a figure alone
In this option, a low Uw value matters, but should be assessed together with the installation, g-value, unit size and equipment.
- Compare Uw values for the same window dimensions.
- Confirm the installation and support method.
- Check the balance of daylight and solar gains.
The result is educational. It does not replace building energy calculations or verification of the specific unit by the manufacturer.
Product performance
Uw describes the complete window, not the glass alone. The value should apply to the specific dimensions, configuration and equipment, not only a reference model.
Connection to the building
Even a highly insulating window cannot correct a thermally weak support, discontinuous insulation or a leaky joint. Installation is part of the result.
Everyday comfort
Daylight, g-value, airtightness, ventilation, acoustics, ease of operation and durability also matter. One parameter does not describe the complete window.
What does ‘best insulated’ really mean?
The aim is usually to achieve the lowest possible Uw value, which describes heat transfer through the complete window. The result is determined by the glass, frame, edge of the glazing unit and their relative proportions. That is why two windows with the same Ug value may have different Uw values, and a small window may perform differently from a large glazed unit.
For a valid comparison, you need values calculated for the same size and a similar division. Comparing a catalogue Uw value for one model with the result for a specific window from another manufacturer leads to false conclusions.
When does a very low Uw value make the most sense?
- when the building has well-designed, continuous insulation,
- where the total glazed area is large, particularly on colder elevations,
- when low heating costs and a high level of comfort near the window are priorities,
- in a home with controlled ventilation and carefully designed airtightness,
- when the price difference does not take budget away from more important installation components.
When can chasing a record value be a poor purchase?
If an existing wall remains poorly insulated, the reveals are unprepared and the installation will lack stable support and an airtight junction, improving Uw by another hundredth will not be the most important issue. The same applies when the additional cost reduces the budget for safety glass in large panes, better hardware or correctly designed shading automation.
Be careful not to assume that ‘warmer’ automatically means ‘better in summer’. Overheating is primarily determined by orientation, glass area, the g-value and external shading. A low Uw value limits heat transfer but cannot replace solar protection.
Five questions that bring clarity to a quotation
- Does the stated Uw value apply to my dimensions and divisions?
- Which Ug and Uf values, spacer and g-value have been used?
- How will the support and sealing of the junction be designed?
- Is the weight of the glazing unit suitable for the hardware and opening method?
- What do I gain or lose by selecting the next level of thermal performance?
Would you like to compare two options without guessing?
Send the dimensions, divisions and both specifications. I will check whether the additional cost delivers a real benefit in your home or merely improves one figure in a table.
Ideally, include the building plan, orientation and information about the heating, ventilation and planned installation.

17
Buying and comparing quotations
8 min read
What is worth paying extra for?
Not every upgrade offers the same value. It is worth knowing which items improve comfort, durability or performance and which are mainly optional extras.
Read more →
Purchasing and quotation comparison · homeowner's guide
What is worth paying extra for?
The best upgrade solves a specific problem: it reduces heat loss, improves safety or everyday operation, or protects the construction for years. The worst sounds impressive but addresses none of your home's actual needs.
The principle matters more than the list of extras
Secure the essentials first: the correct product and dimensions, structural requirements, glass, hardware and installation. Only then allocate the budget to comfort, automation and appearance. The same upgrade may be essential in one home and entirely unnecessary in another.
What adds the most value to your project?
Choose your most important objective. The ranking will reorder the items, but safety and correct installation will always remain the priority.
First refine the installation joint and glass edge; select further upgrades according to the glazed area and the building’s energy standard.
The ranking is a discussion tool, not a quotation. Whether an upgrade is worthwhile ultimately depends on the dimensions, system, location and installation scope.
Risk first
Structural requirements, safety glass, load-bearing support and correct fixing are not premium extras. For particular dimensions, they may be essential to a safe construction.
Everyday use next
Invest in features you will appreciate every day: effortless operation, quiet closing and protection from noise, sunlight or loss of privacy.
Appearance last
Colour, handles and concealed hinges matter aesthetically, but they should not displace technically required installation work, glass or hardware from the budget.
Upgrades that often deliver a tangible benefit
Better installation and substrate preparation
This is usually one of the first items to check. Stable support, suitable fixing and correct sealing protect the window’s performance, airtightness and durability. The label ‘warm installation’ is not enough—the quotation should describe the materials, reveal preparation and treatment of the lower junction.
Warm-edge spacer
At a reasonable additional cost, it improves conditions at the glass edge, reduces the linear thermal bridge and may lower the risk of condensation. It cannot replace ventilation, but its purpose is clear.
Glass matched to the risk
Safety or laminated glass makes sense for large panes, patio doors, low-level glazing and areas exposed to impact. Acoustic glazing should be selected for the noise source, not merely by its marketing name.
Where does comfort justify a higher price?
- hardware and an operator matched to a heavy sash that you will use every day,
- a low threshold at the patio entrance where accessibility and a smooth connection between the interior and garden matter,
- external solar protection for large south- and west-facing glazed areas,
- magnetic contacts, sensors and automation where they form part of a well-designed home system,
- a more durable finish on the side particularly exposed to sunlight and weather.
Upgrades that require a measured assessment
Do not dismiss aesthetic extras—they may be important to the architecture. Keep appearance separate from performance, however. Concealed hinges, an unusual colour, a designer handle or a special texture do not automatically improve thermal performance, acoustics or safety. Choose them knowingly once the essentials are secure.
Also be wary of ‘premium’ packages that do not itemise their contents. Ask for a base price and separate options. This will show whether you are paying extra for the necessary glass, hardware and installation or merely for the package name.
How can you decide without exceeding the budget?
- Mark the technically required items—they are not negotiable.
- Choose the two issues that most affect everyday use.
- Request a base, recommended and enhanced option for the same windows and doors.
- For each upgrade, record its function, price and the consequence of omitting it.
- Compare the complete scope, including installation, rather than only the final price.
Would you like to prioritise the upgrades in your quotation?
Send the specification and briefly describe the home. I will separate technically required, worthwhile and purely aesthetic items—without adding equipment that does not solve your problem.
Include information about large glazed areas, noise, orientation, children, the patio and how the spaces will be used.

18
Buying and comparing quotations
9 min read
How should you read a quotation for windows and doors?
How to check a quotation's scope, product options, equipment, installation and additional items before comparing the final price.
Read more →
Purchasing and quotation comparison · practical review
How should you read a quotation for windows and doors?
The final price is only the last line. A reliable comparison begins with dimensions, functions, profiles, glazing and equipment, and ends with installation, transport, making good and responsibility for the entire scope.
The most important rule
Do not compare two totals until you are sure that both quotations describe the same product and scope of work. A lower price may result from different glazing, simplified hardware, or the omission of removal, transport, window boards, support or sealing.
Does the quotation provide a sound basis for a decision?
Select the information clearly stated in the document. The tool will identify gaps and prepare a list of questions—without judging the price.
An unticked item does not mean it is absent—only that it has not been described clearly. Always confirm the scope with the seller before signing the contract.
Product
Dimensions, divisions, profile, colour, glass, hardware and accessories. Every change affects function, appearance or price.
Service
Surveying, delivery, removal, installation, sealing, making good, window boards and disposal should all have a clearly defined scope.
Conditions
VAT, payments, timescale, quotation validity, warranty and acceptance terms define each party's responsibilities.
1. Begin by checking compliance with the design
Check every window in turn: width, height, divisions, opening direction and sash function. The drawing should match the description. Pay particular attention to patio doors, fixed glazing, flying mullions, fanlights and coupled units.
A preliminary quotation may be based on the design, but production should use the final survey and approved drawings. If the openings or finished floor levels are not ready, the document should state clearly that the dimensions are provisional.
2. Read the product specification, not just the trade name
For windows, check the material and profile system, construction depth, internal and external colours, core colour, number of seals and any reinforcement where it is structurally relevant. The series name alone does not reveal how a particular window is equipped.
For the glazing unit, verify the number of panes, Ug value, overall unit thickness, spacer and specialist glass. For large or low-level glazing, ask about safety glass; where noise is an issue, ask about the unit construction and the acoustic rating of the complete window.
3. Break the installation down into individual tasks
Terms such as ‘standard’, ‘warm’ or ‘airtight installation’ are insufficient without a description. The document should specify the fixing method, type of support, sealing materials, substrate preparation, connection to the waterproofing and scope of making good.
- Does the price include surveying and transport?
- Are removal and disposal of the old units included?
- Who prepares and levels the reveals?
- Are window boards, frame extensions and thermally insulating base profiles listed separately?
- Does installation of heavy units require a crane, vacuum lifters or an additional team?
4. Net price, gross price and discount
Check whether the summary includes VAT and which rate has been applied to the product and service. Assess the discount only after establishing the final price and full scope—a high percentage does not guarantee a better-value quotation.
When comparing options, ask for the differences to be listed separately. One change across several items may be hard to spot in a large table, so request a short list of what was added, what was removed and how the price changed.
5. Delivery terms are part of the quotation
The production lead time usually begins after the contract is signed, dimensions are approved and the deposit has cleared—not necessarily on the date of the first quotation. Also establish the acceptance procedure, storage conditions and responsibility for access to the installation location.
The manufacturer’s product warranty and the installer's responsibility for installation are two separate areas. The document should make clear whom to contact about a problem with the glass, hardware, adjustment or installation junction.
Warning signs
- one total without an itemised breakdown of products and services,
- missing drawings or unit dimensions,
- a Ug value presented as the value for the complete window,
- installation described only with a marketing slogan,
- missing information about VAT, quotation validity or timescale,
- large glazed units without details of the glass, transport and support.
Would you like to check the quotation before deciding?
Send the document together with the design or opening schedule. I will identify differences in products, equipment and installation and prepare a list of questions to ask before signing the contract.
You may remove personal details and prices if you only want the technical scope reviewed.
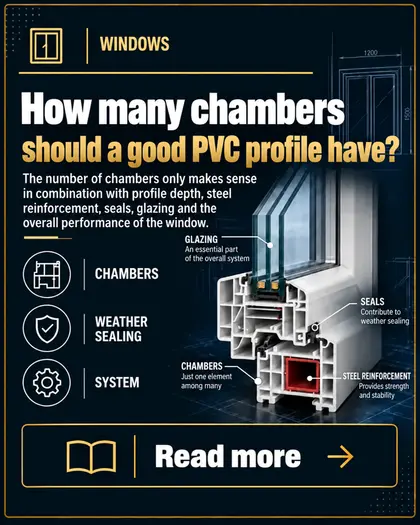
19
Windows
8 min read
How many chambers should a good PVC profile have?
The number of chambers only becomes meaningful when considered together with the profile depth, steel reinforcement, seals, glass and performance of the complete window.
Read more →
PVC windows · profile construction
How many chambers should a good PVC profile have?
There is no single correct number for every window. Chambers help limit heat transfer and organise the profile construction, but quality depends on the whole system: depth, geometry, reinforcement, seals, glass, manufacture and installation.
The short answer
Modern profiles often have five, six or seven chambers, but a higher number does not automatically guarantee a warmer or stiffer window. First compare the construction depth and performance of the specific unit, then regard the chambers as one aspect of its construction.
See what the number of chambers alone changes
Switch between the options. This educational diagram does not represent a particular manufacturer’s profile or structural calculations.
Chambers provide insulation
Closed spaces divide the heat-flow path through the profile. Their arrangement and geometry are just as important as their number.
Steel provides stiffness
Reinforcement helps transfer loads and maintain geometry. Its shape and thickness are selected to suit the system and dimensions.
Seals provide protection
An arrangement of two or three seals affects airtightness and the division of the profile into zones, but it also requires correct manufacture and adjustment.
Why does a profile have chambers?
PVC forms the outer shape of the frame and sash, while internal webs divide the profile into closed spaces. Air trapped in these zones limits heat conduction, while the webs provide geometry and create space for reinforcement, hardware and drainage.
Not every space visible in a cross-section serves the same function. One may contain steel, another may drain water, while another works mainly thermally. Simply counting the partitions in a photograph does not replace system data.
Why are seven chambers not always better than six?
Chambers may be wide, narrow, differently positioned and enclosed by webs of varying geometry. A shallow seven-chamber profile need not achieve a better Uf value than a well-designed, deeper six-chamber profile.
The frame and sash also matter. Manufacturers may state chamber counts for different parts of the profile, so establish precisely what the declaration refers to before comparing products.
Performance matters more than the phrase ‘multi-chamber’
- System depth — provides space for chamber geometry, glazing and stable joints.
- Profile Uf value — describes its thermal insulation in a particular configuration.
- Uw value of the complete window — takes account of the frame, glass, edge and proportions of the specific unit.
- Reinforcement — its type matters in relation to dimensions, colour and loads.
- Seal arrangement — two or three sealing planes create a different joint arrangement.
- Permitted glazing — the profile must accommodate glazing suited to the required thermal, acoustic and safety performance.
Does a greater number of chambers make the window stiffer?
This cannot be assumed. The stiffness of the complete unit depends on its dimensions, profile, reinforcement, corner joints, mullions, glass, hardware, colour and installation method, among other factors. Chambers affect the profile geometry but do not replace calculations or suitable reinforcement.
For large sashes and dark colours, ask first whether the unit remains within the system limits and what reinforcement has been specified. The number of chambers does not answer questions about deflection or thermal expansion.
How can two profiles be compared fairly?
- Compare the construction depth and seal arrangement.
- Check the profile Uf and the Uw values for windows of the same dimensions.
- Compare the glazing unit, Ug value, spacer and glazing thickness.
- Ask about the reinforcement in the specific units.
- Confirm the dimensional limits, particularly for dark colours.
- Finally, assess the installation, warranty, service and price of the complete scope.
The most common customer mistake
A quotation with more chambers may appear better in the first table. Yet the alternative may have a more suitable depth, better glazing, a warmer edge, more appropriate hardware or a more precisely specified installation. One number is easy to remember, but it does not describe a finished window.
The best question is therefore not, ‘How many chambers does the profile have?’, but, ‘How does the complete system perform in my dimensions, and how has it been prepared for installation?’
Do you have two profiles and are unsure which to choose?
Send both specifications and the dimensions. I will compare the depth, seals, glazing, performance and installation scope—without judging solely by the number of chambers.
Ideally, include drawings of the largest units and information about their colour and orientation.
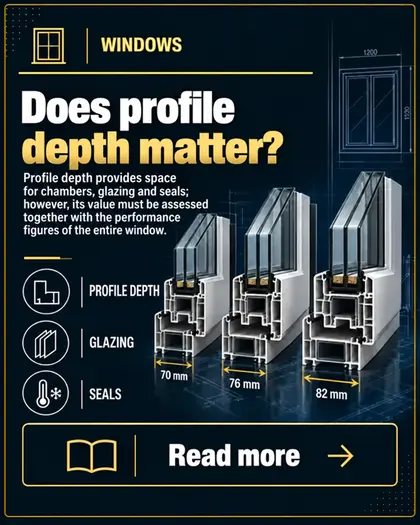
20
Windows
8 min read
Does profile depth matter?
Depth provides space for chambers, glazing and seals, but its value must be assessed together with the performance of the complete window.
Read more →
PVC windows · system geometry
Does profile depth matter?
Yes, because it creates space for chambers, reinforcement, seals and thicker glazing. It is not an independent measure of quality, however—a deeper profile must always be considered alongside Uf, Uw, the window construction and the building’s requirements.
What do 70, 76, 82 or 85 mm mean?
This is usually the construction depth measured from the internal to the external face of the frame. A greater depth gives the designer more space, but the result depends on how it is used, not on the millimetres alone.
Compare profile depths
Switch between the options to see which possibilities generally increase with depth. This is an educational diagram, not a technical data sheet for a specific system.
shallowerdeeper
More space
A deeper profile can accommodate more developed chamber geometry, wider reinforcement and a thicker glazing unit.
Better potential
A longer heat-flow path may help reduce Uf, but the actual result is confirmed by the system documentation.
Not always necessary
In a garage, outbuilding or some refurbishment projects, the deepest system may not deliver value proportionate to its additional cost.
Where does greater depth help most?
In a new home built to a high energy standard, greater depth can work with triple glazing, a warm-edge spacer and airtight installation. Where there are many windows, improved frame performance can make a meaningful difference to the building’s energy balance.
A deeper system can also accommodate a thicker glazing unit. This matters not only for thermal performance, but also where laminated, acoustic, solar-control or safety glass is required.
What does greater depth not guarantee?
- does not automatically confirm a lower Uw value for the complete window,
- does not show which reinforcement is used in a particular frame and sash,
- does not define the number or quality of the seals,
- does not ensure adequate structural performance for a large or dark-coloured sash,
- does not replace correct manufacture, hardware, adjustment and installation.
A 70 mm or 82–85 mm profile?
A system of around 70 mm may be a rational choice for refurbishment, a room with moderate requirements or where budget is critical. This does not automatically mean a poor window—the glass, seals, workmanship and installation all matter.
Depths of around 82–85 mm are a natural choice for new homes and triple glazing. They offer greater thermal potential, but check whether the additional cost also includes the equipment needed to realise that potential.
Effect on window sills and installation
A deeper frame occupies more space within the reveal and changes the window-board dimensions and positioning relative to the insulation layer. When replacing windows, check the existing reveals, roller shutters, window boards and access for fixing.
The profile alone does not determine the window position. The junction design establishes whether the frame sits within the wall, at its edge or in the insulation layer, and which extensions, base profiles and brackets are required.
How should you compare quotations?
- Check the exact system name and frame depth.
- Compare Uf and Uw for the same dimensions.
- Compare the number of chambers and seal arrangement.
- Check both the maximum and the specified glazing thickness.
- Ask about reinforcement in the largest units.
- Compare the installation scope and support elements.
Not sure whether a deeper profile is worth the additional cost?
Send both options and the dimensions. I will compare not only the millimetres, but also the glass, seals, Uw values, unit construction and installation to assess the real difference.
State whether this is a new home, a refurbishment or a space with lower requirements.

21
Windows
8 min read
What does a third window seal provide?
AD or MD? See where the seals work and what the additional barrier in the profile really changes.
Read more →
Window technology · sealing
What does a third window seal provide?
A third seal is neither a decorative extra nor a guarantee of the ‘warmest window’. Its purpose is to divide the area between the frame and sash and create an additional barrier against air, water and cold.
See how the seals work
Switch the system and then the weather conditions. The diagram shows the operating principle; final performance always depends on the specific profile, hardware, manufacture and installation.
outsideinside
separated zone
MD system · three seals
An additional barrier in the centre
The central gasket separates the outer, wetter rebate zone from the inner section and hardware zone. It gives the designer an additional level of control over air and water flow.
In calm weather, the difference cannot be judged by eye. Compare the declared performance of the complete windows and their workmanship.
AD and MD—what do these abbreviations mean?
AD is an arrangement with two rebate seals, one external and one internal. It is simple, proven and, in a good system, can provide full sealing performance. Water entering the outer rebate area is discharged through drainage channels.
MD adds a centre seal. It divides the space between the frame and sash into separate zones: an outer zone exposed to rain and wind and a better-protected inner zone. This separation is its most important function.
Air and wind
The additional barrier lengthens the flow path. Its effectiveness still depends on the profile geometry, compression and hardware adjustment.
Water and drainage
The centre seal helps separate the wet outer zone. The drainage channels must still remain clear.
Temperature and noise
MD may support thermal and acoustic insulation, but only data for the specific window confirms the result.
What does a third seal not guarantee?
The number of seals alone determines neither Uw nor the air-permeability or watertightness class. Two MD systems may achieve different performance, just as a well-made AD window may outperform a poorly designed or adjusted three-seal window.
The most important rule
Compare complete constructions: the profile, glazing, hardware, reinforcement, declared test results, manufacturing quality and installation method. ‘Three seals’ is a design feature, not a standalone certificate of quality.
When is an MD system particularly worthwhile?
- when the building is highly exposed to wind and driving rain,
- when a high energy standard matters and you are comparing well-developed systems,
- when the hardware and inner rebate area should be better separated from the external zone,
- when you want the most complete solution possible but verify it through testing and performance data.
For a standard project, a correctly selected AD system may still be a sensible choice. Base the decision on the building’s exposure, requirements and the price difference across the complete quotation.
Seals also require attention
A seal must be continuous, flexible and correctly seated. Dust, paint, aggressive chemicals, lack of sash adjustment or material wear may reduce its effectiveness. During window maintenance, check the corners, groove cleanliness, even compression and clear drainage.
Five questions for the supplier
- Which sealing system exactly will I receive—AD or MD?Ask for the profile name and technical cross-section.
- Which classes does the offered window achieve?Check air permeability, watertightness and resistance to wind load.
- Do the values apply to my dimensions?The result for a small reference window does not describe every unit.
- How are the drainage and hardware designed?An additional seal does not replace correct construction and adjustment.
- How is servicing handled?Ask about adjustment, maintenance and whether the seals can be replaced.
I will review the complete system with you, not just the number of seals.
Send the profile cross-section, dimensions and equipment. I will identify the differences that may matter to your project.
You do not need to know the AD and MD designations. A photograph of the cross-section, the system name or an extract from the quotation is enough.

22
Windows
8 min read
White or black PVC profile core?
The core mainly affects colour consistency in the rebate and the visibility of minor damage. By itself, it does not determine window quality.
Read more →
PVC windows · core colour
White or black PVC profile core?
The core is the material visible beneath the decorative layer of the profile. In a coloured window, its colour can affect the appearance of the open sash and any scratches, but it does not replace technical performance.
The short answer
A white core is the natural choice for white windows. With anthracite, black and other dark décors, a dark core usually produces a more uniform appearance in the rebate. Thermal performance, rigidity and durability, however, depend on the complete system rather than the colour of the PVC alone.
See the core in different situations
Select the core colour, then open the window or reveal a minor scratch. The diagram explains the aesthetic difference — it does not simulate the durability of a specific product.
Dark core + dark foil
Rebate appearance
The core colour is most visible when the sash is open, around the hardware grooves and on unfoiled edges.
Scratch visibility
If damage penetrates the décor, the contrasting white material may be more noticeable beneath a dark foil.
Not a thermal-performance value
Thermal performance depends on chamber geometry, material, glazing, gaskets, dimensions and the construction of the complete window.
What exactly is the profile core?
A PVC profile may have a white core or be coloured dark throughout. The décor — most commonly a foil reproducing a colour or texture — is then applied to its external surfaces. An ‘anthracite window’ may therefore have anthracite foil over either a white or dark substrate.
Also ask about the colour of the gaskets, spacers, glazing beads, hardware covers and handles. Together, these details create a coherent result.
Is a black core always better?
No. It is primarily an aesthetic choice with dark décors. A white core can be part of an excellent system, achieve the required performance and work correctly for many years. A dark core cannot compensate for poor glazing, unsuitable reinforcement or incorrect installation.
Do not confuse appearance with window quality
When comparing quotations, consider the core colour separately from profile depth, Uf and Uw values, glazing-unit build-up, gaskets, hardware and installation scope.
What should you check with dark-coloured windows?
- whether the décor is applied on one or both sides,
- the colour of the core, glazing bead and gaskets,
- whether the corners and grooves maintain a consistent appearance,
- the dimensional limits and required reinforcement,
- the manufacturer’s specified method for maintaining and repairing the décor.
Five questions before choosing
- Is the core colour specified in the quotation?Do not base the decision solely on a décor sample.
- Where will the window be white and where coloured?Confirm the internal side, external side and rebate.
- Is the glazing bead the same colour?This component is visible from inside the room.
- How are the corners finished?Ask to see a finished window, not only a profile sample.
- What is the performance of the complete construction?Assess the core only alongside the Uf and Uw values, glazing and reinforcement.
I will help ensure that every visible detail is coordinated.
Send the selected décor and quotation. I will check whether the core, gaskets, glazing beads, spacer and handles form a coherent whole.
You can send a photograph of the sample, a visualisation of the house or simply the décor name — we will check the remaining elements step by step.

23
Windows
9 min read
White or coloured windows — what should you know?
Colour changes more than appearance. With dark frames, solar exposure, dimensions, reinforcement and correct installation become more important.
Read more →
PVC windows · colour and use
White or coloured windows — what should you know?
White is neutral and reflects a large proportion of solar radiation. Dark décors make a stronger architectural statement, but on a sun-exposed elevation they require closer attention to dimensions, reinforcement, movement allowances and installation.
There is no single best colour
White windows are easy to coordinate and usually absorb less solar energy. Coloured windows allow the window and door systems to complement the elevation and interior. A good choice combines appearance with the window location, unit size and manufacturer’s requirements.
See how the required level of attention changes
Select the colour, orientation and size. The result does not give a profile temperature — it shows when system limits and the installation detail require particularly careful checking.
attention level
Colour and solar energy
A dark surface absorbs more solar radiation than a white one. The difference becomes more significant with strong exposure and limited shading.
Dimensions and thermal expansion
The larger the construction, the more important the permitted dimensions, reinforcement, divisions and specified installation clearances become.
Décor technology
Foil, a matt surface or a coloured coating may look and behave differently. Check the specific system.
White — simplicity and lower solar loading
White PVC is a classic choice that works easily with many interiors and elevations. A light surface generally absorbs less solar energy, so thermal stresses may be lower than with a very dark décor. This does not mean that a white window can be enlarged without limit — structural restrictions still apply.
Colour — a strong effect and more decisions
Colour may be applied on one side, both sides or with a different finish on each side. The external and internal décors and the colours of the core, glazing beads, gaskets, spacers, handles and hardware covers must be specified precisely.
With anthracite and black, coordination between the components is especially important. A complete corner sample or finished window reveals more than a small piece of foil.
Why does orientation matter?
South- and west-facing elevations can receive intense sunlight, particularly without eaves, external venetian blinds or roller shutters. North-facing elevations generally experience lower thermal loads but greater moisture exposure and slower drying. East receives morning sun, while west receives afternoon sun, often at a higher ambient temperature.
Colour never acts alone
Orientation, shading, size, divisions, profile material, reinforcement, opening method and installation all matter together.
What requires particular attention with large, dark-coloured windows?
- permitted dimensions for the selected system and décor,
- the type and arrangement of reinforcement,
- fixing points, clearances and support beneath the lower frame,
- limits for large sashes and heavy glazing,
- external solar shading to reduce overheating indoors.
Safe care
Clean profiles with a soft cloth and products recommended by the manufacturer. Avoid solvents, abrasives and unsuitable polishing products. Check the drainage, gaskets and hardware adjustment regularly. Do not attempt to repair a minor scratch with aggressive chemicals — first ask about the correct service method.
Quotation-comparison checklist
- Exact décor name‘Anthracite’ may refer to different shades, textures and finishes.
- One or both sides?Specify the external and internal colours separately.
- Colour of every detailCore, glazing beads, gaskets, spacer, handles and covers.
- Structural limitationsCheck them for the specific dimensions, décor and opening method.
- Warranty conditionsAsk about installation, maintenance and permitted shading solutions.
Let us coordinate all windows and doors as one coherent system.
Send a visualisation of the house, the elevation orientation and the window schedule. I will help check the colour, details and structural requirements.
If you do not have a visualisation, a photograph of the elevation, the roof colour name and its orientation are sufficient.
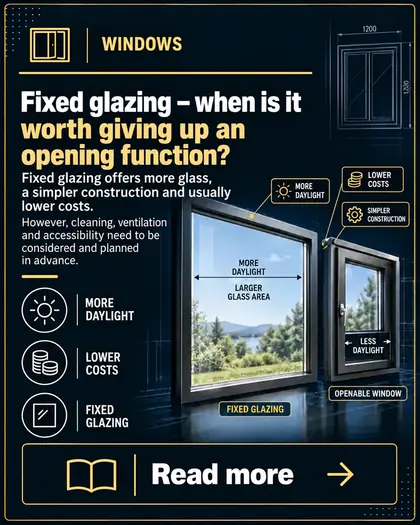
24
Windows
9 min read
Fixed window — when is it worth giving up the opening function?
Fixed glazing provides more glass, a simpler construction and usually a lower cost. Cleaning, ventilation and access must, however, be resolved in advance.
Read more →
Windows · function and divisions
Fixed window — when is it worth giving up the opening function?
Fixed glazing can offer better thermal performance, slimmer sightlines and a lower price than an opening sash. A good decision is not to replace every window with fixed glazing, but to retain opening functions deliberately where they are genuinely needed.
The key balance
Fixed glazing eliminates the hardware, handle and moving sash. You gain a larger glass area and fewer components requiring adjustment. You lose the ability to ventilate, clean the outside conveniently and gain direct access through that panel.
Click the panels and decide which should open
Each of the three panels can be changed from fixed glazing to an opening sash. See how the amount of framing, potential daylight and cleaning access change.
Click any panel to change its function
More light
Fixed glazing without a moving sash can have slimmer visible profiles and a larger glass area within the same opening.
Fewer mechanical components
No hardware or handle means fewer moving parts, adjustments and components subject to everyday wear.
More difficult access
A fixed panel cannot be opened for cleaning, ventilation or bringing in a large object. These issues must be resolved in advance.
Fixed glazing in the outer frame or in a sash frame?
Fixed glazing installed directly in the outer frame is the simplest option and can provide the largest glass area. Beside an opening sash, however, its visible profile width may be slimmer. Fixed glazing in a sash frame has no opening hardware but retains a visible width similar to the adjacent sash. This can make the divisions look more even.
The quotation should specify the type of fixed glazing and include a drawing showing the profile sightlines. An elevation alone, without a section, may not reveal the difference.
Where does fixed glazing work best?
- in large assemblies where one adjacent sash provides ventilation,
- on the ground floor, where the glass can be cleaned safely from outside,
- in stairwells and tall glazed areas designed with service access,
- in rooms with another opening window or planned ventilation,
- where the view, daylight and slim profile sightlines are priorities.
When should you retain an opening function?
Retain an opening sash where it is needed for everyday ventilation, safe cleaning, operation of solar shading or external access. On an upper floor, a large fixed panel without balcony access may require specialist cleaning.
Fixed glazing does not replace a ventilation design
Airtight fixed glazing does not supply fresh air. Trickle vents, mechanical ventilation and the option of purge ventilation must be considered for the room as a whole.
Safety and servicing
For low-level, large or impact-exposed glazing, check whether safety glass is required. Also plan the delivery route and possible replacement of a heavy glazing unit. Fixed glazing may be simple to use, but servicing still requires access from both sides.
Decision checklist
- How will I clean the outside?Check the actual reach, balcony or terrace access, or the need for technical access.
- How will the room receive fresh air?Consider other opening sashes, trickle vents and the ventilation system.
- Will the divisions look even?Compare fixed glazing in the outer frame with fixed glazing in a sash frame.
- Is safety glass required?The height of the lower edge, size and manner of use are relevant.
- What is the service and replacement route?A large glazing unit must remain removable and replaceable in future.
We will plan the functions so that you do not pay for unnecessary opening sashes.
Send the room plan and elevation. I will assess the view, cleaning, ventilation and the most practical layout.
You do not need to mark the fixed panels yourself. A drawing of the openings and details of the side from which cleaning access is available are sufficient.
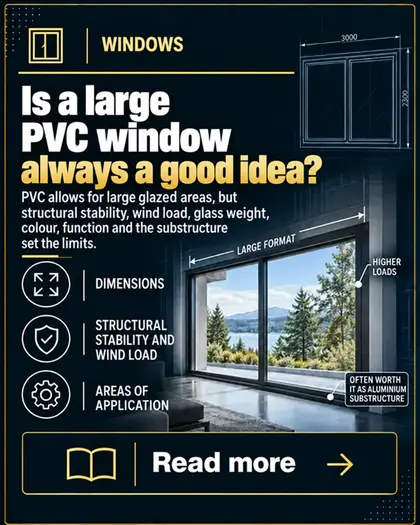
25
Windows
10 min read
Does a large PVC window always make sense?
PVC can be used for large glazed elements, but the limits are determined by structural performance, wind, glass weight, colour, function and the method of support.
Read more →
PVC windows · dimensions and structural performance
Does a large PVC window always make sense?
Not every large glazed unit needs to be aluminium, but not every design can be transferred safely to PVC. The larger the dimensions, heavier the glass and darker the profile, the more important the calculations and complete construction become.
The material is only one factor
Feasibility depends simultaneously on width and height, divisions, fixed or opening sections, glazing weight, wind load, colour, reinforcement, coupling profiles, fixing and load-bearing support. A technical specialist should therefore confirm the answer for the specific assembly.
See when the need for verification increases
Set the approximate dimensions, function and colour. The three indicators show design relationships — they do not replace structural calculations or manufacturer approval.
Dimensions
48
Sash movement
18
Thermal movement
24
Fixed glazing is structurally simpler
A fixed panel does not load hinges or change geometry when opened, but it must still withstand wind and glass weight.
An opening sash has limits
A heavy, wide sash requires suitable hardware and reinforcement, and must operate reliably without excessive deflection.
A dark profile undergoes greater thermal movement
On a sun-exposed elevation, a dark surface makes thermal expansion, fixing and the required clearances more important.
What limits the size of a PVC window?
The profile must retain sufficient rigidity under its own weight, the glass weight and wind pressure. The second moment of area of the reinforcement, the form of the steel section, spacing between fixing points and the use of mullions and coupling profiles are important.
The same dimensions may be permissible as fixed glazing but too demanding for a single opening sash. They may also work in white, while a dark décor requires an additional division or other restrictions.
Wind loading is not the same everywhere
A ground-floor window in a sheltered house is loaded differently from a construction on an upper storey, exposed site or building corner. Location, installation height, exposure and wind zone all matter. A catalogue dimension is therefore not the only answer.
Large dimensions require complete information
The technical specialist needs not only the width and height, but also the divisions, functions, glazing, colour, building height and installation method.
Why is glass weight so important?
A triple-glazed unit weighs considerably more than a drawing suggests. In a fixed panel, its weight must be transferred correctly through glazing blocks to the frame and substrate. In an opening sash, the hinges, hardware and corners also carry the load. Incorrect glazing-block placement can cause sash drop, stress or operational problems.
When should you consider a division or aluminium?
- when a single sash exceeds the capacity of the hardware or profile,
- when very slim frames are required across a large area,
- when the assembly is tall, wide and subject to high wind loads,
- when a dark construction is installed on a highly sun-exposed elevation,
- when PVC divisions become too bulky or require numerous coupling profiles.
Aluminium is not automatically required for every large window. It can, however, be the more suitable material when rigidity, slim sightlines and very large dimensions are priorities.
Installation is part of the construction
A large window requires continuous load-bearing support, particularly beneath mullions, coupling profiles and thresholds. Insulation layers must not carry loads for which they were not designed. Transport, unloading, the use of vacuum lifters or a crane and a safe delivery route must also be planned.
Pre-quotation checklist
- Exact dimensions and divisionsNot only the opening — include the width of each panel.
- Fixed or opening?The function can completely alter whether a construction is permissible.
- Glazing build-up and weightThe glazing build-up, lamination and toughening affect the weight.
- Colour and exposureConfirm the orientation, shading and building height.
- Structural performance and installation methodAsk for confirmation of the reinforcement, coupling profiles and support.
Let us check them before ordering, not only during installation.
Send the window and door schedule and elevation drawings. I will help identify panels that require calculations, a division or a change of material.
Include the largest dimensions, colour, opening method and building height. This is enough for an initial assessment.
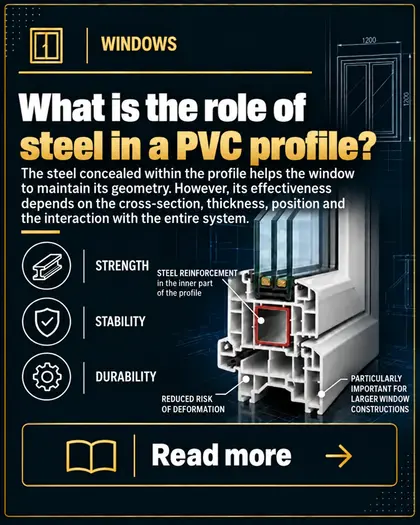
26
Windows
10 min read
What role does the steel inside a PVC profile play?
Steel concealed inside the profile helps the window retain its geometry, but its effectiveness depends on its cross-section, thickness, position and interaction with the complete system.
Read more →
PVC windows · reinforcement and structural performance
What role does the steel inside a PVC profile play?
A PVC profile provides thermal insulation and an attractive finish, but at larger sizes it needs a component that limits deflection and helps carry the glass weight and wind load. This concealed skeleton is usually steel reinforcement.
Answer in 30 seconds
Steel increases the stiffness of the frame, sash and mullions, but the statement ‘profile with steel’ says very little on its own. Check the shape and thickness of the reinforcement, how it fits the relevant chamber, how it is screwed in and whether the solution is approved for the window’s dimensions, colour, glazing and function.
See when reinforcement becomes more important
Select the construction type, size and colour. The tool will show which loads become more important and what information to obtain before ordering.
Element type
Dimensions
Colour
REINFORCEMENT
wind
weight
temperature
Geometry matters
A closed or suitably shaped section can be stiffer than a simple component assessed only by sheet thickness.
The steel must work with the profile
The reinforcement should fit the correct chamber and be fixed in accordance with the system requirements.
The window works as a complete system
The profile, steel, glass, hardware, coupling profiles, support and installation carry the loads together.
Why does a PVC profile need reinforcement?
PVC is a good insulator and enables multi-chamber profiles, but it is less stiff than steel or aluminium. The frame is subjected to the weight of the insulating glass unit, positive and negative wind pressure and temperature changes. Reinforcement limits deformation, stabilises the hardware fixing points and helps maintain correct sash compression against the seals.
It is not only about sheet thickness
Two inserts of the same thickness can have completely different stiffness. Width, height, the number of bends, an open or closed section and the position of the material relative to the load direction all matter. Quotations should therefore not be compared solely by the phrase ‘1.5 mm steel’ without knowing where it is used and what shape it has.
The key question
Do not ask ‘is there steel inside?’, but ‘what reinforcement is specified in the frame, sash and mullions for my particular window set?’
When does steel reinforcement become more important?
- in wide and tall sashes,
- in heavy balcony doors and constructions with laminated glazing,
- in dark profiles exposed to strong sunlight,
- in window sets exposed to higher wind loads,
- in mullions, transoms and connections between several elements.
Steel and thermal insulation
Metal conducts heat more readily than PVC, so manufacturers design the reinforcement position together with the chamber and seal geometry. Steel must not be removed in pursuit of a supposedly warmer profile, nor should more metal automatically be assumed to make a better window. The solution must balance stiffness, durability and thermal performance.
What else affects stability?
Even good reinforcement cannot compensate for incorrect support, too few fixings or unsuitable coupling profiles. For large window sets, check load transfer beneath the mullions, anchoring into the wall, the installation gap and sufficient allowance for thermal movement of the profiles.
Quotation-comparison checklist
- Reinforcement for each componentThe frame, sash, mullions and coupling profiles may require different sections.
- Shape and thicknessRequest a drawing or description, not merely a general declaration.
- Permitted dimensionsConfirm them for the colour, function and glazing weight.
- Hardware fixingCheck that the screws engage with the specified reinforcement.
- Support and installationVerify the load-bearing points and connection to the building structure.
Adviser’s tip
I do not assess a construction solely by the number of profile chambers or the declared steel thickness. I first consider its dimensions, function, glass weight, colour and the building’s exposure.
For large sashes, mullion reinforcement, hardware fixing and the permitted dimensions of the system are particularly important. Sometimes a different division is safer than adding further kilograms of steel.
A good quotation should clearly establish what is installed in each specific window. If the description is general, request technical confirmation before signing the order.
Let us check the reinforcement before the construction goes into production.
Send the window and door schedule, largest dimensions, colour and opening method. I will help identify the elements requiring closer verification.
You do not need to understand steel designations. The quotation or section drawings are enough—I will organise the questions and explain the differences in plain language.

27
Glass and daylight
10 min read
Toughened safety glass (ESG)—when is it needed?
ESG withstands impacts and temperature differences better and breaks into small fragments. It does not, however, replace laminated safety glass (VSG).
Read more →
Glass and daylight · safety
Toughened safety glass (ESG)—when is it needed?
Toughening increases a pane's resistance to impact and thermal shock, but does not address every safety requirement. The key question is what should happen after the glass breaks.
Answer in 30 seconds
ESG is worth considering where glass is exposed to impact, localised heating or intensive use. When broken, it disintegrates into many small fragments, reducing the risk of deep cuts. If the pane must remain in the opening or resist passage, VSG or a glazing unit combining both solutions may be required.
Select the appropriate glass-safety function
Select the location and main hazard. The result will indicate whether ESG, VSG or a combination of both technologies should be the starting point for the glass specification.
Location
Priority
ESG
Before breakageGreater impact resistance
ESG is more resistant
The toughening process increases the pane's mechanical and thermal resistance compared with ordinary annealed glass.
Breakage behaviour matters
When broken, toughened glass disintegrates into small fragments rather than large, sharp shards.
ESG does not retain the barrier after breakage
After disintegration, the fragments fall out. Laminated safety glass (VSG) retains the fragments on an interlayer.
How does toughening work?
The pane is heated and then rapidly cooled, creating a controlled stress pattern within the glass. This increases its resistance to impact and temperature differences. Once toughened, the glass cannot safely be cut or drilled—all processing must be planned in advance.
Where is ESG particularly useful?
- in all-glass doors and glazing along circulation routes,
- in low-level panes exposed to accidental impact,
- in enclosures, partitions and heavily used components,
- in locations susceptible to uneven heating,
- in selected large panes where required by the design or manufacturing process.
ESG or VSG?
ESG primarily provides greater resistance and safer breakage behaviour. VSG consists of panes bonded with an interlayer that holds the fragments together after breakage. Where fall protection, resistance to passage or retention of the barrier is important, ESG alone may be insufficient.
Functions can be combined
One glazing unit may contain toughened glass, laminated glass or a toughened pane that is subsequently laminated. Selection depends on the actual risk.
What increases the risk of thermal breakage?
Partial shading, dark curtains close to the pane, a radiator, applied film, a local heat source or strong sunlight can create large temperature differences within one pane. Toughening improves resistance to such loads, but does not remove the need to design the glazing unit and its surroundings correctly.
Marking and manufacturing quality
ESG should carry a permanent identification mark. Edges and all holes must be prepared before toughening, so the positions of hardware, handles, fixings and cut-outs must be known when the order is placed. A hole cannot be moved after production as it could in a furniture board.
Pre-order checklist
- Pane location and heightAssess user access and the possibility of accidental impact.
- What should happen after breakage?Disintegration into small fragments or retention of the glass in the opening?
- Thermal conditionsCheck sunlight, shading, radiators, applied films and shading systems.
- Glass processingAll holes and cut-outs must be known before toughening.
- Description in the quotationRequest clear identification of ESG and VSG and their positions within the glazing unit.
Adviser’s tip
I do not begin by asking whether the customer wants ‘safety glass’. I first identify the hazard: impact, cuts, falling, attempted passage or thermal stress.
For doors and low-level glazing, breakage behaviour is often important. For balustrades, fall protection or the need to retain a barrier, lamination and the fixing method must also be assessed.
The best decision depends on the precise location of the pane. The glass schedule should therefore state not only ESG or VSG, but also its position within the unit and the function of each layer.
Let us review the glazing room by room.
Send the plans, window and door schedule or photos of areas with large panes. I will help organise the risks and prepare questions for the quotation.
You do not need to decipher the markings yourself. Show me where the glass will be installed and how it will be used, and we will identify the right solution.

28
Glass and daylight
10 min read
Laminated glass (VSG)—what does it offer?
VSG bonds panes of glass with an interlayer that retains the fragments after breakage. The level of protection depends on the complete laminate build-up and the way it is retained.
Read more →
Glass and daylight · safety after breakage
Laminated glass (VSG)—what does it offer?
Two or more panes bonded by an interlayer form a glass panel that can remain intact after damage. This is entirely different from toughening alone and is important for protecting people and property and maintaining the closure of an opening.
Answer in 30 seconds
VSG retains glass fragments on the interlayer after breakage, limiting their dispersal and reducing the likelihood of an open gap forming immediately. Not all laminated glass provides the same protection: pane thicknesses, the number and type of interlayers, dimensions and retention in the frame all matter. VSG is not automatically security glass.
See how the laminate's function changes
Select the priority and glass location. The diagram provides direction for a discussion with the manufacturer—it does not replace a design or the classification of a specific product.
Primary function
Location
Pane
Interlayer
Pane
After breakageFragments remain bonded to the interlayer
The interlayer retains fragments
After breakage, the glass fragments remain bonded to the interlayer instead of falling freely.
The build-up determines the function
Pane thicknesses and the number of interlayer sheets affect the laminate's behaviour after damage.
The frame is part of the protection system
Even a strong laminate cannot perform correctly if the insulating glass unit is not properly supported and retained in the profile.
How is VSG constructed?
The simplest laminate consists of two panes with a polymer interlayer between them. During manufacture, the components are permanently bonded under heat and pressure. Following impact, the glass may crack, but the interlayer retains the fragments and limits their dispersal.
VSG and ESG perform different functions
Toughened ESG glass has greater resistance to impact and thermal stress and breaks into small fragments. Laminated VSG is designed to maintain integrity after breakage. The technologies can be used separately or combined where both greater resistance and fragment retention are required.
Define the required outcome first
Should the glass simply reduce the risk of injury, remain in the opening, protect against falling or make forced entry more difficult? Each need leads to a different specification.
Where should laminated glass be considered?
- in doors and low-level glazing,
- in large panes accessible to children or other users,
- in overhead glazing and locations where fragments must be retained,
- in areas where damage could create an opening to the outside,
- where the design specifies a protective function or required product class.
Is VSG burglar-resistant?
Lamination alone does not justify that description. Resistance depends on the complete glass build-up, number of interlayers, pane thicknesses, dimensions, frame, hardware and installation method. Check the specific classification of the complete solution in the quotation, not merely the abbreviation VSG.
Effect on acoustic performance and weight
Laminated glass can improve sound reduction, particularly with a suitable acoustic interlayer and an asymmetrical glazing build-up. It does not, however, automatically guarantee quiet. Additional panes and interlayers also increase glazing weight, which must be considered when selecting hardware, profiles, transport and support.
Pre-order checklist
- Full laminate specificationCheck the pane thicknesses and number of interlayers.
- Position within the glazing unitSpecify which pane, internal or external, is to be laminated.
- Required functionFragment retention, residual protection, fall protection or property security.
- Weight of the complete insulating glass unitConfirm that the hardware, sash and transport arrangements can accommodate it.
- Frame and installationVerify the edge cover, support and fixing of the complete unit.
Adviser’s tip
When a customer asks for safety glass, I always ask what it needs to protect against. The correct choice differs for a child colliding with a door, a risk of falling, or the protection of property.
I do not compare quotations solely by the abbreviation VSG. I check the full laminate specification, its position in the glazing unit and whether the frame and hardware are designed for the additional weight.
If a specific protective function is required, I ask for it to be clearly confirmed in the documentation. This ensures the customer knows what they are actually buying rather than relying on a marketing term.
Let us identify where VSG is genuinely justified.
Send me the window and door schedule or plans with the glazing marked. I will help distinguish areas requiring protection from those where the extra cost would provide no meaningful benefit.
You do not need to understand laminate codes. Simply describe the location and required protection—I will prepare the right questions for the quotation.

29
Glass and daylight
11 min read
Acoustic glass—how does it work?
Quiet does not come from thicker glass alone. Asymmetrical pane thicknesses, laminated glass, window airtightness, trickle vents, installation and the character of the noise all matter.
Read more →
Glass and daylight · acoustic comfort
Acoustic glass—how does it work?
Effective noise protection requires a glazing unit matched to the sound source and all routes by which sound can enter the room to be sealed. Even the best glass will not help if a trickle vent or installation joint remains the weak point.
Answer in 30 seconds
Acoustic glass works through suitable mass, differing pane thicknesses, varied cavity widths and sometimes a vibration-damping laminate. Performance must be assessed for the complete window, not the glazing alone. Rw describes laboratory sound insulation, while the C and Ctr adaptation terms help relate the result to the character of the noise.
See where sound can bypass the glazing
Select the noise source and ventilation method. The tool will show which components must be checked alongside the acoustic glazing unit.
Dominant noise
Air supply
Road traffic
glazing unit
closed
INTERIOR
Asymmetry helps
Panes of different thicknesses have different resonant frequencies and do not weaken the unit across the same frequency range.
Airtightness is essential
A small gap, trickle vent or defective installation joint can provide an easier path for sound than the glazing itself.
The type of noise changes the result
Heavy traffic, voices and high-frequency sounds have different characteristics, so a single figure cannot describe everything.
Why is thicker glass alone not enough?
Greater mass generally helps reduce sound transmission, but every pane has a frequency range in which its insulation falls. If identical panes are used, their weaker ranges can overlap. Varying the thicknesses shifts these effects and improves the performance of the complete unit.
The role of laminates and cavities
A specialist acoustic interlayer can damp vibration between panes. The cavity widths and entire glazing build-up also matter. A third pane alone does not guarantee a better result—an unsuitable symmetrical unit may provide less benefit than a well-designed triple-glazed unit.
The full specification matters
Ask for the glazing build-up and the performance of the complete window, not merely the marketing term ‘soundproof glass’.
How should Rw, C and Ctr be read?
Rw is a weighted sound reduction index obtained under test conditions. C and Ctr are spectrum adaptation terms that relate the result to different types of sound. For road and low-frequency noise, the value including Ctr may be particularly important, rather than simply choosing the highest Rw without context.
Common flanking sound paths
- a trickle vent with lower sound insulation than the window,
- the night-vent position or a tilted sash,
- insufficient compression or worn seals,
- voids or incompletely filled installation joints,
- a roller-shutter box, lightweight wall or another weaker part of the building envelope.
Assess the noise before choosing
A window for a quiet street is specified differently from one beside a major road, railway or airport. Day- and night-time sound levels, distance, storey, building orientation and the required room comfort all matter. A bedroom usually requires a more conservative approach than a corridor or utility room.
Acoustic quotation checklist
- Source and character of the noiseRoad, rail, voices, industrial premises or mixed noise.
- Performance of the complete windowDo not equate the glazing result with that of the complete product.
- Rw with adaptation termsCheck C and Ctr for the dominant source.
- VentilationCompare the trickle vent and method of air supply.
- Installation and adjacent elementsSeal the joint and check the roller-shutter box and wall.
Adviser’s tip
Before selecting the glass, I ask which sound is most troublesome and at what time. Constant road noise, passing lorries and conversations beneath the window each require a different approach.
I then identify the weakest item in the complete building envelope. There is little value in paying for excellent glazing if a standard trickle vent, leaky roller-shutter box or poor installation allows most of the noise through.
A good acoustic quotation should describe the complete construction and the conditions under which it performs. I also make clear that tilting the sash or using the night-vent position radically changes the effect experienced in the room.
Let us match the complete window to the actual noise source.
Send me the location, a photo of the façade, window dimensions and a description of the most noticeable noise. I will help check the glazing, trickle vents, roller shutters and installation scope.
You do not need to interpret Rw, C and Ctr yourself. I will compare the quoted values and identify where an extra cost may make a genuine difference.

30
Glass and daylight
Solar control glass—when is it worthwhile?
Preventing overheating is not about choosing the ‘darkest’ glass. Orientation, glazing area, g-value, daylight and external shading all matter.
Read more →
Glass and light · overheating protection
Solar control glass—when is it worthwhile?
Well-selected glass can reduce solar heat gain, but every such decision also affects daylight, the appearance of the façade and winter heat gains. The specification should therefore be matched to the particular façade, not merely to a product name.
Answer in 30 seconds
Solar control glass is particularly worth considering for large south- and west-facing glazing where there is a genuine risk of overheating and no effective external shading. Compare the g-value and light transmittance Lt. The lower the g-value, the less solar energy enters the interior, but the glass may also admit less light or alter colour perception. It is one part of the building’s overall energy balance, not an automatic substitute for roller shutters, external venetian blinds and appropriate ventilation.
Check whether solar control glass is justified here
Select the orientation, glazing area and shading. The result provides a direction for the design discussion—it does not replace an energy balance calculation.
Orientation
Glazing area
External shading
South · medium glazing area
The g-value describes energy
The g-value describes the proportion of solar energy that passes through the glazing into the interior.
Lt describes light
Two glass types with similar g-values can differ in light transmittance and colour neutrality.
Shading provides control
A roller shutter or external venetian blind blocks solar radiation before it reaches the glass and can be used only when needed.
What does solar control glass actually do?
A functional coating reduces the proportion of radiant energy entering the room. Modern selective glass can retain relatively high light transmittance with a lower g-value, but no option is entirely free of trade-offs.
Do not ask only for the product name
Ask for the specific g and Lt values of the complete insulating glass unit included in the quotation.
When does the risk of overheating increase?
- large areas of south- or west-facing glass,
- no trees, canopies or external shading,
- a room on the top floor or with low thermal mass,
- high internal heat gains from occupants and equipment,
- limited ventilation or cooling options.
Why can west be more challenging than south?
In summer, the western sun is low when the building is already warm. Conventional eaves may then provide less effective shading than on a south-facing façade. Large west-facing glazing therefore requires a particularly considered combination of glass and movable shading.
Light, colour and view
A lower g-value does not automatically indicate how much light the user will perceive. Lt, external and internal reflection and any glass tint must be assessed separately. When different glazing units are combined on one façade, samples should be viewed side by side, preferably in daylight.
Glass or external shading?
Glass works continuously and requires no operation. External shading can respond to the weather and time of day and, when raised, does not restrict daylight. A balanced combination is often best: moderately selective glass with an automatically controlled external venetian blind or roller shutter.
Pre-order checklist
- Orientation and shadingAssess each façade separately, including neighbouring buildings and trees.
- g and Lt valuesCompare them for the specific glazing unit, not for a general product family.
- Appearance of the glassAssess reflection, tint and the visual consistency of the glass across one façade.
- Shading and controlsDefine their type, power supply, sensors and safety position.
- Whole-building energy balanceConsider heating, cooling, ventilation and winter solar gains.
Adviser’s tip
I do not recommend the same solar control glass for every window. I first divide the façades by orientation, glazed area and shading options. A specification that is beneficial on the west may be unnecessary on the north.
I compare g and Lt together because the client should experience less overheating without unknowingly losing daylight. For very large glazing, I also request a visual glass sample and confirmation that all panes across the façade will match.
If the building has effective external shading, I consider its control strategy as part of the decision. Glass, external venetian blinds, ventilation and cooling should form one integrated system.
Let us assess the risk of overheating before selecting the glazing unit.
Send the plans, orientations, glazing dimensions and information about roller shutters, external venetian blinds or canopies. I will help you compare g, Lt and the available protection options.
You do not need to interpret glass data tables yourself. I will organise the quotation parameters and show where solar control glass is justified and where it could unnecessarily restrict daylight.
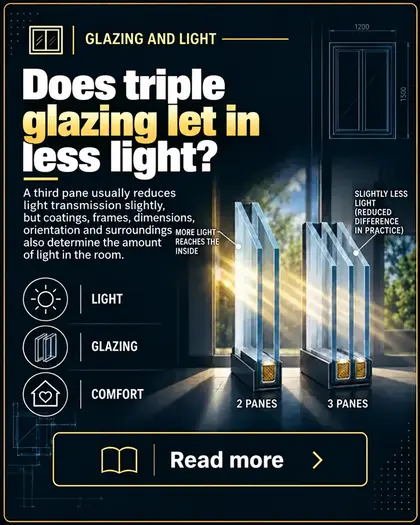
31
Glass and daylight
Does triple glazing let in less light?
A third pane usually reduces light transmittance slightly, but coatings, frames, dimensions, orientation and the surroundings also determine how bright the interior feels.
Read more →
Glass and light · Lt light transmittance
Does triple glazing let in less light?
An additional pane and coating can block some light, but the number of panes alone is not enough to assess interior brightness. The most important factors are the Lt value of the specific glazing unit, the actual glass area and the conditions beyond the window.
Answer in 30 seconds
Yes—a typical triple-glazed unit usually transmits slightly less visible light than a comparable double-glazed unit because the light passes through an additional pane and coating. The difference is not always large and cannot be assessed from the number of panes alone. Ask for the Lt value of the specific unit. Also check the frame dimensions, glass area, reveal colour, window orientation and shading. A large triple-glazed window may provide more light than a small double-glazed one.
See what really affects the brightness of a window
Select the glazing unit, glass type, frame and window size. The tool will display an educational light index and the values worth asking about in a quotation.
Glazing unit
Glass type
Frame and dimensions
Triple glazing · Lt approx. 74%
Check Lt
Visible-light transmittance relates to the specific unit construction, coatings and glass type.
Glass area matters
A wider profile and numerous divisions can reduce light more than a small difference between glazing units.
The room affects perception
Orientation, room depth, a balcony, trees and wall colours all affect whether a space feels bright.
What does the Lt value mean?
Lt indicates what proportion of the visible light falling on the glazing passes through the unit. A higher number means greater transmittance, but it does not show how the light will be distributed within the room. Use the documentation for the exact glazing make-up, not a general catalogue value.
Why is there a difference between double and triple glazing?
At every material interface, some light is reflected or absorbed. An additional pane and low-emissivity coating can therefore reduce Lt slightly. Modern high-transparency glass can limit this loss, so two triple-glazed units may achieve different results.
The same number of panes, a different result
Standard, solar-control, acoustic and laminated glazing may have different transmittance despite having the same number of cavities.
Frames and divisions also reduce light
In small windows, the profile occupies a large proportion of the opening. A wide frame, a flying or fixed mullion and additional divisions reduce the glass area. When comparing systems, therefore, compare the clear glass dimensions rather than only the overall window dimensions.
Why can a large glazed area still be very bright?
Even with a slightly lower Lt value, a larger glass area provides plenty of light. Room depth still matters: the area beside the façade may be bright, while the rear of the room may require a well-planned layout, light-coloured surfaces or additional openings.
Common comparison mistakes
- judging by the number of panes alone,
- comparing the glass Lt value with a value for a different complete window,
- overlooking safety, solar-control or patterned glass,
- ignoring the profile width and number of divisions,
- assessing a small sample without considering the whole façade.
Checklist for a bright interior
- Lt of the specific glazing unitAsk for the value for the complete glazing make-up.
- Clear glass dimensionsCompare the actual glass area after deducting the frames and mullions.
- OrientationAllow for balconies, canopies, neighbouring buildings and vegetation.
- Additional functionsCheck the effect of solar-control, VSG laminated, acoustic and patterned glass.
- Sample appearanceAssess the colour and reflections from inside and outside.
Adviser’s tip
When a client is concerned that the interior may be darker, I do not answer simply ‘double’ or ‘triple glazing’. I compare the Lt values of the specific units and check how much glass will actually remain after allowing for the frames and divisions.
In large glazed areas, a small difference in Lt may be less noticeable than in a small window with a wide profile. Conversely, solar-control, laminated or decorative glass may affect the result more than the additional pane itself.
If daylight is crucial, coordinate the windows with the interior design and shading. The most thermally efficient glazing should not be selected without considering occupant comfort.
Let us compare not only the number of panes, but also the actual Lt value and glass area.
Send me the window dimensions, divisions, selected glazing units and a photo of the façade. I will help compare daylight, thermal performance and the additional functions of the glazing.
You do not need to interpret every designation yourself. I will identify which differences may be visible in the room and which data to request from the seller.

32
Glass and daylight
Why does condensation form on the outside of the glass?
Moisture on the outer pane often appears precisely with well-insulated glazing. Surface temperature, humidity, the night sky and air movement determine whether it occurs.
Read more →
Glass and light · external condensation
Why does condensation form on the outside of the glass?
In the early morning, the outer pane may become colder than the surrounding air. When its temperature falls below the dew point, water vapour condenses on the glass—like dew on grass or a car body.
Answer in 30 seconds
Condensation on the outside of the glass is usually not a defect. It occurs on cool, humid and still nights when the outer pane radiates heat towards a clear sky and cools below the dew point. In a well-insulated glazing unit, little heat from the room reaches the outer pane, so it can remain cold. The condensation usually clears when the sun warms the glass or when humidity and air movement change.
See when dew may form on the outer pane
Select the temperature, humidity, cloud cover and glazing type. This educational calculation illustrates the relationship; it is not a forecast for a specific window.
Air temperature
Relative humidity
Night sky
Insulating glass unit
Condensation highly likely
The dew point matters
Condensation begins when the glass surface is colder than the temperature at which moisture condenses from the air.
Good insulation keeps the outer pane cooler
Reduced heat flow from the home means that the outer pane is not continually warmed from inside.
Sunlight usually clears the condensation
As the glass warms, its surface temperature rises and the condensed moisture evaporates.
Why does the glass become colder?
On a clear night, surfaces facing the sky lose energy through radiation. The outer pane may temporarily become colder than the air. Clouds limit this effect because they act as a warmer ‘cover’ across the night sky.
Why is it seen more often on high-performance glazing?
A glazing unit with a low Ug value reduces heat loss from the room. The interior therefore loses less energy, but the outer pane also receives less heat from inside. Its surface may consequently reach the dew point more readily. The phenomenon alone does not prove the quality of the window, but it is often consistent with good insulation.
This is not ‘water coming out of the window’
The droplets come from moisture in the outdoor air and settle on the cold surface.
When is the phenomenon most visible?
- after a clear, humid night,
- early in the morning, before direct sunlight,
- when there is little air movement,
- near lawns, bodies of water or dense vegetation,
- on areas of glass with the greatest exposure to the night sky.
Why do not all panes mist up in the same way?
A canopy, balcony, recess, roller shutter, trees and neighbouring buildings alter heat exchange and air movement. One pane may therefore be misted while another remains clear. The visible droplet pattern does not always reflect a difference in glazing performance.
How can the three condensation locations be distinguished?
Moisture on the outside can be wiped from the façade side and usually disappears as the weather changes. Internal condensation occurs when the surface is too cold or the indoor humidity is high. Misting between the panes that cannot be wiped from either side may indicate failure of the glazing-unit seal.
When should the issue be reported for inspection?
- Identify the side of the glassCarefully check whether the moisture can be wiped from the outside or inside.
- Take a photograph in the morningNote the time, weather and location where it occurs.
- Observe how long it takes to clearTypical external dew disappears when the glass or air warms or dries.
- Compare adjacent panesConsider canopies, roller shutters, vegetation and air movement.
- Report misting between the panesIf it cannot be removed from any accessible surface, the glazing unit must be inspected.
Adviser’s tip
When a client shows me misted glass, I first establish the precise location of the moisture. Otherwise, normal external dew can easily be confused with internal condensation or a failed glazing unit.
If the droplets are on the façade side, appear mainly in the morning and disappear in sunlight, I explain the dew-point mechanism. I do not claim, however, that every instance of misting automatically means ‘the most thermally efficient window’; the conditions and overall pattern must always be assessed.
A photograph taken before wiping, information about the weather and precise identification of the pane are usually enough for an initial assessment.
Let us first establish which side the moisture is on.
Send a photograph of the whole window and a close-up of the glass, ideally in the morning before wiping it. Tell me whether the condensation clears in sunlight and from which side it can be removed.
Based on these observations, I will help distinguish external dew, internal moisture and possible glazing-unit seal failure, and recommend the next step.
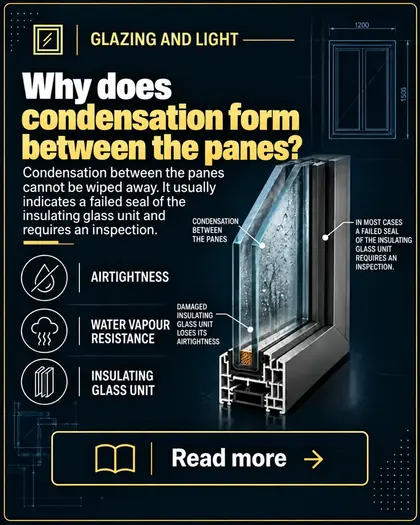
33
Glass and daylight
Why does condensation form between the panes?
Misting trapped within the glazing cavity cannot be wiped away. It usually indicates failure of the unit seal and requires the glass to be inspected.
Read more →
Glass and light · glazing-unit integrity
Why does condensation form between the panes?
The cavities within an insulating glass unit should remain hermetically sealed. When the edge seal no longer protects the interior of the unit, humid air can enter between the panes and create misting that cannot be removed from the accessible surfaces.
Answer in 30 seconds
If condensation is between the panes and cannot be wiped away from either the room side or outside, the insulating glass unit has probably lost its seal. Moisture has entered the cavity and the desiccant in the spacer can no longer absorb it. Usually only the glazing unit needs replacing, not the entire window, provided that the frame, sash and other components remain serviceable. Before reporting the issue, take photographs, note the date and check the warranty terms.
Check where the condensation really is
Perform a simple wiping test and select when the misting appears. The tool will indicate the most likely diagnostic route.
After wiping inside
After wiping outside
When is it visible?
outsideinsideMoisture between the panes
The cavity must remain sealed
The edge seal limits the passage of water vapour and maintains the conditions designed for the unit.
The spacer contains a desiccant
The hygroscopic material absorbs small amounts of moisture, but its capacity is limited.
The entire window does not always need replacing
If the profile and hardware are serviceable, the damaged glazing unit can usually be replaced on its own.
How is an insulating glass unit sealed?
The panes are separated by a spacer and joined around the entire perimeter by a sealing system. One layer limits the transmission of water vapour and gas, while the other mechanically protects the edge seal. The spacer contains a desiccant that binds residual moisture from the manufacturing process.
What happens when the seal fails?
Humid air gradually enters the cavity. Once the desiccant can no longer absorb it effectively, mist or droplets form on the cold pane. At first, the issue may appear only in certain weather conditions and then become persistent over time.
Argon loss cannot be seen with the naked eye
The presence or absence of gas does not itself create a visible ‘cloud’. Misting results from moisture within the cavity.
What can damage the edge seal?
- a defect in or ageing of the sealing material,
- damage to the edge during transport, glazing or use,
- prolonged contact between the edge of the unit and water,
- incorrect support or sash movement that places stress on the glass,
- very large temperature and pressure changes acting over many years.
Can an insulating glass unit be dried without replacement?
Drilling the unit or temporarily removing the moisture does not restore the factory seal, the correct desiccant or the declared thermal performance. The lasting solution is usually replacement with a unit manufactured to the correct dimensions and specification.
What should be checked before ordering replacement glazing?
The exact dimensions, overall unit thickness, pane make-up, spacer type, coatings, safety glass, pattern, colour and any glazing bars are required. Reproducing the dimensions alone without the functions of the original unit may alter the window’s appearance or performance.
How should a report be prepared?
- Confirm the location of the moistureCheck the accessible surfaces without dismantling the window.
- Create a photographic recordA photograph of the entire sash, a close-up and a photograph of the markings on the spacer will make identification easier.
- Find the documentsPrepare the quotation, invoice, order number and warranty terms.
- Do not interfere with the glazing unitDo not drill the unit or remove the glazing beads without agreeing this with the service team.
- Check the remaining panesNote whether the problem affects one pane or several.
Adviser’s tip
First, I ask the client to perform a simple wiping test on both accessible sides. A photograph taken against the light helps show whether the misting is actually within the cavity.
If the glazing unit seal has failed, I check the documentation and the exact glazing make-up. A replacement must preserve not only the dimensions, but also the thickness, coatings, safety, acoustic performance and appearance.
I do not recommend attempting to drill the glass at home. This may complicate a warranty claim, does not restore the original performance and does not remove the cause of the failed seal.
Let us check whether the insulating glass unit needs to be reported or replaced.
Send a photograph of the whole window, a close-up of the misting, the markings on the spacer and the purchase document, if available.
I will help identify the location of the moisture, prepare complete information for the service team and check which performance values the new unit must retain.
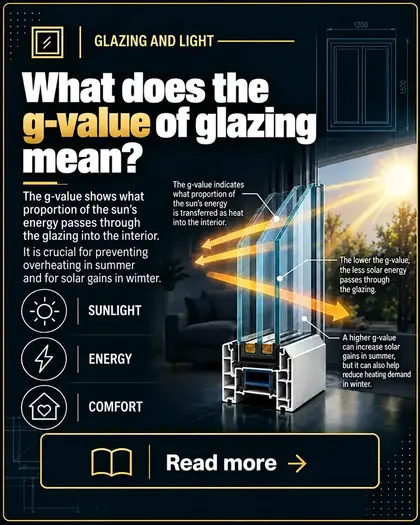
34
Glass and daylight
What does the glazing g-value mean?
The g-value shows what proportion of solar energy passes through the glazing into the interior. It is a key parameter for summer overheating and winter solar gains.
Read more →
Glass and light · solar energy
What does the glazing g-value mean?
A single figure describes how much of the total solar radiation energy passes through the unit, both directly and secondarily after the glass has warmed. It does not, however, show how much visible light will enter or how well the glazing limits heat loss.
Answer in 30 seconds
The g-value defines the total solar energy transmittance of the glazing. When g is 0.50, approximately 50% of the energy falling on the glass reaches the interior, while the remainder is reflected or released outside. A lower g-value reduces summer overheating but may also reduce useful winter solar gains. The g-value should not be confused with Ug, which describes heat loss, or Lt, which relates to visible light.
See how much solar energy passes through the glass
Select the g-value, level of sunlight and shading. The diagram separates the property of the glass from the actual load on the room.
g-value
Solar exposure of the façade
External shading
Entering the interior out of 10035
g describes energy
It includes radiation passing through directly and the proportion of heat released to the interior by the warmed glass.
Lt describes light
Glazing units with similar g-values may differ in brightness, reflection and colour neutrality.
Ug describes heat loss
This is a different mechanism: Ug relates to heat flow caused by the temperature difference across the glazing.
What makes up the total solar gain?
Some radiation passes directly through the glass. Another proportion is absorbed by the panes, warms them and is subsequently released on both sides. The g-value combines the direct energy with the proportion of secondary energy released into the room.
Is the lowest g-value always best?
No. A very low g-value may be beneficial on a highly exposed façade, but unnecessary on a north-facing or well-shaded window. It also limits winter solar gains and, depending on the product, may affect Lt, colour and reflectivity.
Assess each elevation separately
The same glazing unit may not be optimal for north-, south- and west-facing elevations.
g-value and external shading
The g-value applies to glazing in a particular configuration. A roller shutter, external venetian blind, screen, canopy or tree changes the amount of radiation reaching the glass. Movable shading has the advantage that it can limit energy in summer and uncover the window when daylight and solar gains are wanted.
How should solar-control glass be compared?
Alongside g, check Lt, external and internal light reflection, the colour seen through the glass and the visual consistency of panes on the same elevation. The ratio of Lt to g is a useful guide, but the final choice should consider comfort throughout the building.
Common mistakes
- selecting the lowest g-value for every orientation,
- confusing g with Ug or Uw,
- overlooking Lt and the appearance of the glass,
- failing to account for roller shutters, external venetian blinds and canopies,
- comparing values for units of different thicknesses and constructions.
Quotation checklist
- Exact glazing-unit g-valueAsk for the value of the glazing included in the quotation.
- Lt light transmittanceCheck how much light remains with the selected solar protection.
- Orientation and areaAssess the orientation and size of each glazed item.
- ShadingAllow for canopies, balconies, trees and planned shading systems.
- Façade appearanceCompare samples, particularly when different glazing units are used on the same façade.
Adviser’s tip
I do not select a g-value solely because a project has ‘large glazing’. I first check the orientation, shading, glass area, function of the room and available cooling.
I then compare g with Lt. The client should know not only how much energy the glass will block, but also whether the amount of light, reflection and colour perception will change.
Different glazing units may be appropriate on different elevations, but I ensure their appearance remains consistent. Technical performance and the appearance of the home must be coordinated together.
Let us assess the glazing together with the home's orientation and shading.
Send the window schedule, plans showing orientation, and information about roller shutters, external venetian blinds or canopies. I will help clarify the g-value, Lt and function of each glazing unit.
You do not need to interpret the tables yourself. I will show where a lower g-value may improve comfort and where it would unnecessarily reduce solar gains or light.
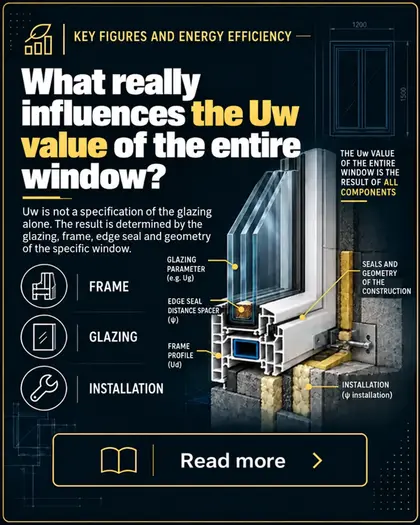
35
Performance and energy efficiency
What really affects the Uw value of a complete window?
Uw is not a value for the glass alone. It is determined by the glazing, frame, edge of the glazing unit and geometry of the specific window.
Read more →
Performance and energy efficiency · complete window
What really affects the Uw value of a complete window?
The glass usually occupies the largest area, but the frame and glazing-unit perimeter can significantly alter the result. The same system and identical Ug value therefore do not guarantee the same Uw value for a small window, a large fixed window and a balcony door.
Answer in 30 seconds
Four main elements affect Uw: the glazing Ug value and area, the frame Uf value and area, the linear Ψg value at the edge of the glazing unit, and the length of that edge. The total is related to the area of the complete window. The greater the proportion of high-performance glazing and the smaller the perimeter in relation to the area, the more favourable the result may be. Uw should therefore be checked for the actual dimensions and divisions, rather than copied directly from a reference window.
See which component has the greatest effect on the result
Select the window format and the values for the glass, frame and edge. The result is indicative and illustrates the calculation method for a simple, single-sash window.
Window format
Glazing Ug
Frame Uf
Edge Ψg
123 × 148 cm
Ug applies to the centre of the glazing
It does not include the profile or the linear thermal bridge at the spacer.
Uf applies to the frame
The result depends on the profile, reinforcements, joints and actual configuration of the frame components.
Ψg describes the glass edge
When multiplied by the perimeter length, it shows the additional heat flow at the junction between the glazing and frame.
How is Uw calculated?
In simplified terms, the losses through the glass and frame and the linear effect of the glazing perimeter are added together, then divided by the area of the complete window. Each component has its own value and geometric dimension, so changing the size or divisions changes the result.
Ug is not Uw
Quoting Ug = 0.5 in the description of a complete window without providing Uw may mislead the client.
Why can a larger window have a better value per square metre?
In a large, simple window, the glazing forms a greater proportion of the area and the frame and spacer perimeter is relatively smaller. If Ug is better than Uf, the higher proportion of glazing can reduce the average Uw value. This does not mean lower total heat loss, however, because a large window has a greater area.
How do divisions change the result?
Every mullion, transom and additional sash increases the profile area and length of the glass edge. Two windows with identical overall dimensions can therefore have different Uw values if one is fixed and the other has multiple sashes.
The importance of a warm-edge spacer
A lower Ψg reduces the linear thermal bridge around the glazing unit and may raise the temperature at the inner edge of the glass. In small windows and multi-pane constructions, the edge length is large in relation to the area, so the effect of the spacer becomes more noticeable.
Product Uw and installation quality
Uw describes a window as a product in a particular configuration. It does not include losses through the window-to-wall junction, threshold, support or thermal bridges in the wall. A high-performance product can lose some of its advantage if it is poorly aligned, supported or sealed.
Uw comparison checklist
- Actual dimensionsAsk for the result for the specific window, not only the reference window.
- Divisions and opening methodCheck the number of sashes, mullions and fixed panes.
- Ug, Uf and ΨgCompare the components behind the final result.
- Complete glazing make-upInclude the warm-edge spacer, safety glass and additional functions.
- InstallationDistinguish the product value from the quality of the connection to the building.
Adviser’s tip
When two quotations state different Uw values, I first check whether the results apply to the same dimensions, divisions and opening method. Without this, comparing the figures alone may be misleading.
I also ask for Ug, Uf and information about the spacer. This reveals whether the better result comes from the glass, profile, geometry or simply a different reference window.
Finally, I consider the product value together with the installation. The client needs both a good window and a good junction—one cannot replace the other.
Let us compare the result for the same dimensions and divisions.
Send the window and door schedules with the Ug, Uf and Uw values and a description of the spacers. I will check what is really causing the difference.
You do not need to calculate every window yourself. I will organise the components, identify missing data and distinguish the product result from the installation scope.
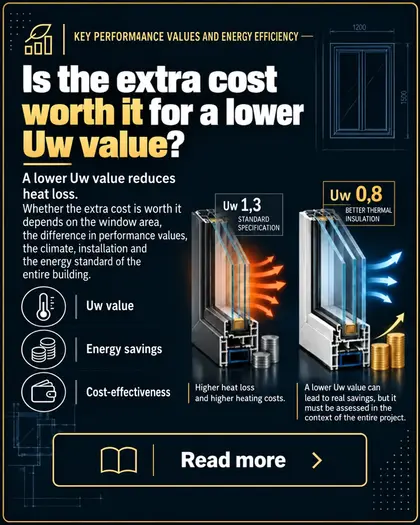
36
Performance and energy efficiency
Is it worth paying extra for a lower Uw value?
A lower Uw value reduces heat loss, but whether the extra cost is worthwhile depends on the window area, difference in performance, climate, installation and the standard of the building as a whole.
Read more →
Performance and energy efficiency · cost effectiveness
Is it worth paying extra for a lower Uw value?
Every reduction in Uw decreases heat flow through the windows, but not every additional cost delivers the same result. The total window area, actual difference in performance, climate, heating method and installation quality matter most.
Answer in 30 seconds
Paying extra for a lower Uw value is worthwhile when the improvement applies to the actual windows offered—not merely a reference unit—and suits the standard of the building as a whole. The benefit increases with the total window area, the difference in Uw and the length of the heating season. A lower Uw can reduce energy use and raise the internal surface temperature, but it does not by itself guarantee a quick payback. The extra cost, installation, heat source, building airtightness and other sources of heat loss must be compared together.
Check the scale of the difference between two Uw options
Select the total window area, current and improved Uw values and seasonal conditions. The result shows an indicative difference in the energy transmitted through the windows.
Total window area
Baseline Uw option
Improved Uw option
Seasonal conditions
Uw 1.0Baseline option
Uw 0.7Improved option
The difference in Uw matters
An improvement from 1.1 to 0.7 has a different effect from an expensive improvement from 0.8 to 0.7.
Area amplifies the effect
The greater the total window area, the greater the overall difference in heat flow.
Installation must keep pace
Poor support, air leakage and a thermal bridge at the installation joint can reduce the benefit of a better product.
What does a lower Uw provide?
A lower value means less heat flow through each square metre of window at the same temperature difference. In addition to reducing energy demand, it can improve comfort near the glazing because the internal surface usually remains warmer.
Why is it impossible to promise one fixed saving?
The bill depends on the weather, indoor temperature, airing habits, solar gains and the type and efficiency of the heat source. The same number of kilowatt-hours also has a different value with a heat pump, gas, electricity or another fuel.
Energy first, money second
A fair comparison shows the estimated energy difference first and only then relates it to the specific heating system.
A new home or replacement of old windows?
In a new, well-insulated building, the windows should suit the energy design and ventilation strategy. Replacing very old windows can deliver a major improvement, but airtightness will also increase, so the air supply and ventilation performance must be checked.
When does the extra cost make more sense?
- with a large total window area,
- in a colder location with a long heating season,
- in a building with well-insulated walls, roof and floor,
- when the improved Uw applies to the actual dimensions and configurations,
- when the installation limits thermal bridges and air leakage.
Where do diminishing returns occur?
Each further improvement reduces losses, but may require an increasingly large additional cost. If the windows already perform very well, improving the installation, solar shading, ventilation or another weak item of the building may provide better value for the budget.
Checklist before paying extra
- Uw of the actual windowsCompare identical dimensions, configurations and functions.
- Total areaAssess the scale of the difference across the complete window schedule.
- Additional costSeparate the glazing, profile, spacer and installation costs.
- Building standardCheck the other elements of the envelope, ventilation and heating.
- Comfort, not just the billConsider the surface temperature and comfort near large panes.
Adviser’s tip
I first compare the Uw values of the specific items, not the best figure in a catalogue. I then apply the difference to the total window area to see the scale of the potential benefit.
I do not quote a payback period without information about the additional cost, location and heat source. I also identify comfort benefits that a simple financial calculation does not show.
If the budget is limited, I maintain the correct priorities: a sound design, a stable unit, appropriate glazing, a warm-edge spacer and, above all, correct installation.
Let us check exactly what you are paying extra for and the scale of the difference.
Send both quotations, the window dimensions, the additional cost and information about the building and heating. I will compare the specifications item by item.
You do not need to calculate cost effectiveness yourself. I will separate genuine improvements from catalogue values and show where the budget may deliver a greater benefit.
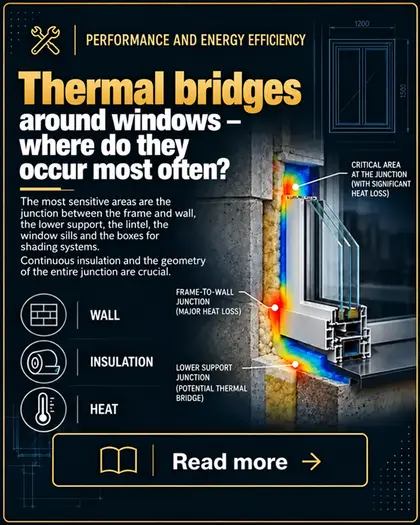
37
Performance and energy efficiency
Thermal bridges around windows—where do they occur most often?
The most vulnerable areas are the frame-to-wall junction, lower support, lintel, window sills and shading-system boxes. Continuity of insulation and the geometry of the complete detail are crucial.
Read more →
Performance and energy efficiency · installation detail
Thermal bridges around windows—where do they occur most often?
A window interrupts the continuity of the wall, so the temperature at the junction is determined not only by the product, but also by the frame position, reveal insulation, lower support, window sills and shading components.
Answer in 30 seconds
Thermal bridges most often occur around the window perimeter: at the jambs and lintel, beneath the threshold or lower frame, at the window sills and around roller shutter or external venetian blind boxes. The risk increases when the wall insulation does not meet the frame, the window is positioned in an unfavourable part of the wall, the support is highly conductive or the installation joint contains voids. Tapes improve airtightness and protect the foam, but cannot replace continuous insulation or a properly designed detail.
Find the most vulnerable area
Select the window position, support method, joint protection and box preparation. The map will show the relative risk in four areas.
Window position
Lower support
Joint and insulation
Shading-system box
Highest risk: lower support
Continuity of insulation
The wall insulation should meet the frame without voids or conductive breaks.
Airtightness and weathertightness are separate functions
The sealing layers control air and moisture, but cannot correct poorly designed thermal geometry.
The lower detail requires support
The item must both carry the weight and limit heat flow beneath the frame or threshold.
What is a thermal bridge around a window?
It is an area where heat flow is greater than through the adjacent part of the building envelope. It may result from corner geometry, a break in the insulation or the use of a highly conductive material. The consequences can include greater energy loss and a lower internal surface temperature.
Jambs and lintel
If the frame remains uncovered by insulation and the installation gap is uneven or incomplete, a colder perimeter forms around the window. The favourable window position depends on the wall type, insulation thickness, fixing method and the feasibility of completing the finishing layers.
Lower detail, threshold and window sills
The lower detail carries the window’s weight, so it cannot be filled solely with soft foam. Stable support matched to the system is required, together with continuous insulation between the interior, frame and window sill or terrace area.
Stability and thermal performance must work together
A thermally insulating material without adequate load-bearing capacity is just as unsuitable as strong but highly conductive support.
Roller shutter and external venetian blind boxes
The box, guide rails, recess and service penetrations alter the insulation arrangement at the lintel. Problems arise when the system is added after the design has been completed or there is insufficient space for continuous insulation and a sealed connection to the window.
Foam and tapes—what is their role?
Foam forms an insulating layer within the joint, provided that it is continuous and protected. The internal layer limits the movement of moist indoor air into the joint, while the external layer protects it from the weather and allows it to dry. This arrangement improves durability and sealing, but cannot replace reveal insulation and correct support.
Checklist for a detail without unintended gaps
- Wall sectionEstablish the wall material and insulation thickness.
- Frame positionDesign the projection and fixing method.
- Lower supportCombine load-bearing capacity with insulation and window sill levels.
- Joint perimeterEnsure continuity of the foam, tapes and insulation.
- External shadingAllow for boxes, guide rails, cables and space for insulation.
Adviser’s tip
Before pricing the installation, I ask for the wall section, insulation thickness, floor levels and information about window sills and shading. Without these details, ‘warm installation’ remains only a label.
I pay particular attention to the lower detail and the lintel with a box. These are the areas where structural, thermal, sealing and finishing requirements meet.
If the detail is unusual, a drawing or calculation should be prepared before the windows are ordered. Correcting a thermal bridge after installation is usually more difficult and more expensive.
Let us check the entire window perimeter before work begins.
Send the wall sections, opening plans, floor levels and information about window sills, roller shutters or external venetian blinds.
I will help identify areas requiring further design and prepare questions for the contractor before the windows arrive on site.

38
Performance and energy efficiency
Windows and the energy performance certificate
Windows affect heat loss, solar gains and the energy balance, but the certificate assesses the whole building—including its envelope, ventilation, heating and auxiliary energy.
Read more →
Performance and energy efficiency · building energy balance
Windows and the energy performance certificate
The certificate does not assess the windows alone. Uw, area, orientation and solar energy transmittance form part of the model of the whole building, together with the walls, roof, ventilation and building services.
Answer in 30 seconds
Better windows can improve a building’s energy performance by reducing transmission heat losses, while appropriately selected glazing also affects solar gains. The certificate result cannot, however, be predicted from Uw alone. The area and orientation of the windows, glass g-value, shading, airtightness, ventilation, heating, domestic hot-water preparation and the other elements of the envelope also matter. A reliable calculation requires the building documentation, not merely a product data sheet.
See when window performance genuinely changes the building’s energy balance
Set the proportion of windows, Uw and ventilation type. The tool will show the relative importance of the windows within the overall balance and list the data needed for a proper assessment.
Proportion of windows in the façades
Uw of the window schedule
Ventilation
ROOFWINDOWSWALLSVENT.
Uw is one item of data
It describes heat transmission through the complete window, but does not cover every gain and loss in the building.
The glazing interacts with the sun
Area, orientation, shading and g-value affect solar gains.
Building services change the result
Ventilation, heating, domestic hot water and auxiliary energy form part of the overall assessment.
What does the certificate actually describe?
The certificate presents the energy performance of a building or part of a building in accordance with the applicable methodology. It shows the demand associated with the building’s use, not the bill of a particular occupant. The calculations use standardised assumptions about climate, use and building services.
What window data is required?
The key information includes dimensions and areas, the Uw values of the complete windows, the proportions of frame and glass, properties of the insulating glass units, façade orientation and shading elements. Each window in its specific location matters in the design, not merely the best figure in a catalogue.
Ug does not replace Uw
Ug applies to the glazing. Describing heat loss through the complete window requires a value that also accounts for the frame and edge of the glazing unit.
Losses and gains occur simultaneously
A window loses heat to the outside, but can also admit solar energy. Large south-facing glazing may reduce heating demand during part of the season while increasing the risk of overheating. Uw must therefore not be assessed in isolation from the g-value, orientation and shading.
Why can two houses with the same windows achieve different results?
Differences arise from building geometry, envelope areas, thermal bridges, airtightness, ventilation, heat source, domestic hot-water preparation, cooling and the proportion of renewable energy. The same set of windows may represent a major change in one house and only a minor adjustment in another.
Window replacement and updating the data
When windows are replaced, declarations of performance, the schedule of dimensions and details of the glazing and installation should be retained. New windows can change the building’s thermal balance and airtightness, but their effect on the certificate should be calculated within the model of the complete building. A specific rating or indicator should not be promised solely on the basis of a window brochure.
Checklist of documents for the calculation
- Window and door scheduleDimensions, configurations and location of every window.
- Performance of complete windowsUw for the relevant units and details of the insulating glass units.
- Orientation and shadingCardinal directions, balconies, eaves and external shading.
- Envelope and thermal bridgesWalls, roof, floor and the method used to install the windows.
- Building servicesVentilation, heating, domestic hot water, cooling and renewable energy sources.
Adviser’s tip
I do not promise that a single change to a window will automatically deliver a particular certificate result. I first establish whether we are comparing the glazing value, a reference window or specific items from the schedule.
For the analysis, I provide not only Uw but also the dimensions, orientation and types of glazing and shading. Only when these data are combined with the building envelope and services can the importance of the windows to the whole building be determined.
If the client plans to improve the energy standard, the windows should be coordinated with the ventilation, heating and solar-protection design before they are ordered.
Let us check whether the window data is complete and comparable.
Send the window schedule, façade drawings and the available performance data for the glazing and complete units.
I will help organise the data and identify questions worth clarifying with the designer or energy assessor.

39
Performance and energy efficiency
Cardinal directions and glazing selection
South, west, east and north place different demands on the glass. Size and Uw are not the only factors—the g-value, view, eaves and external shading also matter.
Read more →
Performance and energy efficiency · light and sun
Cardinal directions and glazing selection
The same large window can work well on one façade and create problems on another. Orientation must be considered together with the room's function, glass proportion, g-value, eaves, surroundings and effective shading.
Answer in 30 seconds
South-facing glazing can benefit from winter solar gains, but requires carefully considered summer shading. West-facing glazing receives intense afternoon sun and often presents the greatest risk of overheating. East-facing glazing warms rooms in the morning, while north-facing glazing provides more even light with limited solar gains. There is no single glazing specification for every façade: the glazed area, g-value, Uw, shading and ventilation options must be matched to each orientation and room function.
See how façade orientation changes the priorities
Select the cardinal direction, proportion of glass and external shading. The result will show whether solar gain, overheating, light or privacy requires the greatest attention.
Façade orientation
Proportion of glazing
External shading
NORTHEASTSOUTHWEST
Orientation changes the time of solar exposure
East receives sun in the morning, west in the afternoon, while south has longer exposure around midday.
External shading acts before the glazing
It blocks a substantial proportion of the energy before it reaches the glass instead of dealing with heat that is already indoors.
The view is also a function
The selection should not compromise light and the connection with the surroundings merely to improve one indicator.
North—even light, limited solar gains
A north-facing façade usually receives the least direct solar radiation. It provides more stable, diffuse light and can work well for a study, kitchen or other room where even illumination matters. With a large glazed area, particular attention should be paid to Uw, comfort near the glass and the frame-to-glass proportion.
East—sun at the start of the day
The sun is at a lower angle in the morning, so the interior can brighten and warm quickly. In a bedroom this means earlier light; in a kitchen, a pleasant start to the day. Shading should work when the sun is low, which horizontal eaves alone may not block effectively.
South—winter gains, summer control
South-facing glazing can provide useful solar energy during the heating season. In summer, correctly designed eaves can partly block the high sun, although the result depends on the building geometry. Large panes require the glass, shading and internal thermal mass to be assessed together.
Do not automatically lower the g-value everywhere
Strong solar-control glass can reduce overheating, but also reduces winter gains and often the amount of daylight. The choice should follow from the overall balance.
West—the most challenging afternoon sun
West-facing windows receive low, intense sunlight when the building is already warm after the day. In living rooms and attic rooms, this can quickly reduce comfort. An external roller shutter, external venetian blind or vertical screen may be more effective than eaves alone.
What else matters besides orientation?
Actual exposure is changed by neighbouring buildings, trees, balconies, recesses, ground slope and storey height. Interior colours, night-time ventilation, the thermal mass of the envelope and room function also matter. A compass alone is therefore not enough to specify the glass.
Checklist for each façade
- Orientation and hours of useRelate the sun’s position to the room's pattern of use.
- Active glass areaAssess the actual proportion of glass, not merely the opening size.
- Uw and g-valueSeparate thermal insulation from solar energy transmittance.
- Fixed shadingAccount for eaves, balconies, trees and neighbouring buildings.
- Shading and ventilationPlan the controls, wind protection and the means of removing heat.
Adviser’s tip
I do not specify one glass type for an entire house merely to simplify the order. I first group the façades by orientation, pane size, room function and available shading.
For west-facing glazing, I pay particular attention to external shading. On the south, I assess whether the eaves genuinely work in summer. On the north, I focus on thermal performance and comfort near large panes; on the east, on morning light and privacy.
For large glazing, the best basis for a decision is a combined review of the design, glass performance and solar protection—and, for a demanding building, a simulation as well.
Let us select the glazing façade by façade.
Send the plans, elevations, site orientation and information about eaves, balconies and proposed shading.
I will help organise the window sizes, glass performance and shading strategy to combine daylight, views and thermal comfort.
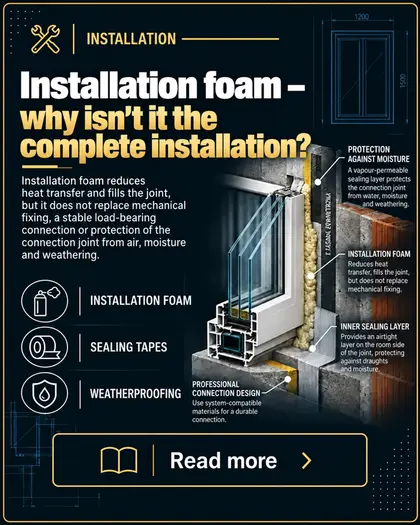
40
Installation
Installation foam—why is it not the whole installation?
Foam reduces heat flow and fills the gap, but it does not replace mechanical fixings, stable support or protection of the joint against air, moisture and weather.
Read more →
Installation · functions of the joint
Installation foam—why is it not the whole installation?
Polyurethane foam is an important insulating layer, but a window also needs load-bearing fixings, stable support and protection of the joint on both the room and façade sides.
Answer in 30 seconds
Installation foam fills the gap and reduces heat flow, but it cannot safely support the window’s weight, replace anchors or frame fixings, provide permanent support, and it should not remain exposed. The joint must be protected from moist indoor air on the inside and from rain, wind and UV radiation on the outside, while still being able to dry. A complete installation relies on several layers and components working together—not on a single can of foam.
See which functions foam alone cannot perform
Select the fixing, support, filling and joint-protection methods. The section will show which function remains unprotected.
Mechanical fixing
Lower support
Joint filling
Foam protection
4 functions missing
Foam insulates
Its primary role is to fill the joint continuously and reduce heat flow.
Fixings transfer loads
Anchors, frame fixings or brackets transfer loads from self-weight, operation and wind to the building structure.
Layers protect the joint
They limit the ingress of moisture and air and protect the insulation from the weather.
What is the purpose of the foam?
Polyurethane foam conforms to the irregular gap between the frame and reveal. When correctly applied, it forms an insulating layer and provides some sound reduction. The joint must have the correct width, continuity and curing conditions; excess foam will not correct a poorly aligned window.
Why does a window require mechanical fixing?
The unit is subject to self-weight, wind, sash movement and forces created during operation. These must be transferred to the wall through mechanical fixings selected for the frame and substrate. Foam is not a fixing design and must not be treated as an anchor.
Alignment is not fixing
Installation wedges help align the frame, but the final arrangement must provide permanent support and load transfer.
The bottom of the window carries its weight
The bottom zone requires stable, permanent support. Loads are substantial beneath wide windows and patio doors, so unsuitable packers, soft foam or voids can lead to deflection, loss of airtightness and hardware operating problems.
What happens to exposed foam?
Moisture, UV radiation and air movement degrade its durability and performance. On the inside, moist air must be prevented from entering the joint; on the outside, protection from driving rain and wind is required. The materials must be bonded to a properly prepared substrate.
Sealing tapes cannot remedy a poor substrate
The reveal surface should be even, sound, clean and prepared in accordance with the system requirements. Dust, crumbling render, moisture or deep voids can impair adhesion. Prepare the detail first, then select the sealing method.
Complete-joint checklist
- Geometry and clearancesCheck the opening dimensions and joint width.
- FixingSpecify the type, spacing and load-transfer points.
- SupportDesign stable support beneath the frame or threshold.
- InsulationProvide continuous filling without voids.
- ProtectionProtect the joint on both the room and façade sides.
Adviser’s tip
When a quotation merely says ‘foam installation’, I ask separately about fixings, support, reveal preparation and joint protection. Only the answers reveal the actual scope of work.
For large units, I pay particular attention to the bottom zone and fixing points. Errors there may later appear as difficult sash operation, dropping, leakage or cracking around the finishes.
I do not judge an installation solely by a material name. What matters is a complete detail, compatible components and workmanship around the entire perimeter.
Let us check what the contractor's scope really includes.
Send me the quotation, wall section and details of the unit type and dimensions.
I will help identify missing items and prepare specific questions about fixing, support, insulation and joint protection.
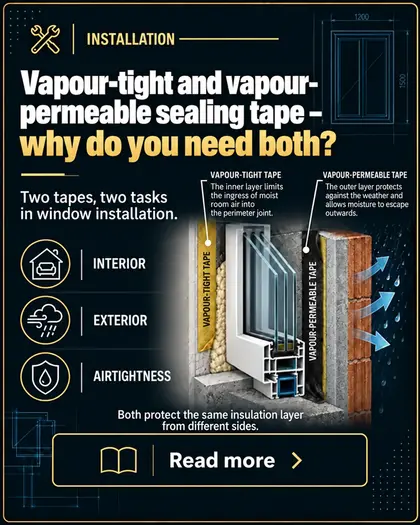
41
Installation
Internal airtight and external vapour-permeable tapes—why are both needed?
The internal layer limits moist air entering the joint, while the external layer protects it from the weather and allows moisture to escape. Both protect the same insulation from different sides.
Read more →
Installation · joint protection
Internal airtight and external vapour-permeable tapes—why are both needed?
A window joint faces different conditions on the warm room side and on the façade side. The internal and external layers therefore perform different functions while protecting the insulation between them.
Answer in 30 seconds
Internally, the joint should limit airflow and water vapour entering the insulating layer. Externally, it must resist rain and wind while allowing moisture to escape. This is why two different materials—or a multifunctional solution with properties suited to both sides—are used. Reversing the tapes, leaving gaps or bonding them to a dusty substrate can undermine the entire multi-layer installation concept.
See the paths taken by vapour, air and rain
Select the condition of the internal, insulating and external layers. The diagram will show how moisture can enter the joint and whether it can dry.
Internal layer
Insulation layer
External layer
Interior
airtight layer
airtight layer
Insulation
thermal insulation
thermal insulation
Façade
weather protection
Moisture can enter from both sidesweather protection
Inside—more airtight
This layer limits warm, moist indoor air entering the joint.
Centre—insulation
Continuous filling reduces heat flow and should remain dry and protected.
Outside—weather protection and drying
This layer protects against rain and wind while remaining more vapour-permeable towards the outside.
Why does moisture move through the joint?
During the heating season, indoor air is usually warmer and contains more water vapour than outdoor air. Moisture can diffuse through materials, but airflow through leaks is often a much greater problem. Continuity of the connection is therefore just as important as the type of tape.
Role of the internal layer
The room-side tape limits uncontrolled airflow and water vapour entering the insulation. It should connect the frame to the prepared reveal around the full perimeter, including corners and threshold junctions.
‘Airtight’ does not mean ‘stuck on anywhere’
Even the correct material will fail if it has gaps, lifts away or terminates on a dusty surface.
Role of the external layer
The external seal should protect the joint against driving rain and wind pressure. At the same time, the arrangement should allow any moisture within the joint to migrate outwards. A suitable tape, membrane or pre-compressed expanding tape selected for the joint width can perform this function.
What lies between the tapes?
The centre layer principally provides thermal and acoustic insulation. It is most often installation foam, although other materials may be used depending on the system. The filling must be continuous; tapes alone cannot insulate an empty joint.
When are other solutions used?
Not every detail requires two separate rolls of tape. Multifunctional systems, membranes with variable vapour resistance and solutions for installation in the insulation layer are available. The joint conditions, material compatibility and system instructions—not merely the popular term ‘warm installation’—should determine the choice.
Checklist before bonding
- Identify each sideDo not reverse the internal and external layers.
- Prepare the revealLevel and clean the substrate and prime it where required.
- Plan the cornersMaintain continuity without tension or accidental cuts.
- Fill the centre layerLeave no voids in the insulation.
- Coordinate with finishesPlan the window sills, threshold, insulation and sequence of subsequent work.
Adviser’s tip
Before ordering a system, I check the substrate to which it will be bonded and when the plaster, window sills and insulation will be installed. Without a coordinated sequence, even good materials may be left without a proper connection.
I always ask the installer how the corners, bottom zone and junctions at roller-shutter or external-venetian-blind guide rails will be detailed. These are the places where layer continuity is most easily broken.
I do not sell tapes alone as a guarantee of quality. Effectiveness depends on correct selection, a prepared reveal, continuous filling and careful workmanship.
Let us match the materials to the wall and construction sequence.
Send me the wall section, photos of the openings and details of the insulation, window sills and external shading.
I will help check whether the internal, insulating and external layers form one continuous, buildable arrangement.
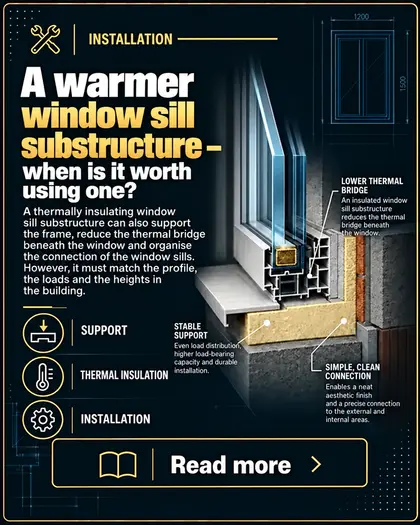
42
Installation
Insulated window base—when is it worth using?
An insulated window base can support the frame, reduce the thermal bridge beneath the window and provide a well-defined connection for the window sills. It must, however, suit the profile, loads and building levels.
Read more →
Installation · lower window detail
Insulated window base—when is it worth using?
The lower part of a window must carry its weight, limit heat loss and connect the frame to the internal and external window sills or terrace build-up. An insulated window base can combine these functions if correctly selected and installed.
Answer in 30 seconds
An insulated window base is worth considering when continuous frame support, reduced thermal bridging beneath the window and a clearly defined window sill installation are important. It is most effective when matched to the specific profile, wall width, finished levels and structural loads. It is not a universal foam packer: its load-bearing capacity must be confirmed, the substrate must be stable, bonding or fixing must be correct and the connection to the other layers must be weathertight and airtight as required.
Check when an insulated window base provides a genuine benefit
Select the unit type, substrate condition, support method and window sill preparation. The tool will indicate the priority of the lower detail.
Unit type
Substrate beneath the window
Support method
Window sill levels
The detail requires preparation
Load-bearing capacity before insulation
The item beneath the frame must safely carry its weight and imposed loads.
Compatibility with the profile
The shape of the upper surface should provide stable engagement with the bottom of the frame.
Levels determine the installation height
Window sills, floor and terrace levels must be established before ordering the item.
What is an insulated window base?
It is a sub-sill profile made from a thermally insulating material and shaped for a specific frame system. It can provide continuous support, reduce heat flow and form the connection for internal and external window sills. The product name alone does not fully describe its load-bearing capacity or application.
When is the benefit greatest?
This solution is particularly useful in a new building, where the lower detail can be planned before the survey. It works well for wide windows, high thermal requirements and where a consistent, repeatable window sill connection matters. It can also reduce the risk of voids beneath the frame.
Is it suitable for every window?
No. Patio doors and heavy sliding systems create greater loads, while the threshold must integrate with the floor, insulation and drainage. A different, reinforced system support may be required. The permitted load and load-transfer method must always be checked.
Thermally insulating does not automatically mean load-bearing
A material with good thermal insulation may be structurally unsuitable. Both functions must be confirmed.
Substrate preparation
The substrate should be level, load-bearing, clean and set to the specified height. Adhesive or mortar must form continuous support in accordance with the system instructions. Supporting the item at isolated points over voids may cause deflection or cracking, even if the profile itself has good properties.
Window sills and sealing
The profile helps form the connection to the internal and external window sills, but does not replace the correct fall, sealed ends, weather protection or connection to the installation layers. All components should form one continuous detail from the interior to the façade.
Pre-order checklist
- Frame systemConfirm that the shape is compatible with the window profile.
- LoadCheck the weight and permitted load-bearing capacity of the solution.
- Wall widthMatch the depth to the wall, insulation and window sills.
- LevelsEstablish the window sill, floor and terrace levels.
- ConnectionsPlan the fixing, bonding, tapes and water protection.
Adviser’s tip
I recommend an insulated window base when its specific function within the detail can be clearly identified. I do not add one automatically to every window simply because it sounds good in a quotation.
Before preparing a quotation, I check the frame profile, wall width, window sill levels and unit weight. For patio doors, I assess the threshold, floor build-up and drainage separately.
The best result comes from a solution planned before the openings are prepared. Cutting an arbitrary profile on site makes it difficult to maintain load-bearing capacity and continuity of the layers.
Let us check whether they suit the profile and lower detail.
Send the window schedule, wall section and the window sill, floor and terrace levels.
I will help assess where the solution provides a genuine benefit and where a different structural support is required.

43
Installation
Sub-sill profile—a small component with a major role
A sub-sill profile provides a well-defined connection between the window sills and frame, but its load-bearing and thermal properties depend on the specific solution. Not every transport profile provides full support.
Read more →
Installation · connection beneath the frame
Sub-sill profile—a small component with a major role
A small profile beneath the bottom frame can assist transport, window sill installation and the formation of a sealed connection. It is essential, however, to know exactly which item is included in the quotation and what the manufacturer requires of it.
Answer in 30 seconds
A sub-sill profile provides space to insert or support the window sill, separates it from the frame and helps create a well-defined lower seal. It can also increase the installation height. It must not be assumed, however, that every thin transport profile carries the window’s weight or eliminates a thermal bridge. Its intended use, material, chamber construction, connection to the frame profile and support from below must all be checked. The complete detail matters, not merely the presence of the profile.
Check whether the item beneath the frame performs every required function
Select the profile type, support method, window sill preparation and continuity of the sealing. The diagram will show what is still missing.
Element type
Support from below
Window sills
Lower sealing
The item does not provide complete support
Transport is not support
A profile that protects the bottom frame during transport may not be intended to carry the full loads.
Window sills need space
The profile helps the window sill fit beneath the frame without blocking drainage or deforming the frame profile.
The lower detail must be continuous
Support, insulation and sealing should connect without unintended voids.
Why is a sub-sill profile installed?
The profile increases the space beneath the frame, facilitates the window sill connection and protects the bottom frame from incorrect drilling or sheet metal being forced directly beneath the window. It can form part of the installation solution if its intended use and support have been clearly defined.
Transport profile versus system profile
The terms are sometimes used interchangeably, although the functions may differ. A thin profile used to transport and protect the frame does not always have adequate structural or thermal properties. A system profile may fit the frame and window sills better, but it also requires proper support from below.
Ask for documentation, not merely the name
What matters most is the manufacturer’s stated intended use for the item and how it is designed to work with the fixing and support.
Connection to the external window sill
The external window sill should have a fall, sealed ends and a connection that drains water clear of the façade. It must not block drainage openings or transfer unintended forces to the narrow edge of the frame. The profile helps establish its position, but does not replace correct weatherproof detailing.
Connection to the internal window sill
Internally, the height, thickness and depth of the window sill must be established and the airtight layer kept continuous. The space beneath the sill should not form an open air path leading to the installation joint.
Effect on window height
The profile occupies space beneath the frame, so it must be included in the manufacturing dimensions and installation level. If it is added after the survey without adjustment, there may be insufficient space for the window or the planned sill height may change. Existing finishes must also be checked when replacing windows.
Lower connection checklist
- Intended use of the profileEstablish whether it is a transport, sub-sill or load-bearing profile.
- Compatibility with the frameCheck the clips, width and profile material.
- Support from belowEnsure stable load transfer to the wall.
- Window sillsDefine the fall, depth, height and end details.
- Installation layersConnect the insulation and sealing without gaps.
Adviser’s tip
For every quotation, I ask whether there is a transport profile, sub-sill profile or load-bearing item beneath the frame. The description ‘30 mm profile’ alone is not enough to assess the detail.
I also check what is beneath the profile. If the weight rests on a few arbitrary points, the presence of the profile alone does not provide continuous, thermally insulating support.
The window sill thicknesses and finished levels should be known before the survey. This allows the item height to be selected without later cutting or concealing errors.
Let us assess the profile, support and window sills as one detail.
Send the section from the quotation, profile name, a photograph of the bottom frame and details of the proposed window sills.
I will help establish the profile's function and identify what to ask before the survey and installation.
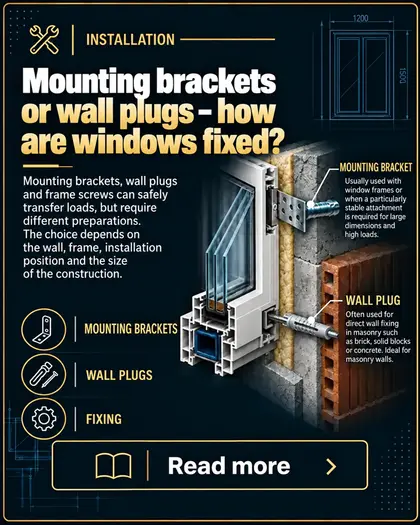
44
Installation
Anchors or frame fixings—how are windows secured?
Anchors, frame fixings and frame screws can all transfer loads correctly, but require different preparation. The choice depends on the wall, frame, window position and size of the unit.
Read more →
Installation · mechanical fixing
Anchors or frame fixings—how are windows secured?
Fixings transfer the window’s weight, wind loads and forces created during operation to the building. They should not be selected merely according to an installer's habit—they must suit the frame, substrate, dimensions and installation position.
Answer in 30 seconds
Installation anchors are attached to the frame and then to the reveal; they allow fixing without drilling through the profile and facilitate installation where the fixing point is set back from the wall edge. Frame fixings or frame screws pass through the profile and create a direct connection to the substrate. No solution is automatically best. The wall type and condition, edge distance, frame reinforcement, window size, wind load, fixing spacing and system instructions all matter.
See what determines the choice between an anchor and fixing through the frame
Select the substrate, unit size and window position. The result will indicate a direction to investigate and the greatest installation risk.
Substrate type
Unit size
Frame position
Direct fixing through the frame
Fixings transfer forces
Foam and tapes insulate and seal, but do not replace mechanical fixings.
The wall determines the anchorage
Solid concrete, hollow block and weak substrates require different fixings and embedment depths.
Spacing is not arbitrary
Fixing points are planned in relation to corners, mullions, hinges and the size of the unit.
How does an installation anchor work?
The anchor is attached to the side of the frame and bent towards the reveal. It connects the window to the wall without drilling through the visible profile chambers. Its stiffness, attachment method and number of points must suit the unit; thin metal must not be extended arbitrarily or fixed into a brittle edge.
Frame fixing and screw through the frame
The fixing passes through the profile and anchors directly into the wall. It provides a rigid, clearly defined connection, but requires correct drilling, suitable embedment depth and controlled tightening. Excessive force can deform the frame, while an unsuitable fixing will not hold in a hollow block.
Direct does not mean universal
Effectiveness depends on the wall material and maintaining the required distance from its edge.
Solid and hollow substrates
Predictable anchorage is easier to achieve in concrete or solid brick. In hollow blocks, the fixing must suit the thin webs and drilling method. In old, crumbling masonry, the substrate may need repair, the fixing point may need to change or an individually designed solution may be required.
Large windows and sliding doors
As dimensions and weight increase, so do wind and operational forces. Wide frames, mullions and thresholds require additional fixing points and sometimes brackets or specialist profiles. Fixing the sides does not replace stable lower support.
The frame position changes the geometry
A window installed deep within the wall, at its edge or projected into the insulation creates a different lever arm for the forces. The greater the projection, the more important the stiffness of the brackets and verification of the deflection and load-bearing capacity of the complete assembly.
Fixing checklist
- Reveal materialIdentify concrete, brick, hollow block and the condition of the substrate.
- Dimensions and weightConsider the glass, sashes and opening method.
- Window positionEstablish the distance between the frame and the load-bearing part of the wall.
- Fixing and anchorageSelect the type, diameter and embedment depth.
- Fixing-point spacingCheck the corners, mullions, hinges and system instructions.
Adviser’s tip
I do not ask only ‘anchors or frame fixings?’. I first need to know the wall material, window position, dimensions and opening method. Only then can the appropriate fixing be assessed.
For large units, I ask for a description of the support and fixing points, not merely a photograph of the foam after installation. The structure must transfer loads safely for many years.
If the wall is weak or the window is to be projected, the solution should be established before the survey. Improvising at a completed opening increases the risk of error.
Let us check the fixing method before ordering the windows.
Send photographs and a wall section, window dimensions and information about the proposed installation position.
I will help identify questions about fixings, spacing, support and substrate preparation.

45
Installation
Installation within the insulation layer—when does it make sense?
Projecting a window into the insulation can improve insulation continuity, but requires a system-designed support, fixing and carefully detailed joint. It is not necessary in every building.
Read more →
Installation · window position within the wall
Installation within the insulation layer—when does it make sense?
Moving the frame beyond the face of the wall can reduce the thermal bridge at the window-to-wall junction. The thermal benefit must, however, be combined with load-bearing support, rigid fixing and the ability to complete every layer.
Answer in 30 seconds
Installation within the insulation layer is most appropriate in well-insulated buildings, with a thick thermal-insulation layer and a design that requires the thermal bridge around the window to be reduced. The frame is projected in front of the wall and fixed on brackets, profiles or within a system installation frame. The solution increases the requirements for load-bearing capacity, deflection, airtightness, weather protection and lower support. Not every unit and wall requires it; the position should be established from the section and detail calculations.
Move the window and see how the benefits and difficulties change
Select the frame position, insulation thickness and unit size. The diagram will show the trade-off between thermal continuity and structural requirements.
Frame position
Insulation thickness
Window and door dimensions
Window deep within the wall
Thermal performance depends on geometry
The best position is one in which the wall insulation can connect smoothly to the frame.
Projection increases the lever arm
The farther the window is from the wall, the greater the demands on brackets and supports.
The lower detail still carries the weight
Heavy glazing requires stable, thermally insulating and designed support.
What is projected installation?
The frame is positioned partly or entirely beyond the plane of the load-bearing wall, within the future insulation layer. Loads are transferred through brackets, angles, profiles or an installation frame. The insulation can surround more of the profile and reduce cooling of the reveal.
When is the thermal benefit justified?
Buildings with a high energy standard, thick insulation and a large total window area gain the most. If the other elements of the envelope perform poorly, full projection can be an expensive refinement of one item without a proportional benefit for the house as a whole.
Sometimes the wall edge is enough
Positioning the frame closer to the insulation and partially covering the profile can provide a good compromise without projecting the complete unit.
How is the weight transferred?
Lower brackets and support profiles carry the weight, while side and top elements stabilise the window and transfer wind and operational forces. The spacing, projection and capacity must be matched to the dimensions, glass, opening method and wall material.
Airtightness and weather protection
The projected joint lies closer to the area exposed to wind and rain. The internal, insulating and external layers must remain continuous around the brackets. Connections to the façade, window sills, threshold and shading boxes are required.
Large glazing requires a separate assessment
Heavy sliding systems create high loads and have complex thresholds. Projection increases the structural requirements, so a system designed for these weights, suitable drainage and control of the floor and terrace levels are required.
Pre-decision checklist
- Wall sectionEstablish the wall type, insulation thickness and proposed façade.
- Thermal positionCompare installation within the wall, at the edge and projected.
- System load-bearing capacityMatch the brackets or profiles to the weight and projection.
- Lower areaPlan the threshold, support, floor and drainage.
- Continuity of layersConnect the sealing to the insulation and flashings.
Adviser’s tip
I do not automatically present installation within the insulation as the best option. I first compare the wall section, energy standard and total window area.
For the quotation, I request the name of the fixing system, maximum projection, support method and scope of reveal preparation. The description ‘projected warm installation’ is too general.
If the budget is limited, a better compromise may sometimes be the correct position at the wall edge, partial coverage of the frame with insulation and airtight completion of the entire perimeter.
Let us compare the thermal benefit with the structural requirements.
Send the wall section, insulation thickness, window and door schedule and floor levels.
I will help identify a sensible frame position and questions about the fixing system, support and sealing.

46
Installation
Can windows be installed in winter?
Read more →
Installation · winter conditions
Can windows be installed in winter?
Frost alone does not provide a complete answer. Safe working depends on the temperature of the substrate and materials, precipitation, wind, reveal preparation and the technology specified by the manufacturers.
Answer in 30 seconds
Windows can be installed in winter, but not in every condition and not with arbitrary materials. The minimum application temperatures for foam, tapes, adhesives and sealants must be checked, as must the actual temperature of the dry substrate. The reveal must not be icy, covered in snow or wet. In strong winds, precipitation or severe frost, work should be postponed or controlled, sheltered and heated conditions created. The instructions for the specific system matter, not the general description ‘winter materials’.
Are today's conditions suitable for installation?
Set the weather and building condition. The result indicates what to check—the final decision must be based on the instructions for the materials used and an on-site assessment of the reveal.
Temperature at the reveal
Weather during the work
Building condition
+5°CConditions for controlled installation
Assessment: favourable conditions
Installation can be prepared in accordance with the system instructions
A dry, clean substrate and a temperature above freezing provide the greatest margin. The application range of the foam, tapes and sealants must still be checked.
SubstrateCheck dryness
MaterialsVersion suitable for the temperature
PrioritySystem instructions
Risk level
18
This tool does not replace the installer's assessment or technical data sheets. The air temperature may differ from the temperature of the wall, frame and stored materials.
The substrate must be ready
Ice, snow, frost, water and dust reduce adhesion and make it difficult to create a continuous seal.
Every material has its own application range
Winter foam does not automatically mean that the tapes, primer, adhesive and sealant work at the same temperature.
Conditions must be controlled
Shelters, warm material storage and a heated work area can improve the reliability of the installation.
Air temperature is only the beginning
A thermometer showing the external air temperature does not reveal how cold the reveal is. The wall, lintel and lower area can remain cold for longer, while foam or tape stored in freezing conditions may behave differently from material prepared according to its instructions.
‘Winter’ foam does not solve the complete joint
Foam is primarily responsible for insulating the gap. Mechanical fixings, primer, tapes, adhesives, sealants and external finishing all have their own temperature requirements. Without checking the complete set, only one part of a correct installation may be completed.
Moisture and ice are a more serious problem than cold
Materials may not bond permanently to a wet, frosted or icy substrate. The reveal must be cleaned, dried and—where required by the system—primed. Fresh snow within the joint must not be covered with foam.
Strong wind and precipitation make safe work more difficult
Wind cools surfaces, makes large units more difficult to position and increases risks to people and glass. Precipitation complicates protection of the interior and completion of the external joint layer. Rescheduling may be more sensible than attempting to rescue the work with makeshift covers.
Heating requires control, not improvisation
The work area can be sheltered and heated, but very hot air should not be directed locally at the profile, glass or fresh sealing. Materials should be stored and prepared according to their technical data sheets, and conditions maintained for the required curing period.
Checklist before winter installation
- Check the forecast and on-site conditionsAssess the temperature, wind, precipitation and ability to shelter the work area.
- Measure the substrate temperatureDo not base the decision solely on the air temperature.
- Verify the complete set of materialsCheck the foam, tapes, primer, adhesives and sealants.
- Prepare a dry revealRemove ice, snow, water, dust and loose material.
- Protect the interior and jointProvide protection until the materials have cured and finishing works are complete.
Adviser’s tip
I do not give the client a one-sentence answer: ‘you can install in winter’ or ‘installation in winter is prohibited’. I ask about the forecast, building condition, wall type, scope of work and materials proposed by the installer.
The quotation should clarify who prepares and dries the reveals, how the interior is protected and what happens to the schedule when conditions fall outside the system instructions.
If a contractor mentions only winter foam but cannot state the requirements for the other layers, I treat that as a reason to ask further questions.
Let us check the technology and conditions before setting the installation date.
Send the scope of the windows and doors, photographs of the openings, proposed date and information about the condition of the building.
I will help prepare a list of questions about materials, protection of the work and installation limits.
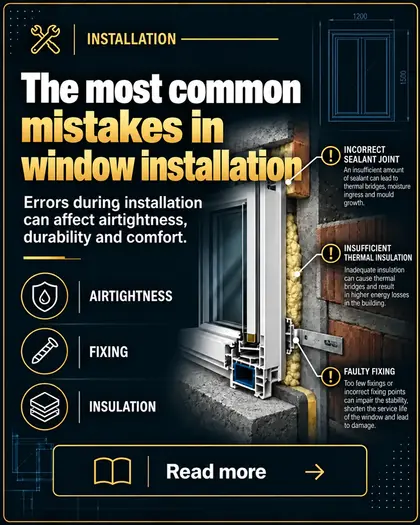
47
Installation
The most common window installation errors
Read more →
Installation · quality control
The most common window installation errors
Even a good window can perform poorly if installed without stable support, deformed during fixing or connected to the wall with a leaking, unprotected joint.
Answer in 30 seconds
The most common errors include an unprepared reveal, arbitrary support, too few or unevenly distributed fixings, a twisted frame, an incorrect installation gap, discontinuities in insulation and sealing, and an incorrectly completed lower detail with a window sill or threshold. The consequences are not always immediately visible: difficulties closing, draughts, damp, cracked finishes, cold corners or drainage problems may develop later. Inspection should cover geometry, fixing, support and all three functions of the joint.
Find six areas that require checking
Select the numbered points around the window. Each shows a different error, its consequence and a question worth asking the installer.
Select an inspection point
Points viewed1/6
Point 1 · revealDirty, uneven or weak substrate
Tapes and sealants should not be bonded to dust, ice or loose plaster. Defects must be repaired and the substrate prepared in accordance with the system.
Possible consequenceSeparation of the sealing, local draughts and moisture within the joint.
Question for the installer: how will the openings be cleaned, levelled and primed?
Geometry first
The frame must be level, plumb, square and straight—it is not enough that it ‘fits in the opening’.
Support carries the weight
Foam does not replace support blocks, thermally insulating support or a solution designed for a heavy threshold.
The joint has three functions
It must transfer forces, limit heat and air flow, and protect the insulation from moisture and weather.
Unprepared reveal
Irregularities, defects, dust and weak plaster make it difficult to position the window and permanently bond the sealing layers. Before installation, check the dimensions, substrate capacity and whether a continuous connection can be formed around the entire perimeter.
Incorrect alignment and a twisted frame
The frame may look correct while still being bowed or twisted. This can lead to uneven gaps between sash and frame, sash drop and rapid loss of hardware adjustment. Plumb, level, diagonals and profile straightness must be checked.
No stable support
Support blocks must be positioned where they transfer the weight to the building structure without deforming the profile. They should not be removed arbitrarily after fixing. Lift-and-slide doors, large glazed screens and heavy glazing units require a solution selected for their weight and threshold.
Incorrect fixing type and spacing
Too few fixings, fixing into a weak part of the wall or excessive tightening can cause frame movement or deformation. Spacing depends on the profile material, unit dimensions, loads and substrate type.
Discontinuous insulation and joint protection
Voids in the foam, unfilled corners and interrupted tapes create local paths for air and moisture. Foam left unprotected deteriorates under weather and construction activity. Each layer should form a continuous perimeter.
Installation inspection checklist
- Reveal and gapCheck substrate preparation and an even clearance around the frame.
- Level, plumb and diagonalsRequest a geometry check before the finishing works are completed.
- Support and fixingsEstablish the support-block positions, fixing type and spacing.
- Continuity of sealingInspect corners, the lower detail, penetrations around brackets and tape joints.
- Operation and drainageCheck the sashes, handles, threshold, window sills and that drainage outlets are clear.
Adviser’s tip
Most problems are concealed in areas that cease to be visible after finishing. The installation scope and inspection method should therefore be agreed before work begins, not only after draughts or cracks appear.
For large units, I pay particular attention to lower support, fixing of vertical joints and threshold preparation. Hardware adjustment alone cannot correct a moving or twisted frame.
Good photographic records of successive stages help confirm how the fixings, insulation and sealing were completed before they were covered.
Let us review the quotation and the areas that will later be concealed.
Send the window and door schedule, installation description, sections or photographs of the prepared openings.
I will help organise questions about support, fixings, sealing, the threshold and inspection of the work.

48
Doors and sliding systems
Low thresholds in patio doors — benefits and limitations
Read more →
Patio doors · threshold
Low thresholds in patio doors — benefits and limitations
A low threshold improves ease of access and the appearance of the transition between the home and the patio. It is not a standalone feature, however: it requires correct levels, stable support, waterproofing and effective drainage.
Answer in 30 seconds
A low threshold reduces the barrier at a patio exit, but does not always provide a completely level transition. The actual difference in level depends on the door system, internal floor, patio build-up and drainage method. The lower the threshold, the more important the falls away from the building, channel drainage, waterproofing and a watertight connection to the threshold become. This decision must be made before the internal floor and patio are constructed.
See what affects the transition height
Compare standard, low and flush threshold options and the conditions on the patio side.
Transition option
Patio drainage
low thresholdInterior → patio
Convenience with controlled drainage
A low threshold is a sensible compromise
The transition is more convenient, while the threshold still retains a clearly defined protective zone. Correct levels and drainage remain essential.
ComfortHigh
Water riskControlled
RequirementsPrecise levels
Detail complexity
48
The actual height depends on the specific system. This cross-section is for guidance and does not replace the manufacturer’s installation detail.
Ease of access
A lower barrier makes everyday use of the patio easier, particularly for children, older people and those with limited mobility.
Water needs a safe route away
A fall away from the building and effective drainage protect the threshold area from accumulated rainwater and snow.
Levels must be established early
The internal floor, patio, waterproofing and threshold should all be coordinated in a single cross-section before the doors are ordered.
Low does not always mean threshold-free
Manufacturers define a low threshold in different ways. Its visible height may depend on the floor finish and how the frame is installed. Check the cross-section and the dimension from finished floor level in the quotation.
The lower connection is crucial
The threshold carries the weight of the structure and loads imposed during use. It requires stable, continuous, thermally insulating support that will not deflect beneath a large door leaf.
Drainage is part of the solution
The patio should direct water away from the building. Where the levels are flush, channel drainage, a suitable fall and a detail that limits water ingress beneath the threshold are often required.
The waterproofing must connect to the threshold
Expanding foam alone does not protect the lower connection. Waterproofing, tapes and flashings should form a continuous connection with the threshold and patio build-up.
Use and maintenance still matter
A low threshold must be kept clean, the drains checked and the threshold kept clear of finishing layers. Leaves, ice and snow can reduce drainage performance.
Pre-order checklist
- System cross-sectionCheck the actual threshold height from finished floor level.
- Finished levelsEstablish the internal floor, patio and layer thicknesses.
- SupportSelect a solution suitable for the weight of the doors.
- WaterproofingForm a watertight connection to the threshold.
- Fall and drainageProvide a safe route for water to drain away.
Adviser’s tip
I recommend a low threshold when it will genuinely improve the client's comfort and the project allows all levels to be planned precisely.
For an uncovered patio, I ask about falls, channel drainage and waterproofing. An attractive flush finish must not compromise protection against water.
The best approach is to agree a coordinated cross-section with the floor and patio contractors and the window and door installer.
Let us review the threshold, levels and drainage as one coordinated detail.
Send me the building cross-section, opening dimensions and details of the floor and patio build-ups.
I will help you identify the right questions for the manufacturer, installer and patio contractor.
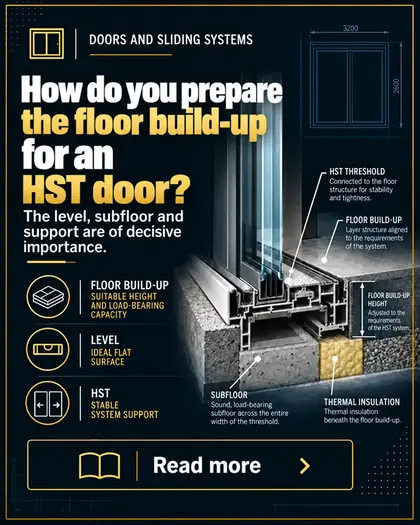
49
Doors and sliding systems
How should the floor be prepared for an HST door?
Read more →
HST · floor and support
How should the floor be prepared for an HST door?
A heavy HST threshold should rest on stable, continuous and suitably insulated support. Its height must be coordinated with the finished floor, patio, waterproofing and drainage.
Answer in 30 seconds
Before an HST door is installed, the finished levels of the internal floor and patio, the thickness of every layer and the intended threshold height must be known. Continuous support designed for the weight of the structure is required beneath the threshold; expanding foam or isolated packers alone are not sufficient. The lower connection must also limit the thermal bridge, allow secure fixing, connect to the waterproofing and drain water away. The safest approach is to prepare a cross-sectional drawing before ordering the doors.
Set the build-up before the threshold is installed
See how floor thickness, patio height and the weight of the structure affect the requirements at the lower connection.
Floor build-up
Patio level
HST size
Interior · threshold · patio
Establish the datum level first
A typical floor build-up and a lower patio create a clear detail
The threshold can be installed on continuous support, while the external difference in level helps protect the area against water.
SupportContinuous
DrainageStandard + fall
CoordinationRequired
Detail complexity
42
The diagram does not specify the installation height for a particular HST system. This dimension must be taken from the system drawing and coordinated with the floor design.
The datum level is the reference point
The finished floor—not the structural slab—determines the correct level for the top of the threshold.
The threshold carries a considerable load
The glass, door leaves and loads imposed during use require stable support across the entire designed length.
Water management must not be overlooked
The waterproofing, fall and drainage on the patio side must connect to the threshold without unintended gaps.
Start with the finished floor level
Allow for the slab, insulation, services, screed, adhesive and floor finish. Without this information, the threshold may be set too high or layers may have to be cut back after installation.
The support must be continuous and load-bearing
An HST door must not bridge a void or rely solely on expanding foam. A system extension, load-bearing profile or insulating support must be selected to suit the weight, threshold width and substrate.
Thermal insulation cannot replace structural performance
An insulating material beneath the threshold only makes sense if it provides the required load-bearing capacity and limits deflection. Thermal performance and structural capacity must be assessed together.
The patio and interior form a single coordinated junction detail
The height of decking, slabs or paving outside affects threshold protection. A high terrace level requires particularly well-designed falls, linear drainage and careful detailing at the façade.
The waterproofing must be practicable
Before installation, establish where the waterproofing will be turned up and how it will connect to the threshold. Subsequent access may be restricted by extension profiles, fixings and finishing layers.
Preparation checklist
- Finished floor levelProvide the full thickness of every layer.
- Patio levelDefine the finish, falls and drainage.
- Weight of the unitSize the support capacity for the specific lift-and-slide door.
- Threshold sectionCheck the height and fixing area.
- WaterproofingPlan a continuous connection before it is covered.
Adviser’s tip
For lift-and-slide doors, I ask for the finished floor level before the production survey. The opening dimensions alone are not enough to plan the threshold correctly.
The window and door installer, flooring contractor and terrace contractor should all work from the same section detail. Every centimetre left to be decided on site increases the risk of compromise.
For very large units, I also ask for confirmation of the support capacity and how the load will be transferred to the foundation or floor slab.
Let us establish the levels and support before the production survey.
Send the plan, section, floor build-up thickness, terrace level and dimensions of the proposed unit.
I will help you organise the information needed to plan the threshold safely.
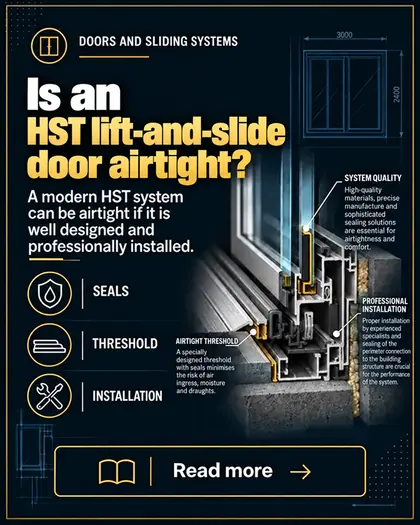
50
Doors and sliding systems
Is an HST lift-and-slide door weathertight?
Read more →
HST · weathertightness and use
Is an HST lift-and-slide door weathertight?
A correctly specified and installed HST system can achieve high levels of weathertightness. The result, however, depends on the construction, dimensions, threshold, gaskets, drainage, adjustment and the quality of the junction between the door and the building.
Answer in 30 seconds
An HST system can achieve declared classes for air permeability, resistance to wind load and watertightness in accordance with the classes confirmed for the specific system and tested dimensions. It should not, however, be compared solely on the basis of the name ‘HST’. Large sizes, building exposure, a low threshold and the configuration of the elements alter the loads. Correct installation, continuous threshold sealing, unobstructed drainage and periodic adjustment are equally important. The declared values must be checked against the specific unit configuration.
See what contributes to the load on an HST door
Set the wind exposure, rain intensity and gasket condition. The result shows which elements require checking.
Wind exposure
Rain
Gaskets and adjustment
≈
Sash junction, threshold and drainageFavourable conditions
A correctly functioning system should maintain good weathertightness
With sheltered exposure and correct adjustment, the gaskets make even contact and the drainage system has a safe performance margin.
SealsEven compression
ThresholdDrainage inspection
PrioritySystem documentation
Load level
22
The simulator does not provide a weathertightness class. The correct values must be checked in the declaration and documentation for the specific system and dimensions.
The class applies to the tested configuration
System performance does not automatically mean an identical result for every door size and configuration.
The threshold is a critical area
Support, sealing, drainage and the connection to the waterproofing determine performance during rain.
Adjustment affects compression
A large sash operates under considerable weight, so the condition of the hardware and even contact of the gaskets must be checked.
Weathertightness has several meanings
Air permeability, resistance to wind load and watertightness are assessed separately. A general statement that ‘the door is weathertight’ does not replace these performance classifications.
Size and building location alter the requirements
A large glazed unit on an exposed elevation is subjected to greater loads than a smaller unit sheltered by surrounding buildings. Building height, orientation and local wind conditions all matter.
Gaskets require even compression
Wear, dirt, sash drop or poor adjustment can cause local leaks. Care and periodic maintenance help keep the system operating as intended.
Water must be drained away
Profiles incorporate drainage paths that must not be blocked by finishes or debris. The terrace must have a fall, and additional drainage may be needed in demanding exposures.
Poor installation can undermine a good product
Leakage does not always occur between the sash and frame. Air and water can pass beneath the threshold, at joints or through discontinuities in the installation layers.
Pre-selection checklist
- System classificationsCheck air permeability, wind resistance and watertightness.
- Unit dimensionsConfirm the permitted size and configuration.
- ExposureConsider the building height and surroundings.
- Threshold and drainagePlan the support, waterproofing and drainage.
- ServicingConfirm the adjustment and gasket-maintenance requirements.
Adviser’s tip
I do not promise weathertightness on the strength of the term HST alone. I check the system documentation, unit size, sash arrangement and conditions on the specific elevation.
If the building stands on exposed ground or the threshold is to be flush with the terrace, I pay particular attention to drainage, waterproofing and the lower seal.
At handover, check sash operation, gasket compression and unobstructed drainage before the threshold area is covered.
Let us assess weathertightness together with the size, threshold and installation.
Send the dimensions, door configuration, building location and a section through the terrace area.
I will help identify the performance values and questions that should be addressed in the quotation.
51
Doors and sliding systems
How much can a large sliding sash weigh?
Read more →
Sliding doors · sash weight
How much can a large sliding sash weigh?
In large doors, glass accounts for most of the weight. Several hundred kilograms affect the hardware, tracks, threshold support, transport, installation and subsequent ease of operation.
Answer in 30 seconds
As a guide, one square metre of glass 1 mm thick weighs approximately 2.5 kg. A unit with three 4 mm panes contains around 30 kg of glass per square metre before the frame, spacers, hardware and reinforcement are added. A 6 m² sash may therefore contain around 180 kg of glass alone, with the complete sash weighing more. The final weight and permitted load must be confirmed in the system documentation.
Estimate the weight of the glass and sash
Enter the sash dimensions and glazing-unit build-up. The result helps illustrate the scale of the loads but does not replace the manufacturer’s calculations.
213 kgEstimated sash weight
High load
This sliding unit must be specified as a complete system
Weight affects the carriages, track, threshold, support and installation logistics.
Area6.00 m²
Glass alone180 kg
Frame estimate33 kg
Load scale
71
The allowance for the frame and hardware is indicative. Laminated glass, thicker panes and the actual profile can significantly alter the result.
Glass accounts for most of the weight
Every additional or thicker pane increases the weight across the entire sash area.
Hardware has load limits
The carriages and tracks must be selected for the specific weight, dimensions and frequency of use.
The threshold requires support
The load should be transferred to a stable structure without local deflection.
How is glass weight estimated initially?
The pane area is multiplied by its thickness and the density of glass. For an insulating glass unit, the thicknesses of all panes, including laminated panes, are added together.
The complete sash weighs more
The sash profile, reinforcement, spacers, carriages and hardware must be added to the glass. The exact weight is determined from the production specification.
Weight affects ease of operation
A correctly specified system allows a large sash to slide with reasonable effort, but dirt in the track, poor adjustment or threshold deflection will quickly impair its operation.
Transport and installation are part of the project
Access, delivery into the building, lifting equipment, the number of installers and safe glazing must all be planned. Simply manufacturing a large sash does not solve the logistical challenge.
Large formats increase the requirements
In addition to weight, wind pressure, profile rigidity, sash proportions and the sash configuration are important.
Quotation checklist
- Sash weightRequest the value from the production configuration.
- Hardware load capacityCheck the permitted carriage load.
- Threshold supportConfirm the load-bearing capacity and deflection of the lower zone.
- LogisticsPlan transport, delivery into the building and glazing.
- ServicingConfirm adjustment requirements and access to the running gear.
Adviser’s tip
For a large sash, I do not simply ask whether the manufacturer can produce it. I also check the weight, hardware limits, support and whether safe installation is genuinely feasible.
If the unit is approaching the system limits, consider a different configuration, fixed glazing or a system designed for higher loads.
Smooth operation in a showroom does not guarantee identical performance after several years—the threshold and installation quality also determine durability.
Let us check the weight, hardware and installation before ordering.
Send the width, height, sash configuration and selected glazing unit.
I will help identify the items that require confirmation from the manufacturer.
52
Doors and sliding systems
When should you choose fixed glazing instead of an opening window?
Read more →
Glazing · fixed panel or opening sash
When should you choose fixed glazing instead of an opening window?
Fixed glazing can provide more glass, a simpler construction and a lower price. It only makes sense where an opening function is not required and cleaning, ventilation and service access are provided in another way.
Answer in 30 seconds
Fixed glazing is worth choosing when a large glass area, an uninterrupted view and simplicity are priorities, and there is no need for daily opening. A fixed panel usually has less hardware and fewer moving gaskets, but it provides neither ventilation nor access. Safe cleaning from outside must also be planned. The best arrangement often combines fixed panels with a limited number of opening sashes exactly where they are needed.
Check whether this panel really needs to open
Select the room function, ventilation method and cleaning access. The tool will suggest a suitable direction for the discussion.
Panel function
Alternative ventilation source
Access for external cleaning
≈
Recommendation: fixed glazing
Fixed glazing works well where the view is the priority
Where ventilation is provided and the glass is accessible for cleaning, there is no need to pay extra for a sash and hardware.
LightMore glass
OperationSimpler
PriorityView
Need to open
18
The result does not replace a ventilation design or safety requirements. Each panel must be assessed in the context of the whole room.
Fixed glazing provides more glass
Eliminating the sash and hardware can reduce the visible profile width and improve the view.
It does not replace ventilation
If the room must be ventilated through the window, at least one section must open.
Cleaning must be planned
On an upper floor, fixed glazing without access from a balcony or the ground may require specialist cleaning.
Two types of fixed panel
A fixed panel may be glazed directly into the outer frame or made as a non-opening sash. The two options differ in profile appearance, glazing line and how they connect to adjacent panels.
Larger formats require structural verification
The absence of an opening function does not remove wind loads or the weight of the glass. Permitted dimensions depend on the profile, glazing unit and fixing method.
Ventilation takes priority over appearance
If the room has no other effective means of air exchange, too many fixed panels can make everyday use more difficult.
Opening sashes are needed where they serve a purpose
A sash can provide access, rapid ventilation, access to the window board or a way to clean adjacent panels. It does not need to be repeated in every module.
Glass safety still matters
Large areas of glazing close to floor level may require safety glass. The choice depends on height, impact risk and how the space is used.
Layout checklist
- VentilationIdentify the panels needed for air exchange.
- AccessProvide access only where it will be used.
- CleaningCheck access to every pane.
- ViewAvoid unnecessary profiles and divisions.
- SecuritySelect glass to suit its position and purpose.
Adviser’s tip
I do not recommend the maximum number of sashes simply because they can be made. Every opening panel should have a specific purpose.
A good design usually combines large fixed panels with a few well-positioned sashes for ventilation and cleaning.
For upper floors, I always ask about external access — saving money on a sash should not create a permanent cleaning problem.
Let us plan the layout around function, views and ease of use.
Send me the elevation, floor plan and details of ventilation and cleaning access.
I will help you avoid unnecessary sashes without compromising everyday comfort.

53
Entrance doors
Steel, aluminium or timber entrance doors?
Read more →
Entrance doors · material
Steel, aluminium or timber entrance doors?
The material affects rigidity, appearance, possible dimensions, maintenance and price. There is no single winner for every home — the complete construction and correct installation are what matter.
Answer in 30 seconds
Steel doors are often a sensible budget-conscious choice and offer a wide range of designs. Aluminium performs well in modern, larger door sets and allows slim, rigid assemblies, but it usually costs more. Timber provides a natural appearance and good performance, although its finish requires informed care. Material alone does not determine quality: compare the door leaf, frame, threshold, gaskets, glazing, locks, Ud value and installation.
Match the option to your home and priorities
Select the most important feature, entrance style and willingness to carry out maintenance. The result provides a starting point for comparing quotations.
Top priority
Character of the house
Care of the finish
Steel entrance door
Recommendation: steel
A sensible starting point when controlling the budget
Steel can offer good value for money if the complete model is compared, including the threshold, locks and installation.
RigidityGood
MaintenanceSmall
BudgetMost affordable
Suitability
82
This is a direction, not an automatic product choice. The performance of a specific model may matter more than the general characteristics of its material.
Steel — a practical budget option
It offers a wide choice of designs and equipment, but the construction and limits require particular attention at large sizes.
Aluminium — large formats and contemporary design
It is well suited to rigid, large doors, side panels and slim details, usually at a higher price.
Timber — natural character
It provides a warm appearance and can be refurbished, but requires inspection and care of the finish.
Material alone does not describe the complete door
The outcome depends on the door-leaf construction, frame, insulation, gaskets, threshold and fixing method. Two models made from the same material may differ more than doors made from different materials.
Compare steel doors together with their frames
Door-leaf thickness, reinforcement, edge protection and the thermal performance of the complete assembly matter. For dark colours and sunny exposures, check the manufacturer’s recommendations.
Aluminium offers extensive design possibilities
Aluminium profiles work well with large door leaves, pull handles and side panels. Check the thermal breaks, Ud value of the complete door and the equipment that affects the price.
Timber requires informed care
This natural material responds to environmental conditions, so bonding quality, the finish, entrance canopy and periodic inspection are important. One advantage is that the surface can be refurbished.
Security comes from the complete assembly
The multipoint lock, cylinder, hinges, glass and installation method should be assessed together. The door-leaf material alone does not guarantee burglary resistance.
Comparison checklist
- Ud value of the complete doorDo not compare the infill panel alone.
- Dimensions and colourCheck the limits and exposure.
- Threshold and gasketsAssess thermal performance, weathertightness and comfort.
- Locks and glazingCompare all equipment.
- Installation and entrance canopyConsider the conditions at the entrance.
Adviser’s tip
I first establish the dimensions, exposure, architectural style, expected comfort and budget. Only then do I compare materials.
For large doors with side panels, I am more likely to consider aluminium. With a limited budget, I assess a well-equipped steel door; for natural architecture where maintenance is accepted, I consider timber.
For every option, I request one complete specification: Ud value, threshold, lock, cylinder, glazing, pull handle and installation scope.
Let us compare performance, equipment and installation point by point.
Send me the dimensions, a photograph of the elevation, your preferred colour and any quotations you have.
I will help explain the price difference and identify which option suits your project.

54
Entrance doors
What does a door’s Ud value mean?
Read more →
Entrance doors · thermal insulation
What does a door’s Ud value mean?
The Ud value describes heat transfer through the complete door: the door leaf, frame, threshold and any glazing. It is a performance value for the entire unit, not just the infill panel.
Answer in 30 seconds
The lower the Ud value, the less heat is transferred through the door. It is stated in W/(m²·K) and should apply to the complete door set at a specified size. The value for the panel or door leaf alone is not sufficient. Actual performance is also affected by the threshold, frame, sidelights, seals, adjustment and airtight installation. This is why two doors with similar Ud values may still differ in everyday comfort.
See how surfaces and edge zones determine the result
Enter indicative values for the door leaf, frame and glazed panel. The calculation illustrates the relationship and does not replace the manufacturer’s declaration.
0.92 Ud
Indicative result
Good thermal performance requires a coherent assembly
A better-insulated panel will have only a limited effect if the frame, threshold or sidelight remains less efficient.
Door leaf0.70
Frame1.30
Glazed side panel or toplight0.70
Heat loss
42
The simplified model assumes typical proportions for the door leaf, frame and a small sidelight. The manufacturer’s documentation remains authoritative.
The letter ‘d’ denotes a door
Ud applies to the complete door, just as Uw describes the complete window.
Dimensions affect the result
The proportions of the frame and door leaf depend on the actual dimensions of the unit.
Installation completes the performance equation
A good declared value will not remedy a thermal bridge beneath the threshold or a leaky installation joint.
What exactly does the Ud value measure?
This value indicates the amount of heat passing through one square metre of the door at a temperature difference of one kelvin. A lower figure means better thermal insulation.
Do not compare the infill panel alone
A manufacturer may quote an excellent value for the infill panel, but the frame, threshold and glazing affect the result for the entire door. For a valid comparison, you need the Ud value of the complete model.
Side panels and toplights make their own contribution
A sidelight or fanlight increases the glazed area, edge length and number of joints. The performance of the complete door set must therefore be assessed.
The threshold is often the weakest area
A low threshold improves ease of access, but it must be properly supported, insulated and connected to the waterproofing.
Weathertightness and adjustment are equally important
Even a well-insulated door can cause discomfort if the seals do not make even contact or the door leaf needs adjustment.
Quotation checklist
- Ud value of the complete doorAsk for the value for the dimensions quoted.
- Elements includedCheck whether the value includes side panels and toplights.
- ThresholdConfirm the insulation and support method.
- SealingCompare the gaskets, locks and compression.
- InstallationRequire a description of the installation layers and threshold detailing.
Adviser’s tip
I do not select a door on the basis of a single figure. I check whether the Ud value applies to the complete unit being offered and whether it includes any sidelights and the specific dimensions.
At an entrance, an air-leaking threshold, poor adjustment or a thermally weak support can be more noticeable than a small difference between catalogue values.
A meaningful comparison is only possible when both quotations specify the same dimensions, glazing, equipment and scope of installation.
Let us assess the Ud value, threshold and installation as one system.
Send the dimensions, construction drawing and data sheets for the two models you are considering.
I will help you determine whether the figures in the quotations really refer to comparable doors.

55
Entrance doors
Entrance doors with side panels or toplights — what should you consider?
Read more →
Entrance doors · sidelights and fanlights
Entrance doors with side panels or toplights — what should you consider?
A sidelight or fanlight can make the entrance feel more open and brighter, but it also increases the overall dimensions, glazed area and number of joints. A good design balances daylight, privacy, security and structural stability.
Answer in 30 seconds
With a door incorporating a sidelight or fanlight, check five points: the dimensions of the complete unit, the type of safety glass, the required level of privacy, the Ud value, and the method of support and installation. A sidelight brings in daylight at face level and makes the entrance appear wider, while a fanlight is effective at brightening a deeper entrance lobby. The more glazing and joints there are, the more important structural design, weather-tightness and careful threshold detailing become.
Explore the balance of light, privacy and construction
Select the arrangement, glass type and entrance width. The visualisation indicates the direction of change; it does not replace the manufacturer’s calculations.
Glazed-panel arrangement
Glass type
Overall width
Recommendation: side panel
Daylight enters exactly where it is needed: at the entrance
This is a good option if there is space beside the door and you want the entrance area to appear wider.
Amount of lightLarge
PrivacyLow
RequirementsStandard
Complexity of the door set
48
For floor-level glazing, specify safety glass, the insulating glass unit and edge protection at the quotation stage.
The glass must be safety glass
Laminated or toughened safety glass is often used around an entrance, depending on the risk assessment.
Privacy should be designed deliberately
Frosted glass, patterns or selective coatings also affect privacy when the interior lights are on.
The complete assembly requires support
A wide unit needs stable support, correct fixing and a continuous seal.
Side panel or toplight?
A sidelight widens the door set and admits daylight at eye level. A fanlight uses the space above the door and can illuminate the deeper part of the entrance lobby.
Safety glass is not a decorative extra
There is a risk of impact at an entrance, so the glass breakage behaviour and retention of fragments should be selected to suit the location and pane size.
Privacy changes after dark
Reflective glass does not guarantee privacy when it is brighter inside than outside. Frosted glass restricts the view more consistently, but it also changes the quality of the light.
More glass affects the Ud value
The performance of the complete unit depends on the insulating glass unit, spacer, edge lengths and the profiles connecting the sidelight to the door.
Installation must cover the complete assembly
The weight and width require continuous support, enough fixing points and a weathertight connection to the wall and threshold.
Design checklist
- Arrangement and dimensionsCheck the width of the entire opening.
- SecuritySpecify the type of glass on both sides.
- PrivacyAssess privacy after dark as well.
- Ud value of the complete assemblyAsk for the performance value of the door including the sidelight.
- InstallationConfirm the support, fixing and sealing method.
Adviser’s tip
I first establish how much daylight the entrance lobby actually lacks. A sidelight or fanlight should meet a specific need, not simply add another option to the quotation.
For a large door set, I check the safety glass, the Ud value of the complete construction and the supporting detail. These points matter more than the glass pattern alone.
If privacy is important, I assess the glass in daylight and after dark—ideally under conditions similar to those at the actual entrance.
Let us match the arrangement, glass and proportions to the elevation.
Send a photo of the entrance, the opening dimensions and an indication of the level of privacy you need.
I will help you check the safety, performance specifications and full scope of installation.

56
Entrance doors
Should entrance doors open inwards or outwards?
Read more →
Entrance doors · opening direction
Should entrance doors open inwards or outwards?
The opening direction affects the entrance lobby, canopy, weather sealing, safe operation and everyday convenience. It should be determined by the entrance layout, not simply by habit.
Answer in 30 seconds
Inward-opening doors are easier to protect from rain and do not take up space outside the entrance, but they require room within the entrance lobby. Outward-opening doors preserve interior space and may perform better under wind pressure, but they need a suitable landing, canopy, snow clearance and a safe swing area. The choice must be coordinated with the position of steps, storage and the doormat, the prevailing wind direction and the threshold detail.
Check where the door leaf will not obstruct movement
Select the conditions at the entrance. The tool will indicate the safer opening direction for further consultation.
Space in the entrance lobby
Area in front of the door
Entrance protection
OUTDOOR AREAENTRANCE LOBBY
Recommendation: outwards
You save space in a small entrance lobby
A wide, sheltered landing gives the door leaf a safe movement zone outside the entrance.
Entrance lobbyClear
LandingRequired
WeatherGood protection
Opening-direction conditions
82
Opening direction and hinge side are two separate decisions. Both should be shown on the plan together with the entrance fittings and furniture.
Check the full swing of the door leaf
The handle, wardrobe, radiator, stairs and doormat must not interfere with the movement of the door.
Weather conditions affect the choice
Rain, snow and the prevailing wind affect comfort and the requirements for an entrance canopy.
The threshold still needs to be designed
Drainage and support must be matched to the opening direction and ground levels.
Inward opening
The leaf moves within the protected interior and the hinges remain inside. However, the full swing area and enough space for several people to enter comfortably must remain clear.
Outward opening
This makes better use of a small entrance lobby, but requires a level landing of sufficient size. The leaf should not open directly over steps.
Wind can help or hinder
Wind pressure depends on the exposure of the façade. In some arrangements it presses the leaf closed; in others it makes opening difficult or catches the door suddenly.
A canopy and snow clearance are functional considerations
With an outward-opening door, snow, ice or items left on the landing may block it. A canopy reduces direct exposure to water.
Do not overlook the escape route
In a single-family home, the opening direction is usually determined by ergonomics. Other buildings may be subject to additional requirements, which the designer should confirm for the project.
Opening-direction checklist
- Door-leaf swingDraw it at full width on the plan.
- Landing and stepsLeave a safe movement zone in front of the door.
- Wind and precipitationCheck the weather exposure and canopy.
- ThresholdPlan the levels and drainage.
- HingesDetermine the hinge side separately.
Adviser’s tip
I always draw the door leaf on the plan and check both opening directions in relation to the wardrobe, stairs, landing and circulation route.
A small entrance lobby often favours outward opening, but only when the landing is sufficiently large and sheltered.
My assessment does not end with ergonomics. I also verify wind exposure, the threshold detail and compliance with the building design.
Let us check the entrance on the plan before you order the door.
Send the entrance-lobby plan, a photo of the landing and details of the canopy.
I will help identify conflicts that are not apparent from the quotation alone.

57
Entrance doors
Electric strike, keypad or fingerprint reader?
Read more →
Entrance doors · access control
Electric strike, keypad or fingerprint reader?
Convenient keyless entry can be achieved in several ways. The differences concern not only ease of use, but also wiring, operation during a power failure, user permissions and servicing.
Answer in 30 seconds
An electric strike releases the latch when it receives a signal and can work with an intercom, push button, keypad or smart-home system. A keypad provides access by code and is well suited to multiple users. A fingerprint reader is particularly quick in daily use, but requires a high-quality device, a reliable power supply and a contingency plan. A good system always retains the option of secure mechanical unlocking.
Match the access method to the users and installation
Select the main requirement, number of users and power-supply status. The result will show the most logical starting point.
Most important requirement
Number of users
Installation by the door
↳)))
Recommendation: electric strike
A simple actuator for an intercom or push button
An electric strike does not identify the user itself. It releases the door after receiving a signal from the selected controller.
ConvenienceGood
ManagementVia the controller
InstallationWired
System complexity
38
This tool does not assess the security of a specific product. The lock, cylinder, wiring and emergency release must be evaluated as one complete system.
The electric strike carries out the command
User identification requires a separate push button, intercom, code or reader.
A code is easy to share
A keypad works well for family members, service personnel or tenants if it allows separate codes to be created.
Biometrics provides fast access
A fingerprint reader is convenient, but moisture, dirt, updates and an emergency mode must be considered.
An electric strike is not the complete system
Its role is to release the latch. The signal may come from an intercom, push button, keypad, reader or building-automation controller.
A keypad makes access management easier
A good device allows separate codes to be issued and removed, temporary codes to be created and the event history to be reviewed. One shared code reduces control.
A fingerprint reader should operate locally
Check how data is stored, whether additional fingerprints can be enrolled, weather resistance and operation at low temperatures.
A power cut must not prevent access to the home
Establish how the system behaves after a power failure, whether a key can be used and how emergency power can be accessed.
Wiring is planned before installation
The power supply, control cable, cable transfer and controller location should be agreed with the electrician and door manufacturer.
Entrance-system checklist
- UsersEstablish the number of users and how access rights will be granted.
- Power supplyPlan the wiring and behaviour in the event of a failure.
- Emergency accessRetain an independent means of opening the door.
- Outdoor conditionsCheck the IP rating and operating-temperature range.
- ServicingConfirm the warranty, updates and availability of spare parts.
Adviser’s tip
I first establish who will use the entrance and whether access should be permanent, temporary or remote. Only then do I select the device.
If the electrical installation has not been prepared, even the best system may require expensive retrofitting of cables across the finished façade.
I always retain a mechanical means of entry and establish how the lock behaves after a power failure—convenience must not create a new risk.
Let us combine the lock, reader and installation into one functioning system.
Send the door model, installation plan and details of who will use the entrance.
I will help you prepare a list of questions for the manufacturer and electrician before ordering.
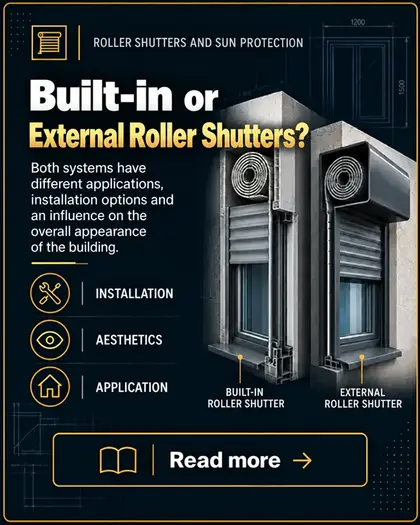
58
Roller shutters and shading
Top-mounted or façade-mounted roller shutters?
Read more →
Roller shutters · box system
Top-mounted or façade-mounted roller shutters?
Both solutions protect the window, but they are integrated with the building in different ways. The choice depends on the stage of the project, space for the shutter box, insulation thickness and the desired appearance.
Answer in 30 seconds
A top-mounted roller shutter has its box fitted above the window and is usually installed in the opening together with it. It works well for replacement windows or in a building designed for this type of unit, but increases the overall item height and requires the box to be properly insulated. A front-mounted shutter is installed externally, either in front of the window or within the reveal. It is easier to retrofit to an existing building and, in a new-build, can be concealed within the insulation layer if space and service access have been planned in advance.
Choose the right solution for the construction stage
Select the construction stage, whether the lintel can be altered and your preferred box appearance.
Project stage
Space above the window
Box appearance
Recommendation: flush-mounted front-mounted roller shutter
A new build allows the box to be concealed within the façade layers
The insulation thickness, inspection access and cable routing must be determined early on.
InstallationBefore the façade is finished
ServicingFrom outside
CoordinationHigh
Design requirements
72
Even a concealed box still requires an accessible inspection cover. It must not be covered with render or insulation.
A top-mounted shutter is installed together with the window
The box increases the overall height of the assembly and affects the window dimensions and glazed area.
A front-mounted shutter sits in front of the window
It can remain visible or be concealed beneath the insulation if the detail is planned in advance.
The inspection opening must remain accessible
The motor, shutter curtain and shaft must remain serviceable without damaging the façade.
A top-mounted roller shutter forms one assembly with the window
The box is fitted to the frame before installation. The overall assembly height must be allowed for during the survey and within the clear opening.
A front-mounted shutter offers greater flexibility
The box is positioned outside and can be installed later. A flush-mounted version requires sufficient insulation thickness and a suitably prepared lintel.
Box insulation must be carefully designed
A top-mounted box sits close to the interior, so its construction, connection to the frame and sealing affect both the temperature and sound insulation above the window.
Guide rails affect the appearance of the façade
Their width, colour and installation method should complement the window frames. Flush-mounted guide rails require effective drainage.
The motor requires wiring and controls
The power supply must be routed to the correct side of the box. Wall switches, radio control and any automation should be decided at the design stage.
Pre-order checklist
- Box typeMatch it to the construction stage.
- Opening dimensionsAllow for the overall assembly height.
- InsulationCheck the available space and continuity of the insulation.
- Inspection accessRetain service access.
- ControlsPlan the wiring, motor and automation.
Adviser’s tip
For a new home, I begin with the lintel cross-section and insulation thickness. This ensures the selected box neither reduces the glazed area nor creates problems with the façade.
When replacing windows, I check whether a top-mounted box will fit without excessively reducing the glazed area and how it will be finished internally.
Whichever option is chosen, I request drawings showing the inspection access, guide rails, wiring and the connection between the box and the insulation.
Let us review the boxes, openings and façade before the survey.
Send me the lintel cross-section, insulation thickness and opening dimensions.
I will help you select a system that can be installed correctly and serviced in future.
59
Roller shutters and shading
Does a roller shutter improve a window’s thermal performance?
Read more →
Roller shutters · warmth and comfort
Does a roller shutter improve a window’s thermal performance?
A closed shutter curtain creates an additional layer and reduces air movement in front of the glass. It can reduce heat loss at night, but it does not change the window’s declared Uw value or remedy installation defects.
Answer in 30 seconds
Yes – a closed roller shutter can temporarily improve the thermal performance of the complete system because it creates an additional air layer and wind barrier between the curtain and the glazing. The effect depends on the curtain, gaps, guide rails and box. This does not, however, give the window a lower declared Uw value. A poorly insulated or leaky box can partly negate the benefit. Closing the shutter is most worthwhile at night and during severe frost.
See what changes when the roller shutter is lowered
Set the outside temperature, shutter position and shutter-box quality. The result indicates the likely change in comfort, not exact energy consumption.
Outside temperature
Roller shutter position
Box insulation
›››
Roller shutter open
The window performs without an additional insulating air layer
Heat loss depends primarily on the window’s performance, temperature, wind and installation quality.
Wind protectionNone
Air layerNone
BoxGood
Estimated heat loss
38
The simulator illustrates qualitative relationships. Assessing the actual energy effect requires data for the specific window, roller shutter, shutter box and building.
The roller shutter curtain creates a buffer zone
A layer of stiller air between the roller shutter and the glazing reduces some heat transfer.
Gaps reduce the effect
Wind entering beneath the shutter curtain or through the guide rails weakens this additional barrier.
The shutter box can form a thermal bridge
Its insulation and connection to the wall are just as important as the shutter curtain itself.
A roller shutter does not change the declared Uw value
Uw describes the window without a periodically lowered screen. A closed roller shutter provides a temporary improvement, but it cannot replace a thermally efficient frame, insulating glass unit or proper installation.
The air layer is crucial
When the shutter curtain is closed, it reduces air movement next to the glazing. The more sheltered and still the space, the greater the potential benefit.
The curtain and guide rails work together
The slat material, perforations, side gaps and bottom rail determine how effectively the roller shutter separates the window from outdoor conditions.
The shutter box must be assessed separately
A poorly sealed access panel or a break in the insulation above the window can create a cold area, even if the shutter curtain improves conditions at the glazing.
The effect of a roller shutter is even more pronounced in summer
Blocking solar radiation before it reaches the glazing can significantly reduce overheating. This is a different mechanism from improving thermal insulation in winter.
Roller shutter thermal-performance checklist
- BoxCheck the insulation and airtightness of the inspection access.
- Guide railsAssess the gaps and connection to the frame.
- Roller shutter curtainSpecify the material and perforations.
- AutomationConsider night-time and weather-based closing scenarios.
- InstallationEnsure continuous insulation above the window.
Adviser’s tip
I present roller shutters as an additional controllable screen, not as a way to compensate for an underperforming window.
In winter, the greatest benefit comes from lowering the shutter regularly at night. In summer, closing it before the glazing heats up limits solar gains.
When comparing quotations, I examine the shutter box and its installation just as carefully as the motor and curtain—it is very easy to create a weak thermal zone above the window.
Let us review winter comfort, summer protection and the shutter-box detail.
Send me the window schedule, shutter-box type and a section through the lintel.
I will help you compare complete solutions, not just the shutter curtain or motor.
60
Roller shutters and shading
Can a roller-shutter box be completely concealed?
Read more →
Roller shutters · concealed installation
Can a roller-shutter box be completely concealed?
The box can be made almost invisible from the façade. Functionally, however, it cannot disappear: it needs space, insulation, drainage and an accessible inspection panel.
Answer in 30 seconds
Yes, a roller shutter box can be concealed beneath the insulation and render if the building has been prepared for a flush-mounted solution. The inspection panel must remain accessible because it provides service access to the shaft, curtain and motor. Adequate insulation thickness, space above the window, suitable guide rails and drainage must also be maintained. Attempting to conceal the box without proper design can create a thermal bridge or reduce the glazed area.
Check what must remain accessible
Select the insulation thickness, façade stage and method of service access.
Insulation thickness
Construction stage
Inspection access panel
Recommendation: correct concealed installation
The box can be concealed within the façade while the inspection access remains accessible
The insulation covers the front of the shutter box, while maintenance is carried out through a purpose-designed external access panel.
AppearanceAlmost invisible
ServicingPossible
Thermal-bridge riskControlled
Detail complexity
58
‘Completely concealed’ means invisible in the finished façade, not permanently sealed with no possibility of repair.
A concealed installation requires space
The shutter-box depth and insulation layers must be coordinated on the lintel detail.
Inspection access is essential
The access panel allows the motor to be replaced, the shaft to be reached and the shutter curtain to be adjusted.
The render must not obstruct operation
The connections must minimise cracking, while the guide rails and shutter curtain need sufficient clearance to move freely.
What does a concealed roller shutter box actually mean?
Once the façade is complete, the front of the shutter box is covered by insulation and render; principally the curtain slot and guide rails remain visible.
The lintel section determines whether concealed installation is possible
Check the shutter-box setback, insulation thickness, opening height and the space required for the drip edge and finishing layers.
The inspection access panel must be able to open fully
Before rendering, check the full travel of the access panel and the clearance required to remove components. Visual access alone is not sufficient.
Continuous insulation protects the lintel
Insulation that is too thin in front of the box, or a gap between the box and the wall, can reduce the internal surface temperature above the window.
The guide rails also affect the final result
They can be partially integrated into the façade, but drainage, correct installation and unrestricted shutter-curtain movement must be maintained.
Concealed shutter-box checklist
- SectionConfirm the position of the shutter box and insulation.
- Inspection accessProvide full service access.
- InsulationMaintain continuous insulation in front of and above the shutter box.
- FaçadePlan the reinforcing mesh, render and movement-joint zones.
- DrainageDo not obstruct the drainage paths or guide rails.
Adviser’s tip
I do not promise a concealed shutter box until I have seen the lintel detail and confirmed the insulation thickness.
If space is insufficient, it is better to accept a discreetly visible component than to interrupt the insulation or reduce the glazed area without understanding the consequences.
Before the façade is finished, I ask the installation team to test the access panel and photograph all cables and connections.
Let us check the lintel, insulation and inspection access before installation.
Send me the wall section, insulation thickness and opening dimensions.
I will help you assess whether the chosen option can be concealed without compromising its function.

61
Roller shutters and shading
Manual operation or electric motor?
Read more →
Roller shutters · drive and automation
Manual operation or electric motor?
The operating method should suit the shutter size, the number of blinds and everyday habits. With numerous or large shutter curtains, a motor quickly stops being a luxury and becomes an important convenience.
Answer in 30 seconds
Manual operation is less expensive, simpler and independent of the power supply, so it makes sense for individual small shutters. A belt or crank does, however, require interior space and regular operation, and can wear mechanically over time. An electric motor is more convenient for large glazed areas and multiple shutters. It enables central control, schedules and weather sensors, but requires wiring, correctly specified torque and service access.
Check when an electric drive offers genuine value
Select the number of roller shutters, the size of the largest curtain and the required level of automation.
Number of roller shutters
Shading-system size
Automation
↻)))
Recommendation: manual operation
For one small roller shutter, a simple solution may be sufficient
A belt or crank keeps costs down and requires no power if daily operation is not inconvenient.
ComfortBasic
InstallationSimple
AutomationNone
Case for a motor
24
The result helps assess convenience, but motor selection always requires the dimensions, curtain weight, shaft diameter and installation conditions.
A belt is simple but remains visible
The belt outlet affects the interior finish and must be sealed correctly.
The motor is selected for the load
An underpowered drive may overheat, while an oversized one does not replace correct end-limit settings.
Automation ensures that roller shutters are used regularly
Night, weather and away scenes improve comfort and ensure consistent operation.
Manual operation still has its place
With a small number of lightweight roller shutters, it can be economical and reliable. However, a visible belt, crank or belt winder must be accepted.
A large curtain requires greater operating force
Weight increases with width and height. Manual lifting can become inconvenient, especially with daily use.
The motor requires the correct torque
Selection takes account of curtain weight, the shaft, friction in the guide rails and a suitable performance reserve. Obstacle and freeze detection should also be checked.
Wired and radio control are not the same
Wired control requires cable routes to switches or a controller. Radio control still needs a power supply to the motor, but reduces control wiring.
Faults and power cuts should be allowed for
Service access, an emergency means of raising the shutter and system behaviour after power is restored must be established.
Drive checklist
- Roller shutter dimensionsMatch the motor torque to the curtain.
- WiringPlan the power supply before plastering.
- ControlsChoose a switch, radio control or central controller.
- SecurityCheck obstacle and freeze detection.
- ServicingMaintain access to the motor and shaft.
Adviser’s tip
I do not push a customer towards a motor for one small roller shutter. With several shutters, however, I ask whether they will genuinely operate them all by hand every day.
For patio doors and large glazed areas, an electric drive usually provides noticeably greater comfort and encourages more regular use of the shading system.
I always establish the control method before the electrical installation is carried out, as adding cables later may damage finished plasterwork.
Let us compare cost, everyday convenience and automation options.
Send the number and dimensions of the roller shutters, together with details of the prepared electrical installation.
I will help identify where a drive adds real value and where manual operation is sufficient.

62
Roller shutters and shading
Roller shutters or external venetian blinds for large glazed areas
Read more →
Shading systems · large glazed areas
Roller shutters or external venetian blinds for large glazed areas
For a large glazed area, the shading system must limit overheating, provide privacy and withstand external conditions. Roller shutters and external venetian blinds achieve this in different ways.
Answer in 30 seconds
A roller shutter provides strong blackout, high privacy and additional wind protection, but when closed it almost completely removes the view. An external venetian blind allows the direction of daylight to be controlled while maintaining some visual connection with the outside. On large glazed areas, however, it requires stable guides, suitable space for the stacked slats and wind-responsive automation. If the priority is a bedroom and complete blackout, a roller shutter will usually be the better choice. If a living room should retain its view and controlled daylight, an external venetian blind is often preferable.
Compare shading systems for a large glazed area
Select the type of shading, the room priority and wind exposure.
Type of shading
Priority
Wind exposure
Recommendation: roller shutter
Complete blackout and privacy when closed
This is a strong choice for bedrooms and wherever the customer wants to prevent any view from outside.
LightBlocked
ViewNone
WindGreater resistance
Installation requirements
55
Permitted dimensions, wind-resistance classes and automatic retraction rules must be confirmed for the specific product.
A roller shutter blocks out light
When lowered, it provides privacy and blackout, but restricts the view of the garden.
An external venetian blind directs the light
The slat angle can shield the interior from the sun without completely blocking the view.
Wind is more significant for external venetian blinds
The large slat area requires guide rails, a sensor and an appropriate protection scenario.
Large glazing needs solar protection
External shading stops a substantial proportion of solar energy before it reaches the glazing unit, so it is more effective than an internal curtain.
A roller shutter provides an ‘open-or-closed’ effect
The curtain can be stopped part-way, but its primary function is to cover the opening. When fully lowered, the view from the interior is lost.
An external venetian blind allows the slat angle to be adjusted
The slats can reflect high-angle sunlight while admitting diffuse light. Their position depends on the time of day and orientation.
Large formats increase the mechanical requirements
Width, height and exposure affect the permitted curtain or slat-stack dimensions, guide rails and motor selection.
Automation can protect the shading system
A wind sensor is particularly important for external venetian blinds. Solar control helps lower the shading before the interior heats up.
Large-glazing checklist
- Room functionEstablish the requirements for view, privacy and blackout.
- OrientationAssess the timing and intensity of sunlight.
- WindCheck the exposure and product classes.
- DimensionsConfirm the permitted shading-system dimensions.
- AutomationPlan the sensors and protection scenarios.
Adviser’s tip
For a living room with an expansive view, I am more likely to begin with an external venetian blind, as it controls daylight without completely cutting off the garden.
In a bedroom or another room requiring full blackout, a roller shutter usually provides a simpler and more predictable result.
On an exposed façade, I check wind-resistance classes, side guidance and automation before assessing appearance—especially at large widths.
Let us match the solution to daylight, the view and the building’s exposure.
Send the façade drawing, orientations, glass dimensions and intended use of the rooms.
I will help compare roller shutters and external venetian blinds against your actual needs, rather than one general rule.
63
Ventilation and trickle vents
Why are trickle vents used in new windows?
Read more →
Ventilation · air supply
Why are trickle vents used in new windows?
New windows are considerably more airtight than old ones. A trickle vent supplies the controlled airflow required by natural or mechanical extract ventilation.
Answer in 30 seconds
A trickle vent is not intended to make a ‘poor window leaky’. It is a planned fresh-air inlet. Without incoming air, extract grilles have nothing to remove, and humidity, CO₂ concentration and the risk of condensation may rise. The vent is selected for the ventilation type, room and required airflow. With a properly designed mechanical ventilation system with heat recovery, conventional window trickle vents are not normally installed.
See when an airtight window needs an air supply
Select the ventilation type, number of occupants and how the windows are used.
Ventilation
Occupants
Ventilation
→ → →
●Direction: controlled air supply
Natural ventilation needs an air-supply path
A trickle vent supplies air without the window being left tilted and supports airflow towards the extract grilles.
Air supplyRequired
HumidityTo be checked
PriorityAirflow sizing
Air-supply requirement
72
This assessment is for guidance. The number and airflow capacity of the trickle vents should be confirmed by the ventilation designer.
Air must be able to enter
Extraction from the kitchen and bathroom works only when the building has an air-supply path.
A trickle vent creates controlled conditions
It supplies air at a defined point instead of through uncontrolled gaps.
It does not replace airing
Rapid airing may still be needed during cooking, bathing or when many people are present.
Airtightness changes ventilation conditions
Old windows often admitted air through incidental gaps. Once they are replaced, this route disappears, so the air supply must be planned.
An extract grille cannot draw from a vacuum
For air to leave the kitchen or bathroom, it must first enter the living spaces and flow through the home.
Moisture is one warning sign
Condensation on the glass, stuffy air and mould may indicate inadequate air exchange, but temperature and thermal bridges must also be checked.
Position affects comfort
The incoming air should mix with warm room air and should not cause a direct draught in permanently occupied areas.
Acoustic performance must be checked separately
A standard trickle vent creates a path for sound. Beside a busy road, compare solutions with enhanced acoustic insulation.
Selection checklist
- Ventilation typeEstablish where the air comes from and where it flows.
- Airflow capacityMatch the number of devices to the rooms.
- Acoustic performanceAccount for external noise.
- Installation positionReduce the risk of draughts.
- OperationDo not cover or permanently close the trickle vent.
Adviser’s tip
Before recommending a trickle vent, I ask about the ventilation system throughout the building. The window’s airtightness alone is not enough to select the device.
Beside a busy road, I also check the acoustic rating because the air inlet can reduce the benefit of an expensive acoustic glazing unit.
The best decision is made together with the ventilation designer before the windows enter production.
Let us check the air supply before ordering the windows.
Send the room layout, ventilation type and information about external noise.
I will help you prepare the right questions for the designer and window manufacturer.

64
Ventilation and trickle vents
Humidity-sensitive or pressure-controlled trickle vent?
Read more →
Ventilation · control method
Humidity-sensitive or pressure-controlled trickle vent?
Both devices supply air, but respond to different conditions. A humidity-sensitive vent responds to indoor humidity, while a pressure-regulated vent limits airflow changes caused by pressure differences.
Answer in 30 seconds
A humidity-sensitive vent opens wider as relative humidity rises, so it responds well to bathing, cooking and more occupants. A pressure-regulated vent stabilises airflow as wind and stack effect change, limiting excessive incoming air. Neither measures CO₂ or replaces ventilation design. The choice depends on the building type, moisture sources, wind exposure, acoustics and expected operation.
See what controls the opening
Select the device type, humidity and wind conditions.
Type of trickle vent
Indoor humidity
Wind
●→→
Humidity-sensitive · response to humidity
Airflow increases as the room becomes more humid
A material-based sensor changes the opening without a power supply, but does not respond directly to CO₂.
Control variableHumidity
WindIndirect effect
OperationAutomatic
Opening
55
This is a functional diagram. Actual airflow depends on the characteristics of the specific model and the pressure difference.
Humidity-sensitive control responds to moisture
It changes the opening with the room's relative humidity.
Pressure control stabilises airflow
It limits excessive incoming air in stronger winds or stack effect.
Neither measures air quality
High CO₂ levels can also occur at moderate humidity.
How does humidity-sensitive control work?
A sensor item changes length in response to humidity and mechanically adjusts the air inlet, usually without electricity.
How does pressure regulation work?
A damper restricts airflow as the pressure difference rises, making the air supply less dependent on gusts.
Humidity does not describe overall air quality
A large number of people can raise CO₂ without a rapid increase in humidity. A trickle vent does not replace an air-quality sensor.
User behaviour still matters
Do not tape over or permanently close the device. Clean it in accordance with the instructions without soaking the humidity-sensitive item.
Acoustic performance may determine the model
Beside a road, compare the sound reduction of the complete ventilation unit, not only the window without the vent.
Selection checklist
- VentilationConfirm the required airflow.
- MoistureAssess the kitchen, bathroom and number of occupants.
- WindConsider the façade's wind exposure.
- NoiseCompare acoustic ratings.
- MaintenanceCheck the cleaning method.
Adviser’s tip
I do not select a trickle vent solely by the name of its mechanism. I first establish the required airflow and the conditions in the specific room.
A humidity-sensitive vent is a logical choice where humidity reflects how the room is used. A pressure-regulated vent may provide more consistent comfort on an exposed façade.
Where noise is a concern, I always consider the vent’s rating together with the acoustic performance of the complete window.
Let us match the airflow, controls and acoustic performance to your home.
Send details of the ventilation type, rooms and external noise.
I will help you understand the differences before ordering the windows.
65
Ventilation and trickle vents
Are trickle vents needed with mechanical ventilation and heat recovery?
Read more →
Ventilation · heat recovery
Are trickle vents needed with mechanical ventilation and heat recovery?
In a correctly designed mechanical supply-and-extract ventilation system, fresh air is delivered through ducts. Additional openings in the windows will usually disrupt this balance.
Answer in 30 seconds
Usually not. Mechanical ventilation with heat recovery supplies fresh air to living spaces and extracts stale air from kitchens, bathrooms and dressing rooms. Window trickle vents would create an uncontrolled airflow route that bypasses the ventilation unit, filters and heat recovery. Exceptions, such as an incomplete system, refurbishment or special requirements for combustion appliances, require a designer’s decision. Before ordering the windows, confirm which ventilation system will actually be installed.
Check whether the airflow route has already been planned
Select the system type, design status and whether a combustion appliance is present.
System
Design and commissioning
Fireplace / combustion appliance
REKU
Direction: no window trickle vents
The designed heat-recovery ventilation system supplies air through ducts
An additional opening in the window bypasses the filter, heat exchanger and system balancing.
Air supplyThrough ducts
Air balanceControlled
DecisionNo trickle vents
Consultation required
22
The final decision must be confirmed by the building services designer. Certain combustion appliances may require a separate combustion-air supply.
Supply air is delivered through ducts
The ventilation unit filters the air and recovers some of its energy.
A trickle vent bypasses the ventilation unit
It creates an uncontrolled air supply dependent on wind and pressure.
The design and installation must match
Simply saying 'there will be heat-recovery ventilation' is not enough before ordering the windows.
Heat-recovery ventilation operates with a controlled air balance
Supply and extract airflow rates are designed and balanced. Air leakage makes the intended balance harder to maintain.
Filtration works only along the planned airflow route
Air entering through a trickle vent passes through neither the unit’s filters nor the heat-recovery system.
Extract-only ventilation is a different system
If the system only extracts air mechanically, the supply may still require trickle vents or separate outside-air inlets.
A fireplace requires separate assessment
A combustion appliance should have an air-supply solution that complies with the design, manufacturer’s instructions and safety requirements.
The windows can be opened
Mechanical ventilation with heat recovery does not prevent windows from being opened, but daily air exchange should not depend on manual airing.
Checklist before window production
- System designConfirm supply and extract air in each room.
- System typeDistinguish heat-recovery supply-and-extract ventilation from extract-only ventilation.
- CommissioningEstablish who will measure the airflow rates.
- Combustion appliancesDesign a separate combustion-air supply.
- Window specificationDo not add trickle vents 'just in case'.
Adviser’s tip
When a client plans mechanical ventilation with heat recovery, I ask for the design to be confirmed before the windows are ordered. This avoids unnecessary openings later.
If the system provides mechanical extract only, the situation is different: the designer may then require controlled supply air through trickle vents.
I do not provide combustion air for a fireplace through an arbitrary window trickle vent. This is a separate building-services safety issue.
Let us coordinate the windows with the ventilation design before production.
Send the services plan, window schedule and information about the fireplace.
I will help identify conflicts between the window and ventilation designs.

66
Ventilation and trickle vents
Why does condensation form on the inside of the glass?
Read more →
Ventilation · condensation
Why does condensation form on the inside of the glass?
Condensation forms when humid air meets a surface colder than its dew point. It indicates the indoor conditions and glass temperature, not automatically a defect in the window.
Answer in 30 seconds
The higher the humidity and the lower the glass temperature, the greater the risk of condensation. Effective ventilation, short periods of intensive airing, steady heating and free circulation of warm air around the window usually help. Droplets between the panes, however, indicate a failed seal in the insulating glass unit and are a different problem.
Check the glass temperature margin
Select the room temperature, humidity and internal glass temperature.
Indoor temperature
Humidity
Glass temperature
Safe margin
The glass temperature is above the dew point
Under these conditions, condensation at the centre of the glass is unlikely.
Dew point7°C
Glazing16°C
Margin+9°C
Condensation risk
12
This is an indicative calculation. The glass edge may be colder than its centre.
Humidity raises the dew point
Bathing, cooking, drying laundry and breathing all increase the amount of water vapour.
The glass edge is colder
This is why the first droplets often appear beside the spacer bar.
Air must circulate
A deep window sill or curtain can prevent warm air from reaching the glass.
The dew point links temperature and humidity
There is no single fixed condensation temperature. It changes with the indoor air conditions.
Moisture sources are part of everyday life
Cooking, laundry, bathing and occupants can quickly raise humidity, especially where air exchange is poor.
Ventilation removes moisture
Supply and extract air must work together. Simply sealing a room traps moisture inside.
A warm-edge spacer helps at the glass edge
It can raise the temperature at the internal edge of the insulating glass unit, but it cannot replace ventilation or heating.
Water between the panes requires a different diagnosis
Moisture inside an insulating glass unit indicates seal failure and usually requires the unit to be replaced.
Inspection checklist
- HumidityMeasure it with a hygrometer.
- VentilationCheck the air supply and extract grilles.
- HeatingDo not prevent heat from reaching the window.
- Location of the dropletsDistinguish between the glass surface, glass edge and cavity between the panes.
- InstallationIf the problem persists, check the reveal temperature.
Adviser’s tip
I begin by measuring humidity and temperature rather than automatically blaming the window.
If the problem affects only the glass edge on frosty days, I examine the spacer, air circulation and indoor conditions. If the reveal is wet, I also check the installation.
Water between the panes is a separate case and requires the insulating glass unit’s seal to be assessed.
Let us establish whether the cause is humidity, ventilation or a cold area.
Send photographs, temperature and humidity readings, and information about the ventilation.
I will help organise the diagnosis before you call for service.

67
Ventilation and trickle vents
Mould around a window — is the window to blame?
Read more →
Ventilation · moisture and thermal bridges
Mould around a window — is the window to blame?
Mould grows where a surface remains damp for a prolonged period. The window may be part of the problem, but ventilation, a cold reveal or incorrect installation are equally common causes.
Answer in 30 seconds
This cannot be determined from appearance alone. Mould may result from high humidity, insufficient supply air, a cold lintel, discontinuous insulation or air leakage. First locate the problem, measure humidity and surface temperature, and check the ventilation. Cleaning alone removes the symptom, not the cause.
Select the conditions to see the most likely cause
Select the location of the marks, humidity and ventilation method.
Location
Humidity
Ventilation
Direction: cold reveal zone
With normal humidity, check the corner temperature
A local thermal bridge or missing insulation may keep the surface below a safe temperature.
First measurementTemperature
VentilationVerified
PriorityReveal
Risk of recurrence
48
This tool does not replace an inspection. Extensive mould should also be assessed by a building-moisture specialist.
Mould needs moisture
The key is to establish why the surface remains damp.
A thermal bridge lowers the temperature
A corner may remain cold despite good window performance.
Diagnosis requires measurements
Humidity, temperature and airflow reveal more than a single photograph.
The window is not always the cause
Marks beside the frame may result from the conditions across the entire room or from the wall construction.
Window replacement can reveal insufficient supply air
Airtight windows eliminate incidental air infiltration that may previously have supported ventilation.
Installation affects the reveal temperature
Missing insulation, poorly executed sealing or an unsuitable frame position can create a local cold zone.
Curtains and furniture restrict air circulation
Air should reach the glass and corners, particularly in winter.
Removing the visible growth does not complete the repair
After cleaning, dry the surface and eliminate the source of moisture.
Diagnostic checklist
- Photographs and locationIdentify the exact area.
- HumidityTake measurements over several days.
- VentilationCheck supply and extract air.
- TemperatureCompare the reveal with the wall.
- InstallationAssess the junction and insulation.
Adviser’s tip
I do not promise a solution from a photograph alone. I first ask for humidity readings and a description of the ventilation.
If the problem remains local despite good indoor conditions, I focus on the reveal and installation. Where marks are more widespread, I assess the entire building.
A lasting remedy must raise the surface temperature or lower humidity – often both at the same time.
Let us organise the measurements and possible causes before repairs begin.
Send photographs, humidity and temperature readings, and information about the ventilation.
I will help establish what the service technician or contractor should check.

68
Acoustic performance
What does Rw mean for a window?
Read more →
Acoustics · sound insulation
What does Rw mean for a window?
Rw is the weighted sound reduction index, expressed in decibels. The higher the value, the better the building item reduces sound—but one figure does not describe every type of noise.
Answer in 30 seconds
Rw allows the sound-insulation performance of windows to be compared under test conditions. A difference of a few decibels may be noticeable, but the performance of the complete window depends on the glazing, profile, seals, dimensions and installation. For road traffic, it is also worth checking the Ctr spectrum adaptation term, because low frequencies behave differently from speech. A trickle ventilator can reduce acoustic performance if it is not selected correctly.
See the difference between Rw and perceived noise
Select the external noise level, declared Rw and installation quality.
External noise
Window Rw
Installation
28 dB
Approximate level on the other side
An airtight installation allows the window to deliver its stated performance
The value is a simplified example of subtracting sound levels, not a prediction for a specific room.
Outside60 dB
Rw32 dB
Inside28 dB
Noise transmission
35
In practice, the noise spectrum, window area, reverberation and all flanking paths matter.
A higher Rw means better sound insulation
However, compare the result for the complete window, not just the glazing unit.
C and Ctr account for the spectrum
The Ctr term is particularly important for road traffic and low-frequency sound.
A gap can negate the benefit
Noise passes through a trickle ventilator, air leak or poorly executed perimeter joint.
The decibel scale is logarithmic
A change in value is not perceived linearly, so a few decibels should not be regarded as a ‘small’ difference.
The glazing unit is only one part of the window
The profile, seals, area and installation method affect the performance of the complete construction.
Asymmetric glazing helps
Different pane thicknesses and laminated layers reduce the coincidence of resonant frequencies.
The type of noise changes the requirement
A window is selected differently for speech than for heavy traffic, rail noise or bass-heavy music.
A trickle ventilator is a sound-transmission path
If one is required, it should provide suitable sound reduction and be included in the assessment of the complete unit.
Acoustic checklist
- Noise sourceIdentify whether the source is a road, railway, airport or neighbours.
- Performance of the complete windowDo not compare the glazing alone.
- CtrCheck the spectrum adaptation term for road-traffic noise.
- Trickle ventInclude its sound reduction.
- InstallationRequire an airtight perimeter joint.
Adviser’s tip
I do not ask only about the expected Rw. I first establish the source of the noise and when it is at its loudest.
For a busy road, I request the full Rw rating together with Ctr and confirm that it applies to the complete window being offered.
Expensive acoustic glazing will not help if the trickle ventilator or installation provides an easier path for sound.
Let us select the window for the type of noise, not just one figure.
Send the location, window dimensions and the performance data in the quotations you have received.
I will help compare Rw, Ctr, trickle vents and the scope of installation.

69
Acoustic performance
Does thicker glass always reduce noise more effectively?
Read more →
Acoustics · insulating glass unit construction
Does thicker glass always reduce noise more effectively?
A thicker pane can improve sound insulation over part of the frequency range, but thickness alone does not guarantee the best result. Acoustic performance also depends on asymmetric pane thicknesses, cavity widths, lamination and matching the glazing unit to the type of noise.
Answer in 30 seconds
Not always. A unit with three identical panes may have unfavourable resonant frequencies. An asymmetric unit with panes of different thicknesses, or laminated glass with an acoustic interlayer, is often more effective. Compare the Rw rating of the complete window together with C or Ctr, not only the glass thickness in millimetres.
See how the glass construction changes performance
Select a glazing-unit option and type of noise. The diagram illustrates the selection principle—the final performance must be confirmed by testing the specific window.
Glazing-unit construction
Dominant noise
Different panes break up shared resonance
Starting point: symmetric glazing unit
More glass does not always mean less noise
Identical panes may respond similarly to the same frequency. For demanding acoustic requirements, an asymmetric option is worth checking.
Construction4 / 16 / 4
AdvantageStandard
CheckRw
Suitability of the option
42
This comparison is educational. It does not calculate a laboratory Rw value for a specific window size.
Asymmetry matters
Different pane thicknesses reduce the overlap of their weaker frequency ranges.
The interlayer damps vibration
Laminated glass can improve the glazing unit’s performance in a selected frequency range.
The rating applies to the complete system
Request the rating for the complete window in the dimensions and configuration being offered.
Greater thickness increases mass, but does not solve everything
A heavier pane is generally more difficult to set into vibration, but every type of glass has a frequency range in which its effectiveness falls. Assessing glass only by its thickness therefore leads to oversimplified conclusions.
Symmetric and asymmetric glazing units
In a symmetric unit, similar panes may have comparable critical frequencies. Using glass of different thicknesses separates these weaknesses and helps achieve more even sound reduction.
Laminated glass is not only for safety
The interlayer joining the panes affects vibration damping. Special acoustic interlayers can be useful for heavy traffic, railways or broad-spectrum noise.
The cavities between the panes also play a part
The cavity width and the gas it contains affect the complete mass–spring–mass system. This does not mean that every wider cavity automatically improves every parameter.
Rw, C and Ctr must be read together
Rw is the base rating, while the spectrum adaptation terms help match the assessment to the type of sound. For road traffic, the Rw + Ctr rating is often particularly important.
Acoustic glazing checklist
- Noise sourceIdentify whether the source is road traffic, railways, speech or music.
- Pane constructionCheck the thicknesses and asymmetry.
- LaminationAsk about the type of interlayer.
- Full ratingCompare Rw together with C or Ctr.
- Complete windowConfirm the rating for the complete construction, not the glass alone.
Adviser’s tip
I do not recommend thicker glass simply because it appears ‘stronger’. I first ask what type of sound is disturbing the customer and at what times.
On a road with a high proportion of heavy vehicles, I pay particular attention to Ctr, asymmetric glazing and the airtightness of the complete window.
Higher-performance glazing also means greater weight, so I check the permitted sash dimensions and hardware capacity.
Let us check its construction before you pay extra for thickness alone.
Send the glass specification, window dimensions and details of the noise source.
I will compare the panes, interlayers, Rw, Ctr and the effect of the complete construction.

70
Acoustic performance
Windows beside a busy road — what should you consider?
Read more →
Acoustics · house beside a road
Windows beside a busy road — what should you consider?
Effective noise protection does not begin with selecting the highest Rw value in a catalogue. You need to identify the sound source, building orientation, room function and every route by which noise can bypass the glazing.
Answer in 30 seconds
Beside a busy road, check the Rw value of the complete window together with the Ctr adaptation term, the insulating glass unit specification, profile airtightness, type of trickle vent and installation method. A bedroom will usually need more protection than a kitchen, while lorries and buses generate more low-frequency noise. Even excellent glazing will not provide quiet if sound passes through a trickle vent, roller shutter box or leaky junction.
Establish where the greatest protection is needed
Select the traffic type, room and ventilation solution. The result creates a list of priorities for discussing the quotation.
Predominant traffic
Room
Air supply
Urban traffic · living room
Direction: complete-window performance
Compare Rw and Ctr, not merely the glazing-unit name
For typical urban traffic, correctly selected glass, an airtight profile and proper installation all matter.
PriorityRw + Ctr
VentilationNo opening
RoomLiving room
Required performance level
48
This tool provides guidance. Actual selection should account for noise measurements and the manufacturer’s documentation.
Noise has a frequency spectrum
Heavy road traffic and rail noise require particular attention to low frequencies and Ctr.
The complete window matters
The glazing value does not replace the result for the complete construction including its profile and seals.
Address the weakest transmission path first
A trickle vent, roller shutter or installation detail may limit the benefit of expensive glazing.
Identify the source and timing of the noise
Steady car traffic has a different spectrum from a passing bus, tram or train. Note whether the problem occurs throughout the day or mainly at night.
A bedroom requires a different approach
Individual loud events are more disruptive in a room intended for sleep. Requirements for the street-facing façade may therefore be higher than for the other windows in the house.
Do not buy on the glazing value alone
The quotation should state clearly whether the declared Rw value applies to the insulating glass unit or the complete window. The unit dimensions and opening method may affect the result.
The trickle vent must be considered before ordering
A ventilation opening creates an additional sound-transmission path. Where supply air is required, select a solution with suitable acoustic performance and airflow capacity.
Installation completes the acoustic protection
A gap in the foam, discontinuous sealing layers or an inaccurate window sill connection can reduce performance. Acoustic insulation requires an airtight junction around the entire window perimeter.
Checklist for a house beside a road
- FaçadeIdentify the windows facing the road.
- SourceDescribe the type and timing of the noise.
- RoomTreat bedrooms separately from living areas.
- Rw + CtrCompare the full performance designation.
- Weak pointsCheck trickle vents, roller shutters and installation.
Adviser’s tip
I do not increase the specification of every window equally. I first establish which façades and rooms genuinely require stronger protection.
For heavy road traffic, I request Rw together with Ctr. A high Rw figure alone may look impressive while failing to describe the most difficult part of the noise spectrum.
I also check roller shutters, trickle vents and the installation method because the client experiences the performance of the complete building item, not the glazing alone.
Let us plan acoustic protection separately for each façade.
Send the house plan, orientation and information about where the noise comes from.
I will help identify where the additional cost is worthwhile and where it is unnecessary.
71
Acoustic performance
Does a trickle vent reduce a window’s acoustic performance?
Read more →
Acoustics · ventilation
Does a trickle vent reduce a window’s acoustic performance?
Any controlled opening through a building item can become a sound-transmission path. This does not mean ventilation should be abandoned: a trickle vent must be selected for both airflow and acoustic attenuation.
Answer in 30 seconds
Yes. An unsuitable trickle vent can reduce a window’s acoustic performance because it deliberately creates an airflow path. The extent depends on the device construction, opening position, installation method and Dn,e,w value. Beside a busy road, use an acoustic trickle vent selected for the required ventilation rate. Do not block the air inlet if it forms part of the designed ventilation system.
See how a trickle vent affects the complete system
Select the window class, trickle vent type and its position. The result illustrates the bottleneck principle without pretending to be a laboratory calculation.
Window performance value
Type of trickle vent
Item
Direction: check the unit’s performance values
A standard trickle vent can become the weakest point
The better the window’s acoustic performance, the more important it is to match the trickle vent’s sound reduction to the complete assembly.
WindowRw 32 dB
Trickle ventStandard
ConclusionCheck Dn,e,w
Risk of reduced performance
58
This is not a calculator for the resulting Rw value. Confirm the figures in the window and trickle-vent documentation.
Air needs a flow path
A trickle vent performs a ventilation function, so it should not be assessed on acoustic performance alone.
Dn,e,w describes the component
This value helps compare the acoustic attenuation of trickle vents.
Every system has a weak point
A better window cannot deliver its full benefit if sound bypasses it through an opening.
Why sound passes through a trickle vent
The device connects the outside and inside through an air channel. Attenuators, labyrinths and absorbent materials can reduce sound, but they do not eliminate the airflow path itself.
Window Rw and trickle-vent Dn,e,w are different values
Rw describes the sound insulation of a building item, while Dn,e,w is used for components such as trickle vents. They should not simply be added or subtracted without an appropriate calculation method.
The opening position affects performance
Airflow and acoustic attenuation may vary with the device position. Read the documentation for the actual operating position, not only the most closed setting.
An acoustic trickle vent must still provide ventilation
The highest attenuation is not enough if the device cannot provide the required airflow. Selection balances acoustics, airflow capacity and the ventilation system’s operating conditions.
Any alternative should be specified in the design
In some buildings, supply air may be provided through wall vents or mechanical ventilation. However, the supply-air path must not be removed without checking the complete system.
Acoustic trickle-vent checklist
- Ventilation systemConfirm the required supply-air path.
- Airflow capacityCheck the airflow rate.
- Dn,e,wCompare the devices' acoustic attenuation.
- Operating positionCheck the value for the actual setting.
- Complete systemConsider the window, installation and room.
Adviser’s tip
When a client needs both quiet and supply air, I do not treat those requirements as contradictory. I look for a device that provides both at an appropriate level.
With a high-performance window, a standard trickle vent may limit the benefit of paying extra for acoustic glazing, so I check it before ordering.
I do not recommend permanently closing or sealing a trickle vent. First confirm how the building is intended to receive fresh air.
Let us select the window and trickle vent as one coordinated system.
Send the window performance data, trickle-vent model and information about the ventilation and noise source.
I will check whether one component limits the performance of the complete system.

72
Buying and comparing quotations
Why can two similar quotations represent entirely different solutions?
Read more →
Purchasing and comparing quotations · scope analysis
Why can two similar quotations represent entirely different solutions?
The same final price does not mean the same unit, equipment or contractor responsibility. Differences are often hidden in the performance of the complete window, glass construction, hardware, installation and services that one quotation simply does not include.
Answer in 30 seconds
Compare quotations item by item, not merely by the gross total. Check the system and unit dimensions, insulating glass unit, core and foil colours, warm-edge spacer, hardware, trickle vents, support, installation method, finishing works, transport, removal and disposal. Only when the scopes are identical does the price difference say anything meaningful about genuine value.
Compare the scope, not merely the price
Select what the quotation being compared includes. The tool will show its completeness and items requiring clarification.
50% of scope
Quotation only partly described
The price does not yet show the full cost
Information about installation, support and additional services is missing. These items may later change the result of the comparison.
- Installation
- Support
- Services
The assessment concerns the completeness of the description, not the quality of a particular manufacturer.
The same name is not enough
One system may be supplied with different glazing, hardware and equipment.
An omitted item is also information
An undescribed component may be excluded from the price or charged later.
The installation scope changes the result
Foam, tapes, support and finishing works are not one service.
Comparison begins with identical dimensions and configurations
A different sash configuration, opening direction or use of fixed glazing changes the weight, hardware and price. First check whether both quotations describe exactly the same units.
The profile does not describe the complete window
Steel reinforcement, sealing, core colour, glazing bead type and permitted dimensions also matter. The system name alone does not guarantee identical construction.
The insulating glass unit may have a completely different function
Quotations may differ in Ug, pane thickness, safety, solar-control or acoustic glass, and in the colour and material of the spacer.
Hardware and ease of use have a price
Night ventilation, multi-stage tilt, security features, automation and hardware capacity affect convenience and durability. They should be named, not hidden under the phrase ‘complete window’.
Installation must be broken down into specific activities
Ask about mechanical fixing, foam, sealing layers, substrate preparation, threshold support, finishing works, removal and disposal. This is where an apparent price advantage often arises.
Quotation comparison checklist
- Dimensions and subdivisionsCompare an identical set.
- Full specificationProfile, glazing, hardware and accessories.
- PerformanceUw, Ug, Rw and required classes.
- Installation scopeMaterials and activities, item by item.
- Final costInclude every additional charge and service.
Adviser’s tip
When a client sends two quotations, I do not begin by identifying the cheaper one. I first create a common list of units, equipment and installation scope.
If one quotation is more detailed, that does not automatically mean it is more expensive. It often simply shows earlier the costs that the other quotation will reveal only after the survey.
A good comparison should end with a list of items that are equal, better, weaker and missing.
I will compare them point by point, without guessing from the price.
Send the complete quotations with drawings and the installation description.
I will identify differences in the units, equipment, services and contractor responsibility.

73
Buying and comparing quotations
Is the cheapest quotation really the cheapest?
Read more →
Purchasing and comparing quotations · total cost
Is the cheapest quotation really the cheapest?
A low starting price may result from a simpler unit, narrower scope or omitted costs that appear later. The cheapest option is a good choice only when it meets the needs of the house and includes everything the client genuinely requires.
Answer in 30 seconds
Not always. Check whether the price includes transport, survey, removal, installation, sealing materials, support, finishing works, disposal and equipment. Also consider future costs: servicing, corrective work, more difficult operation and possible replacement of unsuitable components. The cheapest quotation is genuinely cheapest only when you compare the same scope and a similar level of risk.
Check what may be added to the starting price
Select the items that have not been confirmed in the quotation. The tool does not price them, but shows the scale of the risk of extras and work that may need to be organised by you.
Risk of costs outside the quotation0%
The scope appears complete—confirm it in writing
No selected items means that all have been checked. Make sure they are also included in the contract.
The result is not a quotation. It shows how many important areas remain unconfirmed.
The starting price is not the final cost
The comparison must include every activity through to completed installation.
Risk also has a cost
An unclear scope increases the likelihood of additional charges and disputes.
Savings should be deliberate
A cheaper option is good when the client knows and accepts its limitations.
First establish a common end result
One quotation may end with delivery of the windows, while another includes their installation, sealing and removal of the old units. Only a common final result allows costs to be compared fairly.
No extra charge may mean no component
If you cannot see a charge for a warm-edge spacer, safety glass, extension profiles or tapes, check whether they are included as standard. Silence in the document is not confirmation of the equipment.
The survey may reveal technical costs
The floor level, uneven openings, need to support large units or access to an upper floor may change the scope. A good quotation explains what will happen after the survey.
Cheaper to buy may mean more expensive to use
An unsuitable opening system, less capable automation or under-specified hardware may increase operating effort and the risk of servicing. Not every upgrade is worthwhile, but each should be assessed functionally.
Warranty terms have value
Check the manufacturer’s warranty, responsibility for installation, required inspections and exclusions separately. The lowest price without a clear claims process may transfer risk to the client.
Final-cost checklist
- Product scopeConfirm every item of equipment.
- Scope of workFrom the survey to the finishing works.
- Additional charges after the surveyEstablish how they will be approved.
- Service and warrantyCheck each party's responsibility.
- Final amountCompare the same result.
Adviser’s tip
I do not tell clients that a more expensive quotation is better by definition. I show exactly what they are paying for and which differences will be noticeable in their home.
If the cheaper option meets the technical requirements and has a complete scope, it can be a very sensible choice.
I exercise the greatest caution when the price is attractive but the document does not define the installation, support for large units or responsibility for finishing works.
Let us check whether it represents a genuine saving or an incomplete scope.
Send the quotation and explain the final result that is to be delivered.
I will separate deliberate simplifications from costs that may appear later.

74
Buying and comparing quotations
What should a good quotation include?
Read more →
Purchasing and comparing quotations · documentation
What should a good quotation include?
A good quotation does not need to run to dozens of pages, but it should allow the client to reconstruct exactly what they are buying, who is responsible for what and which work will be completed. The less room there is for assumptions, the safer the decision.
Answer in 30 seconds
The quotation should contain drawings and unit dimensions, the system, colour, insulating glass unit, performance values, hardware, additional equipment, installation method, scope of services, price, VAT, schedule, payment and warranty terms. It must also state what the price excludes and which items will be confirmed after the survey.
Check the quotation against eight points
Select the items you find in the document. You will receive a list of omissions to clarify before signing the order.
2/8confirmed areas
The quotation needs additional information
Record the missing points and request written confirmation.
The document must be verifiable
Every important feature should follow from a specific statement or drawing.
Exclusions are equally important
The client must know what the price does not include.
The survey updates; it does not reset
The quotation should describe how changes after the technical visit will be handled.
Drawings are the basis for checking
Every window should have dimensions, configuration, opening direction and a means of identification. A drawing can reveal an error before the unit enters production.
The product specification must be precise
The system name, material, profile depth, external and internal colours, core, seals and beads should be described so they do not depend on anyone's memory of the conversation.
Glass should be described by layers and functions
Where applicable, specify the number and thickness of panes, Ug, spacer, safety, toughened, laminated, solar-control or acoustic glass.
The installation scope cannot end with the word ‘installation’
The document should define the fixing, sealing, support, substrate preparation, finishing works and responsibility for associated components.
Commercial terms should be clear
Check the net and gross prices, VAT rate, payment schedule, quotation validity, delivery period, method for approving changes and consequences of cancellation.
Pre-acceptance checklist
- DrawingsDimensions, configurations and directions.
- ProductSystem, colour, glazing and hardware.
- PerformanceValues for the relevant units.
- InstallationMaterials, activities and exclusions.
- ContractPrice, schedule, payments and warranty.
Adviser’s tip
A good quotation should also be clear to someone who did not take part in the conversation. If an important agreement exists only verbally, I ask for it to be added to the document.
I do not expect clients to know every symbol. My role is to explain what they mean and which items matter in their project.
Before the order is signed, I check the final version following the survey because that is the version sent to production.
I will check the document before you order.
Send the quotation with its drawings and any additional agreements.
You will receive a simple list of confirmed, unclear and missing items.

75
Buying and comparing quotations
Where can you economise, and where should you not?
Read more →
Purchasing and comparing quotations · sensible budgeting
Where can you economise, and where should you not?
Good optimisation is not about selecting the cheapest component in every item. It is about removing upgrades that provide no benefit in the specific home and protecting solutions that cannot easily be improved later.
Answer in 30 seconds
It is safest to save on aesthetic elements, surplus equipment and performance the house does not need. Do not cut costs on correct sizing, structural performance, safety glass, support for large units, drainage, installation sealing or service access. Select the function first, then the material and accessories.
Select the project priority
The tool will show where to look for simplifications and which elements should not be reduced in the selected scenario.
Worth considering
Simpler aesthetic accessories
Reduce items that do not change safety, weathertightness or everyday function.
Do not save blindly
Installation and support
These elements determine how the unit performs and are difficult to correct after construction is complete.
Importance of the technical elements
70
Function first
Saving must not prevent the solution from performing its primary task.
Protect elements that are difficult to replace
Installation, support and preparation of openings are difficult to correct without expense.
An upgrade must provide a benefit
If the client will not notice it, it is worth questioning.
Save on excess, not the essentials
Not every room needs the same performance. Enhanced acoustic glass may be used only on the street-facing façade, and more expensive hardware only for the heaviest sashes.
Unit configurations affect the price
Fixed glazing is usually simpler and cheaper than an opening sash. However, the ability to ventilate, clean and escape should be retained where required.
Colour and accessories offer scope for optimisation
Double-sided foil, non-standard handles, glazing bars and automation can increase the cost. Omitting them may be safe if they are not important to the design or everyday use.
Do not reduce safety or structural performance
Glass thickness, lamination, reinforcement, hardware and configurations must suit the dimensions and loads. They should not be changed solely to achieve a lower price.
Installation is part of the product
Even a good window performs poorly without stable fixing, continuous support and a sealed joint. This is an area where an apparent saving can lead to corrective work in a finished building.
Budget-optimisation checklist
- PrioritiesThermal comfort, quiet, appearance or ease of use.
- Areas of the houseMatch the requirements to the façades and rooms.
- Technical elementsProtect structural performance, safety and installation.
- AccessoriesRemove those without a noticeable benefit.
- Final resultCheck that the function has been preserved.
Adviser’s tip
I do not automatically seek the most expensive solution. I look for the option whose price reflects genuine value for the specific home.
If an upgrade improves the operation of large patio doors, glass safety, installation sealing or durability of the support, it is worth discussing.
If a more expensive accessory provides no noticeable benefit to the client, I should say so directly and propose a simpler option.
Let us optimise the quotation without cutting the most important elements.
Send the design and quotation, and state the priorities for the house.
I will show which upgrades are justified and which can safely be reduced.

76
Construction and surveying
When should windows be surveyed on site?
Read more →
Construction and surveying · the right time
When should windows be surveyed on site?
The survey should take place once the opening dimensions are reliable and the key technical decisions have been made. A visit arranged too early only appears to save time and may result in another survey or an order based on an outdated stage of construction.
Answer in 30 seconds
The best time is after the openings, lintels and all layers affecting the dimensions have been completed, but before the windows and doors are ordered and before finishing work makes installation more difficult. The finished floor levels, insulation thickness, window-board types, roller shutters or external venetian blinds, installation method and window divisions must be known. The openings should be stable, accessible and suitable for checking plumb and level.
Can the final order survey be carried out now?
Select the items that have already been agreed or completed. The result will show whether the survey can be final or should remain consultative.
0/6areas ready
Consultative survey
First resolve the decisions that affect the dimensions
Solutions can be discussed at this stage, but the openings and levels must be reconfirmed before ordering.
The survey confirms the actual site conditions
The design is the starting point, but the order is based on the actual state of the building.
Levels are as important as width
Patio doors must be set in relation to finished floor level.
Decisions affect the opening
Roller shutters, window boards and the installation method may change the dimensions and position of the window.
A preliminary survey and final order survey are two different visits
A preliminary survey helps prepare a quotation and assess the available solutions. A final order survey should establish the dimensions on which production will be based.
The openings must have stable geometry
The lintels, sides and support zone should not be altered later. The substrate must be accessible so that plumb, levels and diagonals can be checked.
The floor level determines the threshold
The structural slab level alone is not enough. The insulation, heating, screed, adhesive and floor finish must all be added to establish the correct position of the lower edge of the door.
External shading must be planned early
The roller-shutter box, external venetian blind, guide rails and space for insulation affect the height and installation position of the unit. A late decision may require the opening to be altered.
Changes after the survey must be checked again
If the opening is altered, the floor build-up changes or the client adds a roller shutter, the survey must be verified before production. The final order must match the current site conditions.
Pre-survey checklist
- OpeningsComplete and accessible.
- FloorsLevels marked on site.
- FaçadeInsulation thickness known.
- ShadingRoller shutters or external venetian blinds agreed.
- DecisionsDivisions, colours and installation confirmed.
Adviser’s tip
If the site is not ready, a survey can still be a very valuable consultation. It should not, however, be presented as the final basis for production.
Before the visit, I ask the client to mark the finished floor level and prepare information about the insulation, window boards and shading.
The safest approach is to order only after every change made following the survey has been rechecked and approved.
Let us check the stage of work before the survey team arrives.
Send photographs of the openings, the design and information about the floors and shading.
I will tell you whether a final order survey can be carried out or whether a consultation is needed first.
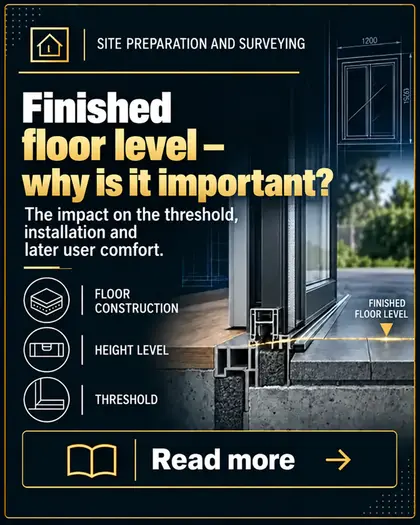
77
Construction and surveying
Finished floor level — why does it matter?
Read more →
Construction and surveying · patio-door threshold
Finished floor level — why does it matter?
A door threshold relates not to the structural slab, but to the surface on which the user will walk. An error in the total floor build-up may leave the threshold too high, bury it too deeply or remove the space required for stable support.
Answer in 30 seconds
Finished floor level is the final floor height after every layer has been completed: insulation, services, heating, screed, adhesive and floor finish. It is used to determine the height of thresholds, frame extensions and load-bearing base profiles. It must be clearly marked on site before patio doors, HST doors and low-threshold entrances are surveyed.
Calculate the approximate finished floor level
Enter the thicknesses of the layers above the structural slab. The total helps prepare information for the survey but does not replace the building design.
0
Finished floor level above the structural slab225 mm
The threshold requires a suitably designed support zone
Give this value to the surveyor and mark the same level in every patio opening.
For guidance only. The final level and layer arrangement must be confirmed by the designer or site manager.
The finished floor is what matters
The structural concrete does not determine where the threshold will finish.
Every millimetre adds up
The adhesive and floor finish also affect the final height.
The threshold requires support
The space beneath the unit is filled with a load-bearing support solution.
The floor datum coordinates all openings
One reference level allows the patio doors, entrance doors, garage thresholds and connection to the patio to be checked. It should be permanently marked and labelled.
The layers must follow the design
Thermal insulation, underfloor heating, screed and the floor finish each have defined functions. Their thicknesses should not be changed merely to accommodate a window that has already been ordered.
A low threshold does not mean that no supporting construction is required beneath it
Stable, thermally insulating and moisture-resistant support is required beneath the threshold. System extensions or load-bearing base profiles are selected to suit the door height and weight.
The interior and patio have different requirements
Outside, the fall, drainage and waterproofing must be planned. Making both surfaces level without a proper design may increase the risk of water entering the building.
The error may only become apparent during finishing work
A threshold installed too high creates a step, while one installed too low may be covered by the floor layers. Corrections after installation are costly and often damage completed work.
Finished-floor-level checklist
- Datum levelMarked in the opening.
- LayersConfirmed against the design.
- ThresholdSet in relation to the floor.
- SupportSelected to suit the height and weight.
- External zoneFall, waterproofing and drainage.
Adviser’s tip
During a survey, I do not estimate the floor build-up by eye. I ask for a specific datum or a confirmed total of all layers.
For large patio doors, I discuss load-bearing base profiles and extensions immediately, because the weight of the unit must be transferred to a stable substrate.
If the patio level has not yet been designed, I record it as a decision that must be resolved before installation.
Let us check the levels before the unit enters production.
Send the floor cross-section, plan and photographs of the opening with the datum level marked.
I will help coordinate the threshold, support and finish of the external zone.
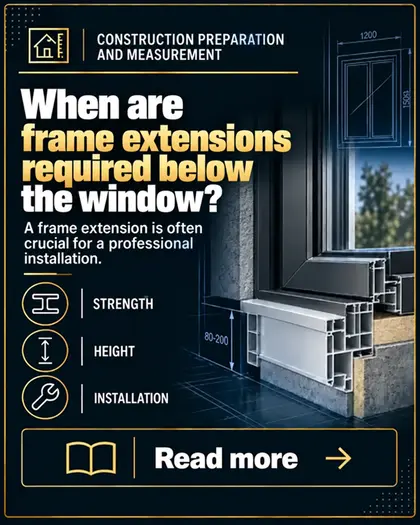
78
Construction and surveying
When are frame extensions needed beneath a window?
Read more →
Construction and surveying · support zone
When are frame extensions needed beneath a window?
A frame extension is not an arbitrary piece of profile. It fills the height between the unit and substrate, creates space for the floor build-up, allows window boards or roller shutters to be fixed correctly and helps form a stable support zone.
Answer in 30 seconds
Frame extensions are used when a window or door needs to be raised above the structural opening, space must be retained for insulation and flooring, window boards need to be connected correctly or a support zone must be prepared for a heavy unit. Their height and type follow from the building cross-section. Beneath large doors, a PVC extension alone may not be sufficient; a load-bearing base profile with suitable strength and thermal performance may be required.
Identify what needs to be resolved beneath the unit
Select the unit type, layer height and planned window board. The result will indicate the approach that must be confirmed during the survey.
Construction
Floor build-up
Lower connection
unitsupport item
Recommendation: window-board profile or frame extension
Provide space for stable installation of the window boards
The lower item should match the insulation thickness and allow a watertight connection to the internal and external window boards.
PriorityWindow sills
LoadTypical
ConfirmSection
The height follows from the cross-section
The frame extension is selected to suit the floor, window boards and insulation.
Weight requires load-bearing capacity
Large units require a load-bearing support item.
Thermal performance and sealing work together
The lower connection must combine structural support with thermal insulation and waterproofing.
A frame extension positions the window at the correct height
If the opening is higher than the finished unit or space must be retained for other layers, a system profile makes up the missing dimension without improvised packers.
A window-board profile creates a properly formed junction
It provides a fixing point for the internal and external window boards and helps maintain continuous sealing beneath the frame. Its width must suit the window system.
Patio doors have greater requirements
A deep floor build-up may require several extensions or a special load-bearing base profile. Beneath a heavy HST door, load-bearing capacity, stiffness and continuous support along the entire threshold are essential.
The material should limit the thermal bridge
The item beneath the frame connects the interior to the external zone. Its thermal insulation, moisture resistance and connection to the floor insulation must be checked.
The space beneath the window must not be left to chance
Isolated wedges, loose blocks or expanding foam alone do not provide correct support. The solution must transfer the load and remain stable throughout its service life.
Frame-extension and base-profile checklist
- HeightCalculated from finished floor level.
- SystemMatched to the window frame.
- Load-bearing capacitySuitable for the weight of the unit.
- InsulationConnected to the building layers.
- SealingDesigned on both the inside and outside.
Adviser’s tip
I do not select a frame extension by height alone. I also check the weight of the unit, profile width, space for insulation and how the threshold will be finished.
A system solution may be sufficient beneath a lightweight window, but a large HST door often requires a base profile designed to carry heavy loads.
Every option should be shown on the quotation drawing so that the client knows exactly what will be installed beneath the frame.
Let us match the lower connection to the building cross-section.
Send the floor level, insulation thickness and unit dimensions.
I will check the height, load-bearing capacity, insulation and connection to the window board or patio.
79
Construction and surveying
What should you prepare before a window and door survey?
Read more →
Construction and surveying · client preparation
What should you prepare before a window and door survey?
A good survey involves more than recording the width and height of the openings. The visit should resolve decisions about levels, installation method, shading, window boards, window functions and connections to the other building layers.
Answer in 30 seconds
Prepare the current design, window schedule, marked finished floor levels and information about the insulation thickness, façade type, window boards, roller shutters or external venetian blinds, installation method and threshold finishes. Ensure access to every opening and the presence of someone authorised to approve the divisions, opening directions, colours and any changes.
Create your own preparation checklist
Select the items that are ready. The tool will indicate which information should be completed before the surveyor arrives.
0%readiness
Before the visit
Complete the essential information
Missing decisions do not prevent a consultation, but may require the dimensions and specification to be confirmed later.
The design should be current
The surveyor must be informed of changes made on site.
An authorised decision-maker should be present
Divisions and opening directions require informed approval.
Good access saves time
Every opening, threshold and lintel must be accessible for inspection.
Bring the design and latest quotation
Plans, elevations and the schedule help match each unit to the correct room. The quotation shows which divisions, systems and accessories must be verified on site.
Mark the levels and finishing layers
Patio doors require a finished floor level, while windows also require the window-board thickness. Outside, the façade, insulation, patio and drainage all matter.
Agree the roller shutters and external venetian blinds before the survey
The box, guide-rail and control types may change the opening height and frame position. The power supply and service access must also be planned.
Prepare decisions about how the units will be used
Specify which sashes should open and where trickle ventilation, a trickle vent, safety glass, a low threshold or a special handle is required. The survey is a good opportunity for a final review of functionality.
Provide safe access
Remove materials obstructing the openings, provide safe access to upper floors and explain any transport restrictions. The surveyor must be able to see the substrate, not merely the clear space between the blocks.
Survey-day checklist
- DocumentsDesign, quotation and list of changes.
- LevelsFloor and patio levels marked.
- LayersInsulation, window boards and façade.
- FunctionsOpening methods, shading and accessories.
- ApprovalAuthorised decision-maker present on site.
Adviser’s tip
Before the survey, I send the client a list of the information required. This allows the visit to conclude with decisions rather than another series of telephone questions.
If the client does not know a technical answer, I do not expect them to guess. We record the issue and identify who should resolve it—the designer, site manager or contractor responsible for the next layer.
After the survey, all changes should appear in the final drawings for approval.
Let us prepare the site so that one visit provides a complete set of decisions.
Send the design and current stage of work, and I will identify the most important information to gather.
We will organise the levels, shading, window boards, installation and unit functions.
80
Maintenance and use
How often should window hardware be adjusted?
Read more →
Servicing and use · hardware
How often should window hardware be adjusted?
Window hardware does not require adjustment according to a rigid schedule. The symptoms are far more important: a sash rubbing, resistance at the handle, uneven compression, draughts or a change in the position of a heavy insulating glass unit.
Answer in 30 seconds
The window should be checked after installation and its initial period of use. Thereafter, respond to symptoms instead of adjusting it ‘every season’. If the sash rubs, the handle is stiff, the seal does not compress evenly or a draught appears, the cause must be diagnosed. Adjustment alone should not be used to conceal installation errors, frame deformation or worn components.
Does the window need adjustment?
Select the symptom you have noticed and the sash type. The result will indicate a safe next step.
What is happening?
Sash size
Correct position
Periodic inspection
Do not adjust a window unless necessary
If the sash operates smoothly and seals correctly, cleaning and lubricating the points specified by the manufacturer is sufficient.
UrgencyLow
First stepInspection
RiskSmall
The symptom matters more than the date
A correctly operating window does not need every adjustment point altered seasonally.
Diagnosis first
A draught may result from the adjustment, seal, frame or installation.
Heavy sashes require attention
The high weight of the glass increases the load on the hinges and hardware.
An initial check after installation is normal
A new construction settles under the weight of the insulating glass unit while the building and materials stabilise. A minor correction after the initial period of use does not necessarily indicate a defect.
A rubbing sash requires prompt attention
Rubbing against the frame can damage the surface, seals and mechanism. Do not continue forcing the window closed or lifting the sash with the handle.
A stiff handle does not always mean a lack of lubricant
The cause may be an incorrectly positioned sash, a striker, contamination or a damaged component. Establish where the resistance occurs before applying lubricant.
Compression should be even
Too little compression may reduce airtightness, while too much increases resistance and stresses the seals. Adjusting one point without checking the full perimeter may impair operation.
Servicing will not correct a substrate or installation fault
If the frame is twisted, the support has settled or the perimeter joint leaks, adjusting the hardware may provide only temporary improvement. The cause, not merely the symptom, must be corrected.
Adjustment checklist
- Sash movementCheck whether it rubs against the frame.
- HandleCheck whether it operates without excessive force.
- CompressionCheck whether it is even around the perimeter.
- SealsCheck whether they are clean and undamaged.
- FixingsCheck whether the hinges and components are secure.
Adviser’s tip
I do not recommend adjusting hardware every six months merely because the season changes. I check whether the window actually shows symptoms requiring correction.
With large, heavy sashes, I respond to the first signs of rubbing more quickly because continued use may increase the extent of the repair.
If the problem returns quickly after adjustment, I look for the cause in the glazing-block arrangement, frame fixing, support or component wear.
Let us identify the cause first and then determine the scope of adjustment.
Send a short video showing the window closing and where the problem occurs.
I will help distinguish a routine hardware adjustment from a fault requiring more extensive servicing.

81
Maintenance and use
How should window gaskets be maintained?
Read more →
Servicing and use · seals
How should window gaskets be maintained?
A seal should remain clean, flexible and correctly seated in its groove. Caring for it is simple, but harsh chemicals, oils and unsuitable products can do more harm than good.
Answer in 30 seconds
Clean the seals with a soft cloth and water containing a mild detergent, then dry them thoroughly. Once or twice a year—in accordance with the manufacturer’s instructions—a product intended for the particular seal material, usually silicone-based, may be applied. Do not use solvents, petrol, cooking oil or stiff brushes. A cracked, permanently deformed or displaced seal should be inspected and replaced if necessary.
Match the action to the condition of the seal
Select its appearance and when it was last cleaned. You will receive a safe plan for the next steps.
Seal condition
Last care
Flexible seal
Plan: inspection and gentle cleaning
The seal does not require intensive maintenance
Remove dust while cleaning the frame, dry the surface and check that the seal has not come out at the corners.
1Water and mild detergent2Dry thoroughly3Continuity check
Clean first
Do not apply a care product over dust, sand or greasy residue.
The product must suit the material
Use products recommended by the window or seal manufacturer.
Care products do not repair cracks
A damaged component requires assessment and often replacement.
Dirt acts as a fine abrasive
Dust, sand and plaster residue can hinder closing and damage the surface of the seal. Cleaning should be particularly thorough after building work.
Mild products are the safer starting point
Water with a small amount of neutral detergent is usually sufficient for routine care. Check the manufacturer’s instructions before using a specialist product.
Not every ‘home remedy’ is suitable
Cooking oils may attract dirt, while solvents can damage the material. The product should be intended for the elastomers used in windows and doors.
Corners and joints require inspection
Check that the seal has not come out of its groove, shrunk or developed a gap. Do not stretch it forcibly, as it may retract again over time.
A hard seal will not always recover its properties
If the material is cracked, permanently flattened or has lost its flexibility, a maintenance product will not replace it. The correct section and material must be selected.
Seal-care checklist
- CleanUse a soft cloth and mild detergent.
- DryDo not close the window with wet dirt on the seal.
- CheckCheck the corners, cracks and seating.
- ProtectUse only a suitable product.
- ReplaceWhen the material is permanently damaged.
Adviser’s tip
I do not recommend lubricating seals with just any product found at home. I first check the material and the manufacturer’s instructions.
If the seal is dirty, I begin with gentle cleaning and drying. Only then do I assess whether it needs a care product.
Where a draught repeatedly occurs, I also check the sash adjustment and installation because a new seal will not correct a distorted frame.
Let us check whether care, adjustment or replacement is required.
Send a photo of the full perimeter together with close-ups of a corner and the seal section.
I will help identify the cause without resorting to unsuitable harsh products.

82
Maintenance and use
Summer–winter window setting — fact or myth?
Read more →
Servicing and use · compression adjustment
Summer–winter window setting — fact or myth?
Sash compression can be adjusted on many hardware systems, but this is not a universal seasonal switch. Turning every locking cam without diagnosis can increase handle resistance, seal wear and the load on the mechanism.
Answer in 30 seconds
‘Summer–winter mode’ is a simplified name for compression adjustment, not a compulsory seasonal procedure. Not every hardware system is adjusted in the same way, and the correct setting depends on the construction, condition of the seals and sash geometry. If the window is airtight and operates smoothly, there is no reason to alter the compression every six months. If there is a draught, identify the cause first.
See what changing the locking-cam setting does
Select the compression level and seal condition. The tool shows a possible effect, not instructions for turning a specific hardware component.
Compression setting
Seal condition
Sash compression against the seal
Baseline setting
Correct compression combines airtightness with smooth operation
Do not increase it without symptoms. Check closing around the full window perimeter.
SealingCorrect
Handle resistanceNormal
SealProtected
There is no single switch
Different hardware systems have different components and adjustment ranges.
Greater compression does not always help
It can increase resistance and accelerate permanent deformation of the seal.
A draught requires diagnosis
The cause may be the seal, adjustment, frame or installation.
Where did the term ‘winter mode’ come from?
Popular guides began calling a change in the eccentric position of locking cams a seasonal mode. In practice, it is simply one aspect of hardware compression adjustment.
Not every hardware system is adjusted in the same way
The shape of the locking cams, markings and direction of adjustment depend on the manufacturer and model. Turning a component without instructions may result in an incorrect setting.
Excessive compression has consequences
The seal is compressed more firmly, the handle may require greater force and the locking components operate under a higher load. Maximum does not mean optimum.
Reduced compression is not a substitute for ventilation
Deliberately making the perimeter leaky is not controlled ventilation. Fresh air should be supplied by a solution designed for the ventilation system.
The paper test has limitations
It may indicate a difference in compression, but does not diagnose the cause or replace measurement and inspection of the full perimeter. The result also depends on the thickness of the paper and test location.
Checklist before adjusting compression
- Hardware instructionsCheck the model and permitted range.
- GeometryCheck whether the sash has dropped.
- SealCheck whether it is flexible and continuous.
- Full perimeterAssess every locking point.
- InstallationRule out a gap outside the frame.
Adviser’s tip
I do not advise customers to alter their hardware automatically in spring and autumn. If the window works correctly, I leave the proper setting unchanged.
When there is a draught, I first locate it: between the sash and frame, at the seal, window sill or installation joint.
Only after checking the geometry and condition of the seals do I decide whether compression adjustment is genuinely required.
Do not increase compression blindly—let us find the true cause.
Send a video showing the handle in operation and photos of the locking cams, seals and the draught location.
I will help determine whether the problem concerns the hardware, seal, geometry or installation.

83
Maintenance and use
Why does a window sash begin to drop?
Read more →
Servicing and use · sash geometry
Why does a window sash begin to drop?
The sash transfers the weight of the glass through its hinges, corners and hardware. Over time, a small change in position can cause rubbing, but a recurring problem may also indicate the glazing-block arrangement, play in the hardware, the system’s limits being exceeded or movement of the frame.
Answer in 30 seconds
A sash may drop because of the weight of the insulating glass unit, incorrect glazing blocks, worn or loose hardware, large dimensions, intensive use or frame deformation. A single adjustment often restores correct operation, but if the problem quickly returns, the construction and installation need a more thorough inspection.
Select the symptom and type of construction
The tool helps select the first area to inspect. It does not replace an examination of the hinges, glazing and frame fixing.
Where does the sash rub?
Sash type
Does the problem return?
Slight dropping on the handle side
First area to check: sash position
Check the position at the hinges and locking points
A typical symptom may require correction of the height and diagonal without overloading the mechanism.
UrgencyMedium
InspectionHardware
Risk of recurrenceLow
The glass stiffens the sash
Correct glazing blocks transfer its weight to the appropriate corners.
Adjustment has a limited range
It will not replace repair of a loose hinge or an incorrectly seated glazing unit.
A recurring symptom is a warning sign
The cause must then be found instead of simply raising the sash again.
The weight acts on the side opposite the hinges
The most typical drop occurs at the bottom corner on the handle side. The larger the glazing unit and the wider the sash, the greater the moment acting on the hardware.
Glazing blocks affect the geometry
The glazing unit should not rest arbitrarily within the sash frame. Correct positioning of the glazing blocks helps maintain the diagonal and transfer the load in accordance with glazing principles.
Hinges and screws require stable support
A loose fixing, worn component or movement of the profile can change the sash position. Altering the adjustment without checking the fixing may be ineffective.
The dimensions must remain within the system’s capabilities
The manufacturer specifies the permitted sash dimensions and weight. Colour, solar exposure, glass type and manner of use may further increase the demands.
The frame can also move
If the fixing or support is incorrect, the problem may affect the complete construction. A dropping sash is then only one visible symptom.
Sash-drop diagnosis checklist
- Rubbing pointIdentify the exact corner.
- DiagonalsCheck the sash geometry.
- HardwareCheck the hinges, screws and strikers.
- GlazingCheck the glazing blocks and position of the glazing unit.
- FrameCheck the fixing, support and plumb.
Adviser’s tip
At the first signs of minor rubbing, I usually begin with a careful inspection and adjustment before the surface or hardware is damaged.
If the sash is large or quickly drops again, I check the glazing blocks and hinge stability, not just the adjustment screws.
When the problem affects several places at once, I also inspect the frame and installation because the cause may lie outside the sash itself.
Let us check the glazing, hardware and frame as one system.
Send a video of the window opening and photos of the hinges and rubbing point.
I will help establish whether adjustment is sufficient or the underlying cause requires investigation.

84
Maintenance and use
How should PVC profiles be cleaned?
Read more →
Maintenance and use · PVC profiles
How should PVC profiles be cleaned?
The safest method is usually the simplest: a soft cloth, lukewarm water and a mild detergent. Problems begin when stubborn dirt is tackled with a strong solvent or an abrasive tool.
Answer in 30 seconds
Clean PVC profiles with a soft cloth or sponge, lukewarm water and a mild cleaning product. Do not use acetone, solvents, scouring powders, wire wool or sharp scrapers. With foil-wrapped profiles, always test the product in an inconspicuous area first. Remove installation residue as soon as possible, but without aggressive rubbing.
What is on the profile?
Select the type of dirt and the surface. The tool will suggest the correct sequence of steps.
Dirt
Area
Light surface contamination
Basic method
Gentle cleaning is sufficient
Remove loose dust, wash the profile with a soft cloth and wipe it dry.
- 1Remove dust without rubbing
- 2Use water with a mild detergent
- 3Dry with a clean cloth
Start with the gentlest method
Only use a stronger product if the safe method does not work.
Foil requires a test
The same product may react differently with white PVC and decorative foil.
Do not flood the hardware
Water and cleaning products must not enter the mechanisms or drainage openings.
Regular cleaning prevents persistent deposits
Dust, traffic grime and greasy marks are easier to remove before they combine with moisture and settle into the surface texture. In most homes, cleaning the profiles whenever the glass is cleaned is sufficient.
Harsh chemicals can dull the profile
Acetone, thinners and aggressive products can alter the gloss, colour or texture of PVC. Surface damage is usually irreversible.
Decorative foil is not ordinary paint
Decorative foil is a factory-applied finish. Clean it without scrubbing and test any unfamiliar product outside the main field of view first.
Installation residue requires care
Plaster, adhesive and foam residues have different compositions. Do not remove them with a blade. First identify the type of residue and consult the profile or material manufacturer’s guidance.
Drainage openings must remain clear
When cleaning, check the drainage openings in the lower part of the frame. They must not be blocked or have accumulated dirt pushed inside them.
Safe-cleaning checklist
- ClothSoft, clean and free from grains of sand.
- CentreMild and suitable for the relevant surface.
- TestIn an inconspicuous area on foil-wrapped profiles.
- HardwareDo not flood the mechanisms.
- Drainage openingsClean and clear after the work is complete.
Adviser’s tip
If I do not know what caused a stain, I do not start with the strongest product. I first try a method that is safe for the surface and check how the material reacts.
With foil-wrapped profiles, I particularly avoid vigorous rubbing on a heated surface. Dark-coloured windows and doors can become very hot, so it is best to work in the shade.
If the dirt was caused during installation, take a photograph and ask the installer what material was used instead of experimenting with chemicals.
Send me a photograph before using a strong cleaning product.
I will recommend a safe course of action based on the type of surface and dirt.
One photograph could protect the profile from permanent dulling or discolouration.
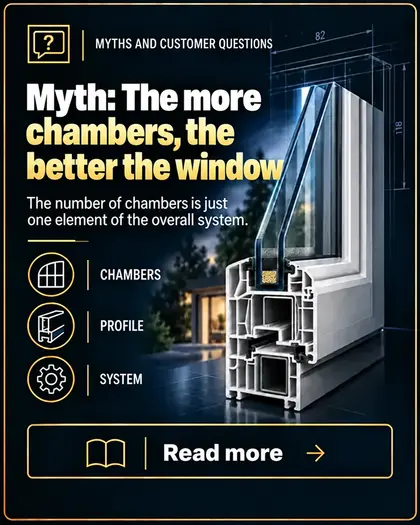
85
Myths and customer questions
Myth: the more chambers, the better the window
Read more →
Customer myths and questions · profiles
Myth: the more chambers, the better the window
The number of chambers sounds specific, so it is easily used as shorthand for quality. In reality, the complete system determines how a window performs: profile depth, steel reinforcement, sealing, the insulating glass unit, hardware, manufacturing quality and installation.
Answer in 30 seconds
More chambers do not automatically mean a better window. Chambers help determine the thermal performance and stiffness of a profile, but their number cannot be compared without considering system depth, the Uf value, type of reinforcement and complete construction. A well-designed five-chamber profile may be a more sensible choice than a seven-chamber system judged solely by a marketing claim.
What affects the result more than the number of chambers alone?
Compare the number of chambers with the profile depth and reinforcement. The tool shows why one figure cannot describe the complete window.
Number of chambers
System construction
5 chambers · basic arrangement
Conclusion
Do not assess a profile by one number
Check the system depth, Uf value, steel reinforcement and ability to accommodate the correct glazing unit.
Role of the chambersPartial
Key checkComplete system
Compare Uf, not a slogan
The profile rating says more than a number presented without context.
Depth creates space
It affects profile construction, glazing and reinforcement options.
The window works as a complete system
The weakest component can negate the advantages of the others.
A chamber is a void within the profile
The internal walls restrict heat flow and help form the profile geometry. The number alone does not reveal the chamber sizes, wall thicknesses or complete cross-section.
System depth changes the basis of comparison
Six chambers in a deeper profile are not the same as six chambers in a shallower system. The comparison should therefore include the actual dimensions and performance values.
Reinforcement provides stability
Colour, sash size and glass weight increase the structural demands. The type of steel or other reinforcement may matter more than one additional narrow chamber.
The insulating glass unit occupies most of the window area
In a typical window, the glass occupies a larger area than the frame. Ug, the warm-edge spacer and the proportions of the construction have a major effect on the final Uw value.
Sealing and workmanship matter in practice
The number of seals, rebate geometry, precision of welded joints and hardware adjustment affect weathertightness and operating comfort regardless of the chamber count.
Profile-comparison checklist
- DepthCheck the system depth in millimetres.
- UfCheck the rating of the frame itself.
- ReinforcementCheck how it has been selected for the dimensions and colour.
- GlazingCheck which insulating glass unit the profile can accommodate and support.
- UwCheck the value achieved by the complete specific window.
Adviser’s tip
I neither reject nor select a system simply because it has five, six or seven chambers. I first establish what that number actually represents.
For large constructions, I pay greater attention to structural performance, reinforcement, subdivisions and glazing. An additional chamber cannot replace correct window design.
In quotations, I request the performance of the complete construction, not only a description of the profile. This ensures that the comparison concerns the product that will actually be installed in the home.
Let us check what genuinely distinguishes the two quotations.
Send the specifications. I will compare the depth, performance values, glazing, reinforcement and equipment.
You do not need to decipher the technical terms yourself—I will explain the differences in plain language.

86
Myths and customer questions
Myth: triple glazing is always better than double glazing
Read more →
Customer myths and questions · insulating glass units
Myth: triple glazing is always better than double glazing
Triple glazing usually reduces heat loss more effectively, but is not automatically the best answer for every room and every construction. The building’s use, weight, daylight, acoustics, safety and the actual performance of the complete window all matter.
Answer in 30 seconds
Triple glazing is most often selected for a heated, year-round home because it provides better thermal performance. Double glazing may, however, make sense in an unheated garage, garden building, seasonally used property or where lower weight and cost are the priorities. The choice should be based not on the number of panes alone, but on Ug, Uw, the window construction and how the room will be used.
Which option suits the project?
Select how the room will be used and the main priority. The result does not replace calculations, but helps structure the decision.
Room
Priority
Triple-glazed unit
Recommended direction
Triple glazing for the heated part of the home
A lower Ug value helps reduce heat loss, particularly where the glazed area is large.
RecommendationTriple glazing
Check additionallyUw value and weight
Ug is not Uw
The glass rating does not describe the performance of the complete window, including the frame and glass edge.
A third pane increases the weight
This affects the hardware, permitted sash dimensions, transport and installation.
The room’s purpose determines the choice
A living room has different requirements from an unheated garage or garden building.
Triple glazing improves thermal performance
Two cavities allow a lower Ug value to be achieved than with a typical double-glazed unit. This is important in heated buildings and for large glazed areas.
More glass means greater weight
The additional pane loads the profile, hinges and mechanisms. For a large sash, check the permitted dimensions, how the glass is supported and ease of operation.
Light transmittance may differ
Every pane and coating affects the amount of daylight and solar energy reaching the interior. It is worth comparing Lt and g-values, particularly for darker rooms.
Acoustic performance does not depend only on the number of panes
An asymmetric glass build-up, suitable pane thicknesses and an acoustic interlayer may provide better performance. An ordinary triple-glazed unit is not always quieter than a well-selected double-glazed one.
Safety requires the right type of glass
A third ordinary pane does not replace laminated or toughened safety glass or a burglar-resistant solution. The protection should be selected for the risk and installation location.
Glazing-unit selection checklist
- RoomCheck whether it is heated all year round.
- Ug and UwCheck the value for the glass and the complete window.
- DimensionsCheck the weight and permitted sash size.
- LightCheck the Lt and g-values of the selected unit.
- Glass functionAcoustics, safety or solar protection.
Adviser’s tip
For the living areas of a new home, I most often recommend triple glazing, but I do not present it as unconditionally the best solution for every opening.
For a garage, garden building or seasonally used property, I check whether the additional cost and weight will provide a tangible benefit to the customer.
If quiet or safety is important, I request the precise glass build-up. The phrase ‘triple glazing’ alone confirms neither function.
Let us match the glazing unit to the particular room.
Send the dimensions, intended use of the rooms and the project's main priority.
I will check not only the number of panes, but also the performance values, weight and capabilities of the construction.
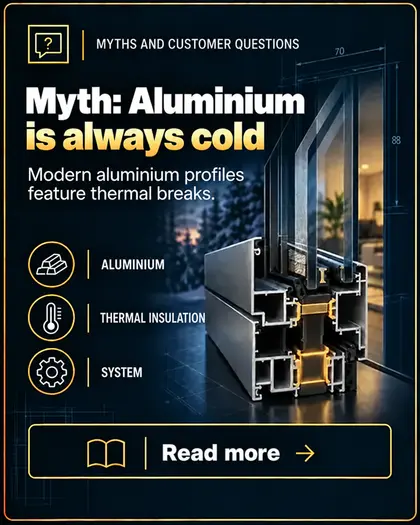
87
Myths and customer questions
Myth: aluminium is always thermally inefficient
Read more →
Customer myths and questions · aluminium
Myth: aluminium is always thermally inefficient
Aluminium conducts heat well, but a modern window system is not a continuous metal profile. External systems use thermal breaks, insulating chambers, appropriate seals and thermally efficient insulating glass units.
Answer in 30 seconds
Not every aluminium window is ‘cold’. Systems intended for heated buildings have thermal breaks separating the outer and inner sections. Thermal performance depends on the profile's Uf, the glass Ug, the edge of the glazing unit and the resulting Uw of the complete window. Non-thermally broken profiles still exist, but are mainly used for internal or unheated structures.
Non-thermally broken or thermally broken aluminium system?
Change the profile type and application. You will see why the word ‘aluminium’ alone is not enough to assess performance.
System type
Application
A thermal break restricts the heat-flow path
Application assessment
A thermally broken system is the right choice for a home
The thermal break separates the aluminium sections of the profile and helps achieve the performance required in a heated building.
RecommendationThermally broken system
CheckUw value of the construction
The thermal break interrupts the thermal bridge
It separates the outer and inner parts of the aluminium profile.
Uf is not Uw
The frame value must be considered together with the glazing and the dimensions of the complete unit.
The application determines the system
A living room requires a different profile from an internal glazed partition.
Aluminium conducts heat, but the profile is an engineered system
The properties of the metal alone do not describe a finished window. A modern external profile comprises several zones, seals, insulating elements and chambers designed to control heat flow.
The thermal break separates the two sides
An item made from a less conductive material joins the aluminium sections of the profile, limiting the direct path for heat flow. Its design affects the frame's Uf.
Non-thermally broken systems have their applications
Profiles without a thermal break are light and slim, making them suitable for internal partitions, entrance lobbies or unheated spaces. They should not automatically be used in the external envelope of a heated home.
Large glazing must be assessed as a complete system
For a large unit, Uw, structural performance, glass, mullions, support and installation all matter. A slim aluminium profile offers design freedom, but requires correct calculations.
A warm-edge spacer reduces cooling at the glass perimeter
The spacer and how the glazing unit is supported affect the temperature at the edge. This matters for comfort and reducing the risk of condensation.
Aluminium system checklist
- ApplicationExternal, internal or unheated.
- Thermal breakWhether the system has a thermal barrier.
- Uf and UwValues for the frame and the complete unit.
- GlazingUg, spacer and additional functions.
- Structural performanceCalculations for the dimensions and exposure.
Adviser’s tip
I do not simply ask whether the unit is aluminium. I check the system name, its intended application and the actual value for the specific dimensions.
For the heated part of a home, I select a thermally broken solution and an insulating glass unit matched to the required thermal performance and glazing size.
Aluminium is particularly worth considering for large dimensions and slim architecture, but its capabilities do not remove the need to check structural performance, support and installation.
Let us check the system, performance and design limits.
Send a schedule of dimensions, the façade design and information about the opening method.
I will help assess where aluminium offers a genuine advantage and which thermally broken system is required.

88
Myths and customer questions
Myth: a thicker profile always means a better window
Read more →
Customer myths and questions · profiles
Myth: a thicker profile always means a better window
A greater profile depth can provide more space for insulation, glazing and reinforcement, but the measurement in millimetres alone is not a quality rating. What matters is the design of the complete system and how well it suits the particular unit.
Answer in 30 seconds
A deeper profile does not automatically mean a warmer, stiffer or more durable window. Compare the frame Uf, the resulting Uw of the specific window, reinforcement type, permitted dimensions and insulating glass unit. A well-designed 82 mm system may be more sensible than a deeper profile if it better matches the dimensions, function and project budget.
Do the additional millimetres provide a genuine benefit?
Select the system depth and unit type. The result will show what should be checked beyond the profile dimension itself.
System depth
Proposed unit
Standard system · typical unit
Conclusion
Choose the profile for its function, not the largest number
For a typical window, Uf, Uw, the glazing unit and the complete specification are more important than depth alone.
Role of depthOne of several parameters
Most important checkUw value of the complete window
Millimetres create possibilities
They do not, however, guarantee that the system uses those possibilities better than a shallower solution.
Uf describes the frame
This value allows the effect of the profile design to be compared, not merely its dimensions.
Structural performance depends on many factors
Reinforcement, colour, glazing and configuration are just as important as depth.
Profile depth is not wall thickness
A dimension of 70, 82 or 90 mm describes the depth of the entire profile. On its own, it says nothing about PVC wall thickness, material quality or the type of internal reinforcement.
A deeper system can accommodate a thicker glazing unit
More space makes it easier to use triple glazing, specialist glass and an appropriate glazing rebate depth. The actual specification of the offered window must still be checked.
Uf allows the frame design to be assessed
Two profiles of similar depth can have different thermal performance. Chamber geometry, sealing system, reinforcement and the insulating materials used all matter.
Large, dark-coloured windows require structural checks
Glass weight and temperature place greater demands on the unit. Profile depth can help, but it does not replace calculations, suitable reinforcement and correct configuration.
The deepest system does not always justify the extra cost
In an unheated garage or for a typical small window, the system’s additional capabilities may provide no noticeable benefit. The solution should meet the requirements, not win a ranking of millimetres.
Profile-depth comparison checklist
- Frame UfThe value achieved by the specific system.
- Window UwThe result for the actual dimensions.
- ReinforcementType and suitability for the dimensions.
- GlazingThickness and functions of the glazing unit.
- ApplicationWhether the extra cost provides a genuine benefit.
Adviser’s tip
I do not select a profile because it has the greatest depth in the catalogue. I check whether its performance and capabilities are needed for the particular home.
For large, dark-coloured units, a deeper system may provide a better basis, but I still require information about reinforcement, permitted dimensions and glazing method.
When comparing quotations, I ask for Uw values for identical dimensions. Only then is it clear whether the additional millimetres genuinely improve performance.
Let us check whether the extra cost delivers genuine value.
Send the quotations or a profile schedule. I will compare performance, glazing, reinforcement and design capabilities.
Instead of a ranking by millimetres, you will receive an assessment matched to the dimensions and functions of your windows.

89
Myths and customer questions
Myth: a more expensive window is always more energy-efficient
Read more →
Myths and customer questions · price and performance
Myth: a more expensive window is always more energy-efficient
A window can cost more for many reasons: colour, size, opening type, hardware, security, acoustic performance, solar-control glass or more complex production. Not every extra reduces the Uw value.
Answer in 30 seconds
A higher price is not proof of better thermal insulation. Compare thermal performance using the Uw value of the specific window, the glazing unit’s Ug value, the frame's Uf value, the warm-edge spacer and the installation method. A dearer window may cost more because of its colour, upgraded hardware, safety glass, acoustic performance or unusual shape—and still have a Uw value similar to a less expensive option.
What are you actually paying extra for?
Select the main reason for the higher price and the size of the unit. You will see whether the extra is likely to improve thermal performance or another function.
Main reason for the extra cost
Construction
Thermal performance
Extra cost directed towards thermal performanceUnderstanding the price
This extra may improve thermal insulation
Confirm it using the Uw value for the specific dimensions, not merely the name of the more expensive option.
Impact on thermal performanceLikely
Evidence to checkDeclared Uw value
The price reflects the complete product
It covers functionality, appearance, production and equipment—not just thermal insulation.
Uw describes thermal performance
Compare it for the same dimensions and configuration to obtain a fair result.
Installation can change the outcome
Even a high-performance window cannot do its job if the installation joint is poorly executed.
Colour can significantly increase the price
Foil on one or both sides, a special paint finish and different internal and external colours increase production costs. They do not normally improve thermal performance.
Security and acoustic performance cost extra independently of Uw
Laminated, toughened or acoustic glass, additional locking points and a lockable handle provide specific functions. Their value should be assessed separately from thermal insulation.
Large dimensions increase both cost and technical demands
More material, a heavier glazing unit, stronger hardware and more difficult transport all increase the cost. A large window may have a different Uw value from a small unit made in the same system.
The glazing value alone is not enough
A Ug value of 0.5 W/(m²K) applies to the glazing unit, not the complete window. For comparison, you need the Uw value, which takes account of the frame, glazing, glass edge and proportions of the unit.
The installation scope affects the quoted price
Removal, opening preparation, base profiles, sealing tapes, finishing work and transport can all account for differences between quotations. The entire premium should not be attributed to the quality of the window itself.
Price and thermal-performance checklist
- UwValue for the specific dimensions.
- Ug and UfGlazing and frame performance values.
- EquipmentWhat increases the price besides thermal performance.
- Installation scopeWhether both quotations include the same work.
- DocumentsThe evidence on which the declared values are based.
Adviser’s tip
I do not assume that the most expensive quotation offers the best thermal performance, just as I do not regard the cheapest as the best value. I first break the price down into performance, equipment and scope of work.
If the extra cost relates to security, acoustic performance or ease of use, it may be very worthwhile—even if it does not change the Uw value. What matters is that you know what you are paying for.
I make a fair comparison using the same dimensions, colours, functions and installation scope. Only then can the price difference be clearly justified.
Let us separate performance, equipment and installation.
Send me the documents. I will show you which extras improve thermal performance and which provide other benefits.
You will receive a point-by-point comparison, without judging the quotations solely by their final price.
I could not find an exact match.
Try a shorter phrase, such as ‘Uw’, ‘glass’, ‘installation’ or ‘HST’. You can also select one of the categories above.
Did you not find the answer?
Message me
Message me and describe your project. I will help organise the subject and explain what deserves attention.
LOCATION
Where can you meet me?
If you would like to discuss your project in person, I invite you to the MK DRZWI I OKNA premises in Łazy. We can review the design, compare solutions and discuss the next steps without rushing.
MK DRZWI I OKNA Sp. z o.o.
Aleja Krakowska 205
Łazy, 05-552 Warsaw and surrounding area
Łazy, 05-552 Warsaw and surrounding area
ADDITIONAL SERVICE AREA
Projects also completed in Lower Silesia
If your project is in Lower Silesia, you can also send me your design.
Aleja Krakowska 205 • Łazy
CONTACT • BEGIN WITH WHAT YOU ALREADY HAVE
Do you have a design, photographs or a quotation?
Send me the materials.
You do not need to know exactly what you need. Simply show me your starting point — a design, photographs, dimensions or a quotation you already have. I will help organise the subject and identify what should be checked next.
ADVISER’S TIP
The more context you provide, the more useful the first conversation can be.
You do not need to prepare complete documentation. Send what you have.
House design / PDF
I will assess the arrangement of windows and doors, large glazed areas, patio doors, shading and the elements worth discussing.
Photographs / dimensions
If you are refurbishing your home or replacing windows and doors, photographs and basic dimensions are an excellent starting point.
A quotation you already have
You can include it as supporting material. If you have several quotations, I will check whether they genuinely cover a comparable scope.
A simple question
Do you have no files? Simply describe the project and the help you need.
SEND MATERIALS
Let us begin with a short message.
Only attach files if you have them. The form is intended to make the first contact easier, not more difficult.
* Your name, email address and telephone number are required to submit the form.
Krzysztof Czerepak is the controller of the data submitted through this form. The data will be used solely to handle and respond to your enquiry.